


The Easiest GF Sourdough Starter began as an experiment, I’ll explain in the post. This recipe includes a video, new instructions and a printable 1-pager to help you create a smaller portion. Nothing goes to waste in the process! All you need is GF brown rice flour, water, fresh lemon juice, a small bowl, a cover and a chopstick. Within 7 days, you should have a lively bubbly starter to use in a recipe.

The Easiest GF Sourdough Starter
I’ve never been too fond of discarding when creating a GF starter. When making a new sourdough starter, you need to remove a little at some point in the process. Doing so helps to strengthen and increase the wild yeast activity. Once you have an established starter, you shouldn’t have to discard if you plan your baking schedule accordingly. Maintaining your starter by refreshing it regularly, if you don’t bake with it often, is essential.
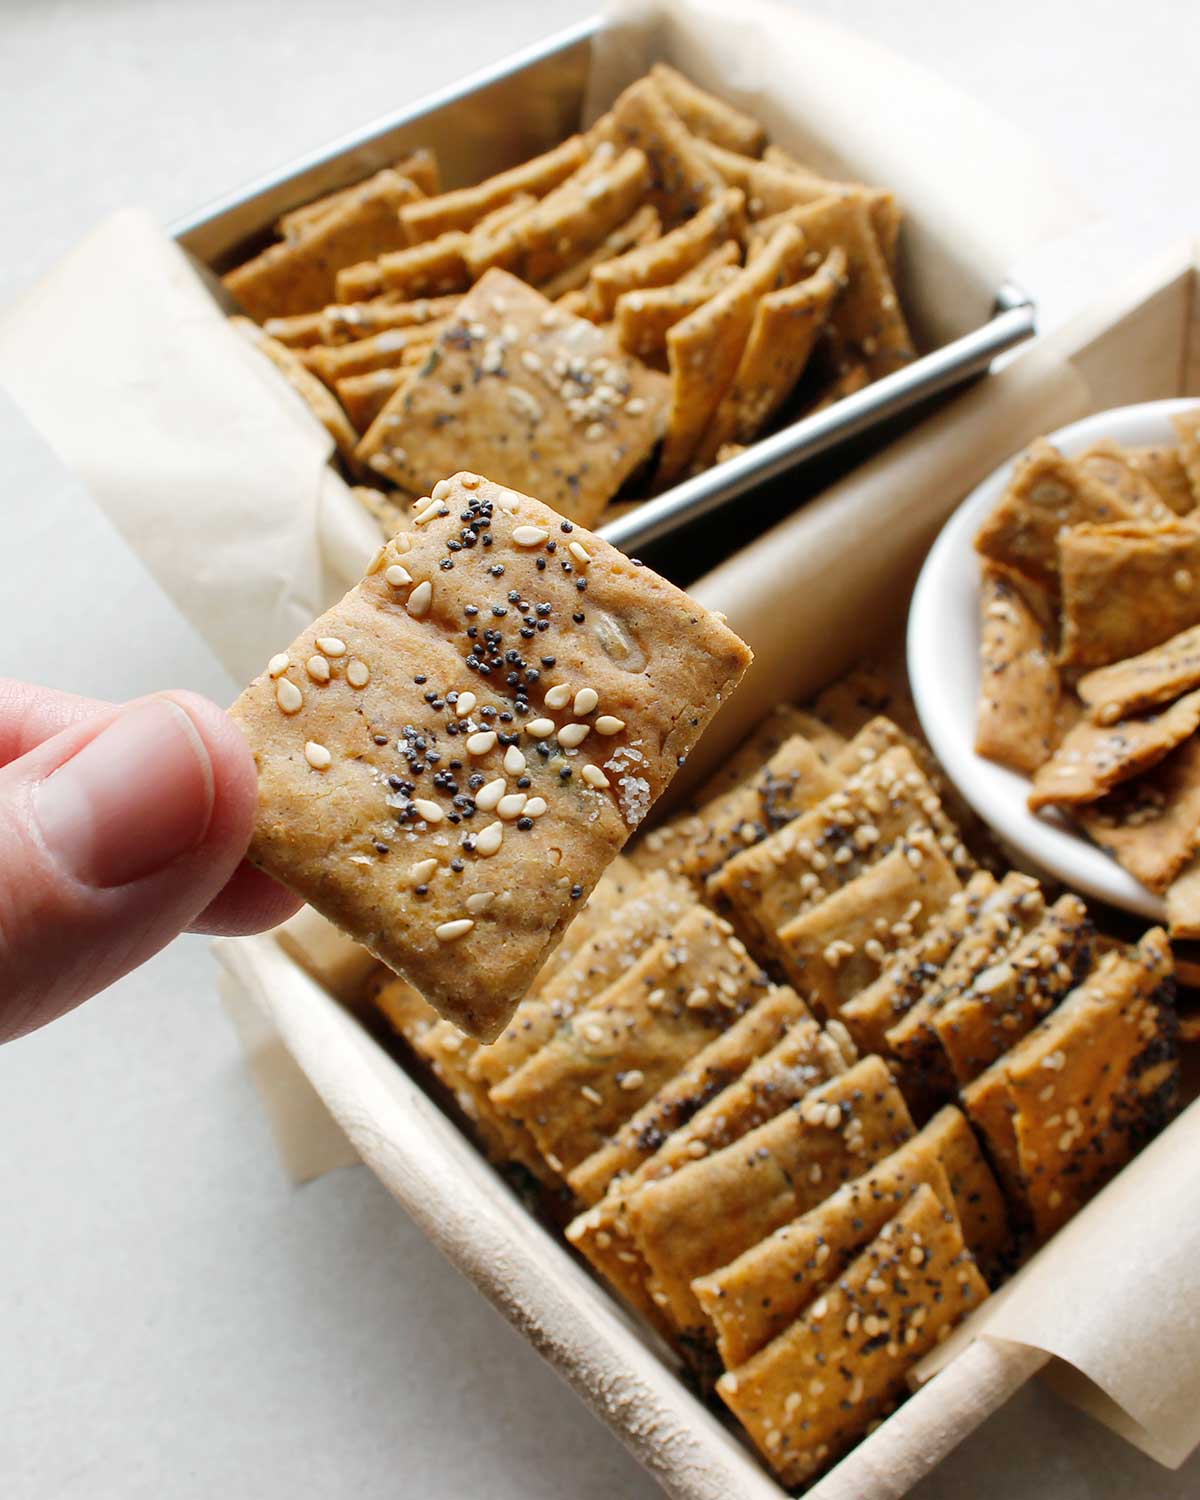
This smaller portion includes a zero-waste process. The few times you need to remove a little, keep it to make something else such as pancakes, crackers, discard chips, pizza crusts, flatbreads, etc. If you can’t use it right away, keep it in the fridge for a few days until you’re ready.
How-To YouTube Video
Watch this video to see how straightforward it is to make the Easiest GF Sourdough Starter.


Fresh is Real’s Amazon Storefront
Visit my Amazon Storefront to search for and buy baking and kitchen staples! Take Me Shopping!
Why Lemon Juice
This starter was an experiment. I was trying to see if I could create a mock sourdough starter by adding fresh lemon juice to sour a flour and water mixture. I wanted to bake sourdough crackers without an actual fermented wild yeast mixture to compare.
The mixture was gritty; for that reason, I didn’t feel like baking with it. I left it on my counter for a couple of days, and to my surprise, it was transforming beautifully into a new starter. At this point, I continued with the process, fed it smaller amounts trying not to remove too much. Within a week, I had the most pleasant sweet smelling GF sourdough starter.
The lemon juice helps to set the right acidity in the sourdough starter without making it smell or taste like vinegar, which can happen when creating and maintaining a sourdough starter.
Cultures for Health has an article about manipulating the sourness of sourdough, read it here.

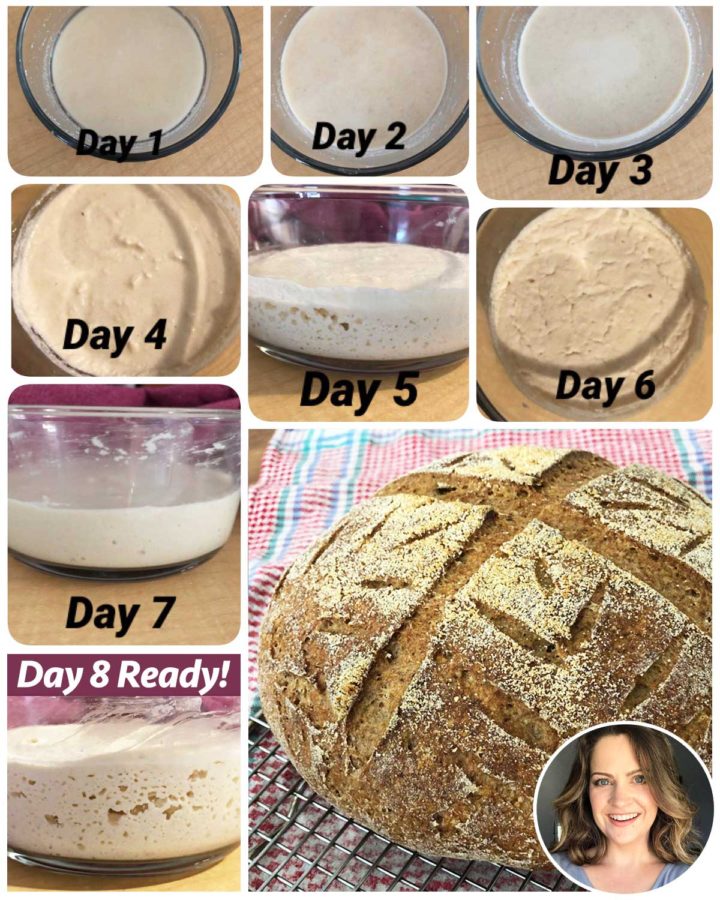
The 7-Day Process
Please note that both starters with or without lemon juice will transform into wild yeast. The difference is the smell and taste of the starters. My favourite was the one with lemon juice. It gave the mixture such a pleasant aroma!


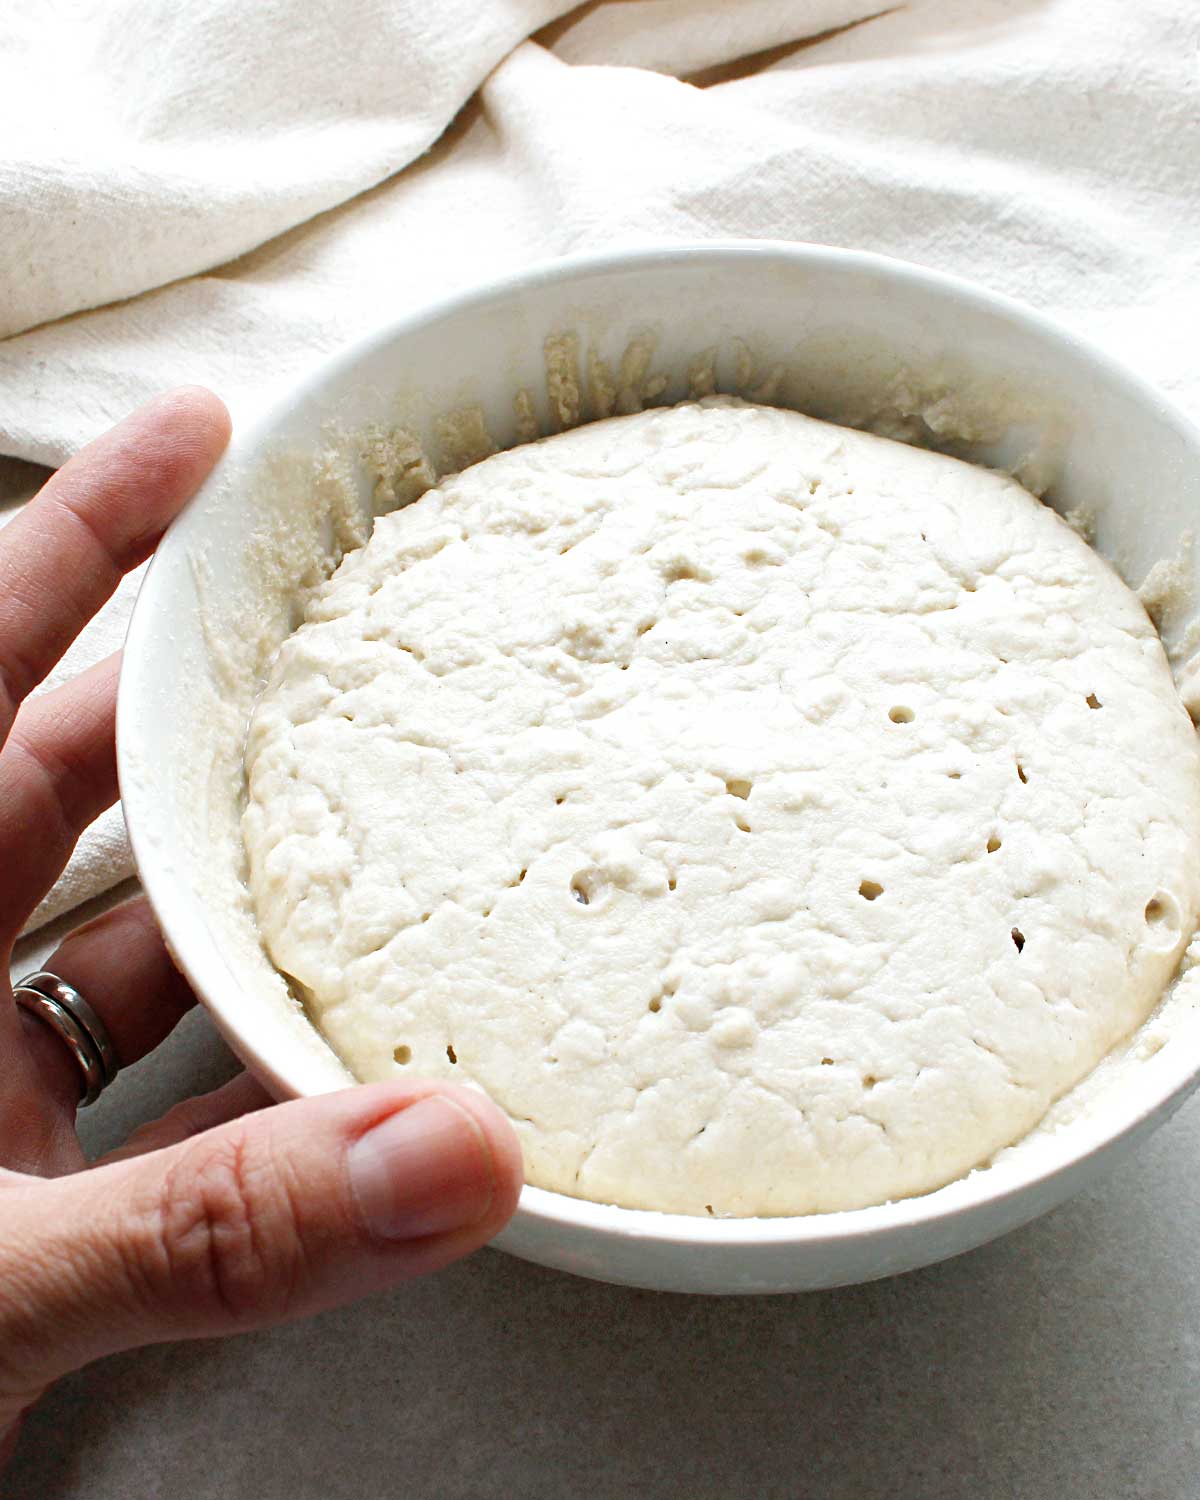
Ready to Use on Days 7 or 8
Your GF sourdough starter should be lively and ready to use on Days 7 or 8. If yours looks bubbly and active on Day 7, go ahead and add some to a recipe, but please, whatever you do, don’t forget to save a little to continue the process if that is what you plan to do.
All the details are in the recipe’s instructions below and this condensed printable 1-pager!

Tested Until Perfect
When experimenting while testing new recipes, I take a lot of notes. I encourage you to do the same, especially for any GF sourdough recipes.
For the Easiest GF Sourdough Starter, I even got a few amazing ladies to test my new instructions. Thank you, Kathy, Kelly and Silvia for helping me out!
Kelly graciously shared her experience and pictures of her 8-day progress.
I am pretty new to sourdough starters. I decided about four months ago to make one and came across Fresh is Real on YouTube, so I gave the brown rice starter a try. It took me a couple of attempts and a few bags of brown rice flour, but I finally had a decent starter and made a delicious loaf of the wild yeast bread. A couple of weeks later, my starter molded for some reason, so I had to throw it out. The thought of starting over seemed a little daunting, but when I heard about making a smaller batch, I decided to give it a go. This method was much easier with not having to feed it so often in the beginning. There were a couple of days in the process that I wasn’t sure if it was going to work or not, but by day 5, things starting looking great. Day 6, I questioned myself again. On day 7, it was nice, bubbly and active. This method gave me my confidence back, and I can’t wait to get baking! ~ Kelly Price, Southern California

Step-by-Step Printable 1-Pager
All the instructions are in the recipe card below. To make things easier, I also created a condensed step-by-step Printable 1-Pager that’s easier to follow.


Click the 1-Pager graphic above or use this link to get a printable copy
Previously on FiR
The last few recipes on Fresh is Real included gluten-free sourdough starter. If you’re reading this post to help you make your first homemade starter, don’t forget to come back and try more sourdough recipes!
| Sourdough Snacks: Sourdough Discard Crackers | Sourdough Treats: Gluten-Free Sourdough Brownies |
Troubleshooting Videos
If you have additional questions you can watch these two other helpful videos on gluten-free sourdough starters.
- Easy Gluten-Free Sourdough Starter Guide – Part 1
- Maintaining a Gluten-Free Sourdough Starter – Part 2
50 Best Vegan & Plant-Based BlogsFresh is Real makes Vegan Liftz’s top 2020 list for favourite Plant-Based & Vegan Recipe Blogs! |
Did You Make This Recipe?
Once you try this recipe, remember to take a picture and share it with us on Instagram Tag it @Freshisreal_ #freshisreal
Print
Easiest GF Sourdough Starter
- Prep Time: 15 minutes
- Total Time: 7 days
- Yield: 3/4–1 cup (+/-200g) 1x
- Category: Bread, Sourdough
- Method: Fermentation
- Cuisine: Gluten-Free, Vegan, Plant-Based
- Diet: Gluten Free
Description
A smaller portion recipe to help you to create the Easiest GF Sourdough Starter—in only 7 days! If you’ve already made one in the past, but it got mouldy or dry, this zero-waste method will be perfect for trying! One cup of GF brown rice flour, fresh lemon juice, water and a little patience are all you’ll need to get it going!
Don’t forget to print out the step-by-step 1-pager to help you along the way!
Ingredients
- 1 cup GF brown rice flour (120g)*
- 2 teaspoons fresh lemon juice
- Water (spring or filtered), room temperature
Useful Tools:
- Cover (bowl/plate, plastic/fabric wrap)
- Small soup bowl (1-2 cups)
- Chopstick (wood or plastic)
- Small silicone spatula
Instructions
Before you begin, please watch the how-to YouTube video!
DAY 1 –
To a small bowl, combine and mix 6 tablespoons of brown rice flour (50g), 1/4 cup of water (60g/60ml) and 2 teaspoons fresh lemon juice. Cover the bowl and place it in a warm spot in your kitchen.
DAY 2 –
During the day, uncover the starter, smell it and stir the mixture. Use a soft spatula to keep the sides of the bowl clean. Cover it and keep it in its warm spot.
DAY 3 –
Repeat Day 2. Uncover the starter, smell and stir it. Clean the sides of the bowl with a spatula to prevent mould. Cover the starter and place it somewhere warm.
DAY 4 –
In the morning, uncover and smell your starter. Add 1/2 tablespoon of brown rice flour and mix. Adding more water might not be necessary. If your mixture is too thick, add a touch of water, mix and cover. Check on it later in the evening and stir it.
DAY 5 –
Early in the day, remove half the starter**, feed it 1/4 cup of brown rice flour (or heaping spoonful), and enough water to stir. At this point, the mixture might be thin, that’s ok. Cover the bowl and let it ferment/rise.
A few hours later, you can add a spoonful of brown rice flour and mix if the starter is too thin. Don’t add more water if you don’t need it. Later in the evening, you can expect your starter to be fluffy, bubbly and lighter in texture.
DAY 6 –
First thing in the morning, uncover and smell your starter. Remove a spoonful of starter**, feed it a heaping spoonful of brown rice flour with enough water to stir and cover.
DAY 6 – 2nd feeding (pm): Don’t remove any starter, add a spoonful of flour, a little water, mix and cover. A few hours later, check on the starter and stir it if you wish.
DAY 7 –
What to expect: Today, your starter might be ready. Smell it! Does it have a yeasty aroma? A little sweet? Can you hear popping bubbles when you gently stir it? Ultimately the goal is to make the starter very active by feeding it one more time and build it up to create enough starter for whichever recipe you plan to bake. This smaller portion creates about 3/4 to 1 cup (+/-200g), which is enough for some recipes.
- TIP 1: If you need more than 1 cup of starter for a recipe, consider transferring your GF sourdough starter in progress to a bigger bowl or clear glass jar before the next feeding. Doing so will give the starter extra space to grow.
- TIP 2: If you want to bake on Day 8, feed your starter later on Day 7, before your bedtime is great! Doing so will hopefully make the starter lively by the morning.
- TIP 3: You will need to keep a heaping spoonful of starter to continue the starter process. To reduce waste, save the Day 7 discard (instructions below) as the start of the next sourdough starter batch.
DAY 7 –
Instructions: Before you go to bed, remove a heaping spoonful of your starter and put it in a new bowl to make a fresh batch of starter***.
To the first bowl, add a heaping spoonful (or more) of fresh brown rice flour with enough water to stir, cover and let it ferment overnight. Remember: You want to feed it enough flour and water to transform the mixture into a full bowl of wild yeast for the recipe you’re making. If you need to create more than 1 cup of active GF sourdough starter, the feeding will require more flour and water.
DAY 8 – First thing in the morning:
Today, the starter should hold its rise and be active. You will hear bubbles popping if you stir it gently. Now is the perfect time to add some to a GF sourdough bread recipe.
You can make the Gluten-Free BBQ Sourdough or continue to feed and build up the new starter to create even more for a bigger loaf like the Wild Yeast Bread.
Notes
*You’ll need approximately 1 cup of flour to create a small bowl of GF sourdough starter. Use organic flour when possible. Depending on the GF sourdough bread recipe you are baking, you might need extra flour to make more starter.
**You can keep what you remove to make pancakes, crackers, or quick flatbreads.
***Saving the discard from Day 7 will help you continue the process. With this new bowl, feed it a generous amount of flour and water, mix and ferment. Once active, you can use it or refrigerate it until you’re ready to bake again. Ready to bake? Take it out of the refrigerator and feed it more fresh flour and water and give it time to get active. You might not need to discard. But if your starter was left in the fridge for 1-2 weeks without refreshing, it might work faster to remove a little before you feed it. If you refresh it regularly and bake with it often, you shouldn’t have to discard any. Remember to feed your starter the amount of flour and water it needs to create enough starter for the recipe you want to bake. If you don’t use it often, it will be important to refresh it once in a while, every 1-2 weeks will be best for this smaller portion, if not it might dry up.
Additional Notes: If you see mould, don’t take a chance, throw it out and start over. Make sure to use clean tools. Scraping the side of the bowl with a soft spatula helps to keep bowl tidy and clean. If your cover gets too messy, switch it for a new one. Lastly, have fun with the process and watch out for fruit flies—they love starter!