


This gluten-free sourdough without psyllium, chia seeds or flax recipe (with video) will surprise you with its simplicity and short list of ingredients! Plus two options are available for you to try!


Many of my gluten-free, vegan bread recipes include 10 ingredients or less. Most mixtures vary in ingredient combinations because each creation is often developed for someone with specific dietary requirements in mind—even though I share them with everyone!
Each loaf is crafted and tested many times to yield the best texture and flavour with the handful of unique ingredients selected (e.i. gluten-free grains, starches, seeds, vegetables, fruits, etc.).
Quick Overview
This bread recipe is perfect for beginner gluten-free, vegan sourdough enthusiasts.
- Combine and mix ingredients, let sit for 1 hour in a bowl
- Transfer mixture to a bread pan, let rise for 1-2 hours
- Preheat oven
- Bake
- Cool
- Enjoy!

Tools
- glass mixing bowl (clear is great)
- ingredients listed in the recipe (see below)
- mixing (spoon) and measuring tools (cups and spoons)
- bread pan (approx. 8.5 x 4.5 x 2.5 inches)
- unbleached parchment paper
- large Dutch oven (optional)
- baking stone* (optional)
- baking sheet** (optional)
- oven
Gluten-Free Sourdough Starter
To make this bread recipe, you will need a bubbly wild yeast starter. The bread recipe was tested with a brown rice starter. But if you can’t consume rice, you can try with sorghum flour. It works very well with both.
Brown Rice Gluten-Free Sourdough Starter, Sorghum Gluten-Free Sourdough Starter


Fresh is Real’s Amazon Storefront
Visit my Amazon Storefront to search for and buy baking and kitchen staples! Take Me Shopping!

Batter-Like Dough
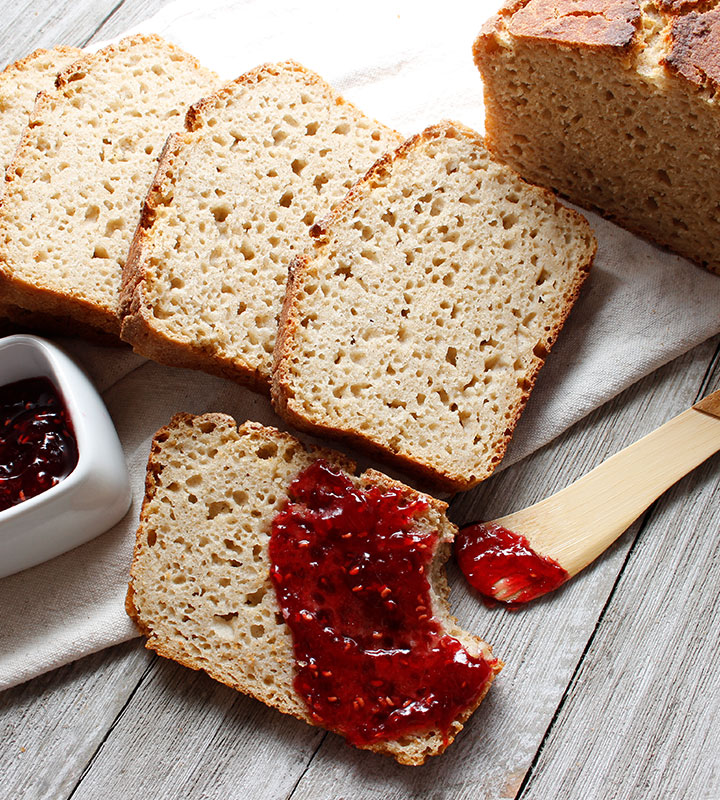
If you’re wondering about the batter-like dough for this sourdough, don’t you worry as it does bake into a beautiful gluten-free, vegan loaf that shouldn’t be gummy either. It will be a little moist but not sticky feeling.
One might question if the texture is compromised without the gelling and binding agents, but to my surprise, this loaf was very comparable to those with psyllium, chia seeds or flax.
I was pleasantly surprised by how wonderful it is—and, I almost prefer it this way!
My favourite is the option with sorghum flour. The rice flour version (see pictures below) is good but a little more dense and crumbly once baked.


Fresh Recipes
Are you looking for more fresh recipes for the months where local and fresh produce are abundant?
Consider trying this 5-ingredient Easy Asparagus Salad with a 5-ingredient homemade dressing!
YouTube Videos
Check out Fresh is Real’s growing YouTube community! Join us by subscribing!
On the channel, you will find videos for most of the bread recipes. The videos are for beginners, intermediate to even the more advanced gluten-free, vegan bakers. Join us on a new baking adventure!
If you prefer more plant-based recipes, follow Fresh is Real on Instagram.
It’s where I share shorter videos with the freshest creations. I also post a lot of fresh bread pictures on Instagram! I like giving my followers a heads up when a new and exciting recipe is coming.
And, occasionally you might even get to see a picture of me and what I’m up to. I love and read every message I receive, so don’t forget to comment on the posts or send me a quick note if you have a question.

| 👩🍳 🍞 Good Food Cooking School 🥖🍪 | |
| If you’re interested in learning more about gluten-free baking, check out the Good Food Cooking School courses taught by cookbook author Heather Crosby from YumUniversity. I took the Bread Baking and the Classic Cookies 101 course a while back, and it’s what got me hooked on my baking journey. Take a tour to see if her baking courses are right for you! |
Did You Make This Recipe?
Once you try this recipe, remember to take a picture and share it with us on Instagram Tag it @Freshisreal_ #freshisreal
ALLERGEN NOTICE: Make sure the ingredients you purchase are prepared in a facility free from the top allergens you avoid. Gluten-free products should be certified GF and clearly labelled. Consult your medical professional with your dietary questions. Even certified gluten-free ingredients such as GF oats, corn, seeds, etc., can create health problems for individuals following a GF diet. Always consult a medical professional if unsure about ingredients for your needs.
Print
Gluten-Free Sourdough Without Psyllium
- Prep Time: 15 minutes
- Cook Time: 45-50 minutes
- Total Time: 3-4 hours
- Yield: 1 loaf 1x
- Category: Bread
- Method: Oven Baked
- Cuisine: Gluten-Free, Vegan, Plant-Based, Allergen-Friendly
- Diet: Gluten Free
Description
If you can’t consume gluten, psyllium, flax, chia seeds or commercial yeast—this bread recipe is for you! It’s also vegan, allergen-friendly and less than 8 ingredients.
Good gluten-free sourdough bread does not need extra binding ingredients to work. In fact, you might even enjoy this simplified hand-mixed version better as it bakes up less gummy than other types of gluten-free sourdough bread recipes that contain gelling agents.
The mixture for this beautiful bread is batter-like as opposed to dough you can manipulate with your hands. You will get better results with sorghum flour (see option 1), organic is even better, but white or brown rice flour is a comparable alternative (see option 2).
You will absolutely need a bread pan for this recipe as the mixture is like a cake batter. A large Dutch oven is an optional tool with this recipe but highly recommended when baking gluten-free sourdough. It helps to trap the heat and steam during the baking process. This dough will bake up nicely without, but the recipe does yield better results with the Dutch oven.
I’ve tested the options below with a brown rice starter although a sorghum sourdough starter should work equally well.
Tools:
- glass mixing bowl (clear is great)
- ingredients listed below
- mixing and measuring tools
- bread pan (approx. 8.5 x 4.5 x 2.5 inches)
- unbleached parchment paper
- large Dutch oven (optional)
- baking stone* (optional)
- baking sheet** (optional)
- oven
Ingredients
Option 1 – Sorghum Flour
- 1–1/2 cups sorghum flour
- 1 cup tiger nut flour
- 1 cup tapioca flour
- 1 tablespoon coconut palm sugar
- 1/2 tablespoon fine grey sea salt (up to 3/4 tablespoon)
- 1 cup active brown rice starter
- 1–1/4 cup (up to 1–1/2 cups) filtered or spring water (room temp. or warm)
Option 2 – White/Brown Flour
- 1 cup brown rice flour
- 1/2 cup white rice flour
- 1 cup tiger nut flour
- 1 cup tapioca flour
- 1 tablespoon coconut palm sugar
- 1/2 tablespoon fine grey sea salt (up to 3/4 tablespoon)
- 1 cup active brown rice starter
- 1–1/4 cup (up to 1–1/2 cups) filtered or spring water (room temp. or warm)
Instructions
Quick Overview
- Combine and mix ingredients, let sit for 1 hour in a bowl
- Transfer mixture to a bread pan, let rise for 1-2 hours
- Preheat oven
- Bake
- Cool
- Enjoy!
Step 1
Important: Before you begin, make sure you have an active gluten-free sourdough starter.
To a large glass bowl, sift and combine all the dry ingredients and mix. Add the gluten-free sourdough starter and 1 cup of water and mix until the liquid absorbs. Proceed to add an additional 1/4 cup of water and mix until all the ingredients are incorporated. If using rice flour (option 2), you will most likely need to add the remaining 1/4 cup of water and mix very well until all the dry ingredients well combined. Note: If making the bread with sorghum flour, 1-1/4 cups of water (up to 1-1/2 cups total) should be sufficient, you might even feel like your dough is way too runny but don’t worry it will be fine. Cover your bowl with plastic wrap or a clean tea towel and let sit for at least 1 hour in a warm area or until you start seeing the formation of little bubbles on the side of your clear glass bowl.
Step 2
Line a bread pan with unbleached parchment paper. Tip: Adding a little oil can help to keep the paper in place, but it’s not necessary. Once you have small bubbles forming throughout your dough (observe the side of your glass bowl), transfer the mixture to your lined bread pan. You will loosely cover the mixture in the bread pan and let it rise for another 1-2 hours or until the dough has increased in size. Tip: Take notice of where your dough is at before you cover it to rise. It should increase by 1/2-in up to 1 inch in 1 to 2 hours if placed in a warm area.
Step 3
After one hour or once you notice some rise to your dough, preheat your oven to 450° F. If you have a Dutch oven that is large enough to fit your bread pan into, go ahead and preheat it at the same time as your oven. Tip: You will need to preheat your oven and Dutch oven for at least 30 to 45 minutes before baking your loaf. Continue to let your dough rise while the oven is preheating.
Step 4
Carefully remove the hot Dutch oven from your oven, take off the lid and place your bread pan inside and cover. Return to the oven right away and bake for 25 minutes covered. At the 25-minute mark, check on your loaf by removing the cover. At this point, you will continue baking the bread for another 20-25 minutes uncovered for a total of 45-50 minutes.
Step 5
After 45-50 minutes, check on your loaf, the top should be golden, and sound hard and crispy when tapped. Remove the bread pan from the oven. If it slides out of your bread pan easily, do so and let it cool on a wire rack until completely cooled. If the loaf is a little stuck, let it cool for 10-20 minutes before trying to remove it from the pan. Don’t leave it too long as it might get wet from the condensation.
Notes
- Best enjoyed fresh on the same day, after that this loaf is usually best toasted.
- Keep on the counter for 1-2 days wrapped in a clean tea towel.
- My favourite way to toast any of my gluten-free, vegan bread recipes is to use a well-seasoned cast iron pan. Toast nice and slow on a low heat for the best results.
- After a couple of days, you can store the leftovers in the fridge or freezer in a glass container or plastic bag for a little longer. Once refrigerated this loaf will feel dry and hard but once toasted it should be just right to eat.
Additional Baking Tips:
- *Baking stone: If you have a baking stone, place it underneath the Dutch oven when preheating your oven. The extra concentrated heat helps when baking gluten-free sourdough bread.
- **Baking without a Dutch oven or baking stone: If you don’t have a Dutch oven or baking stone, you can bake your loaf using steam. Place a baking sheet on the lower rack and preheat at the same time as the oven. Once you place your loaf pan in the oven, you’re going to add a few ice cubes to the bottom baking sheet and close the oven door right away. The melting ice cubes will create steam.
- To Cover or Not to Cover: If you’re not using a Dutch oven, leave your bread pan uncovered. If you are using a Dutch oven, bake your loaf according to the steps listed above.