

These are the best yeasted Soft Gluten-Free Dinner Rolls! You can also transform this recipe into a gluten-free sourdough version with some GF sourdough starter.

Do you prefer pull-apart or free-form soft gluten-free dinner rolls? Lucky for you because in this post, I include details for both with a step-by-step video to help you make them!
Not only are these rolls soft and squishy, but they’re also gluten-free, and allergen-friendly (no wheat, eggs, dairy, nuts, peanuts, or soy). This yummy recipe is also vegan, refined sugar-free and xanthan gum-free.


Fresh is Real’s Amazon Storefront
Visit my Amazon Storefront to search for and buy baking and kitchen staples! Take Me Shopping!
Soft Gluten-Free Dinner Rolls (Vegan)
Have you been looking for a good dinner roll recipe, but all you keep finding are the gluten-free ones with lots of eggs in them?
No worries! I got you! For a recipe without gluten/wheat, dairy or eggs, you will be impressed with the fantastic texture and flavour these rolls have.
How-To Video

What to Expect
This recipe is simple and fun to make. Once you watch the How-To Video, everything will make sense.
If you have questions before making the rolls, you can ask in the comments here or in the comments of the YouTube video.

Overview
This recipe includes a few preparation steps:
- Making homemade plant milk
(hemp milk is great, but you can use any storebought plant milk) - Preparing the yeast/psyllium mixture
- Mixing the ingredients
- Rising the dough
- Dividing the dough
- Rolling out each piece of dough
- Placing the rolls in a baking dish
- Brushing the rolls with oil/milk (optional)
- Baking the rolls
- Cooling the rolls
Baking Tools
- Small bowl(s)
- Measuring cups
- Measuring spoons
- Scale if you want to weigh your ingredients
- Large mixing bowl (clear is great)
- Sifter or sieve
- Spoon(s)
- Baking sheet or 8 x 8-inch baking dish
- Plastic wrap, silicon cover, or clean tea towel
- Unbleached parchment paper
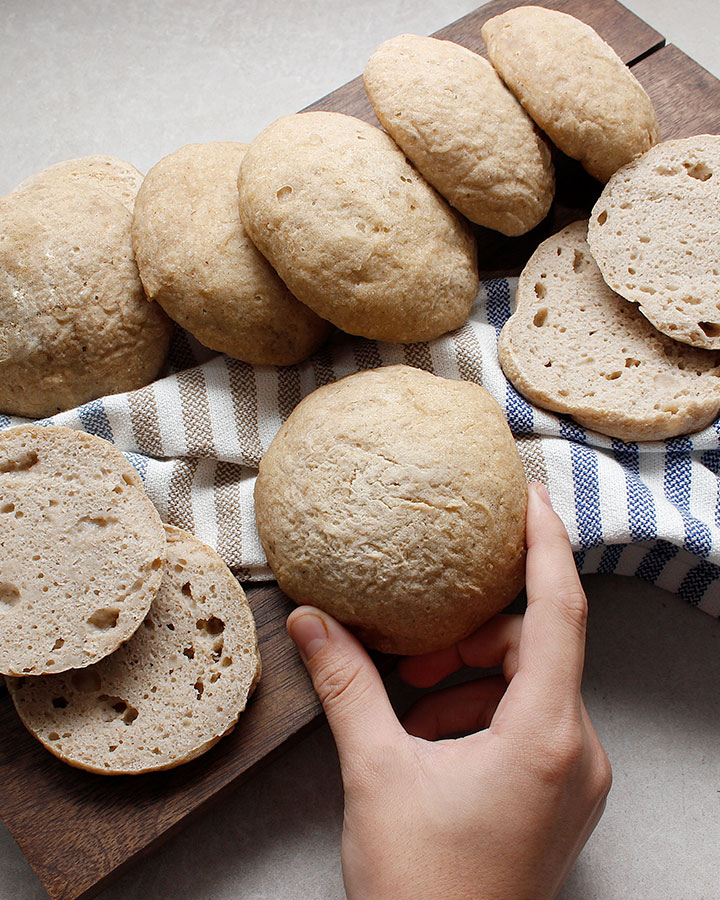
Pull-Apart or Free-Form
This dinner roll recipe is the same whether you decide to roll them and bake them in a square 8 x 8-in dish or on parchment lined baking sheet.
The main difference is that the free-form version will get more golden all around which makes them perfect for burgers.
The pull-apart rolls stay nice and soft because they bake so tightly together.
Baking Stone
In the video, on the bottom oven rack, I placed a pizza baking stone. You can also see it in the photo above. It’s pretty much always in my oven, and I plan on investing in a larger one this year, either baking tiles or large baking steel.
You can preheat the baking stone at the same time as your oven. It will get hot. Once you place the dough in the oven, the stone will help to distribute and concentrate a nice amount of heat directly to your baked goods. Doing so can help the rise and texture of your gluten-free bread.
Substitutes
The ingredients I used in this recipe are what I recommend. If you want to replace the flours and starches with all-purpose gluten-free flour, that will be up to you to try!
If you try it and it works well, please rate and comment on the recipe below to let others know what worked for you.
Note that my recipe doesn’t include xanthan gum, and some gluten-free flour mixes do. It can improve the texture, but I prefer avoiding gums because it’s better for people with digestive issues.
If you’re looking for extra guidance on substitutions, you can ask in the comments below.
Previous Recipe

Easy Gluten-Free Vegan Cinnamon Rolls (yeasted version)
Gluten-Free Sourdough Cinnamon Rolls (wild natural yeast)
| 👩🍳 🍞 Good Food Cooking School 🥖🍪 | |
| If you’re interested in learning more about gluten-free baking, check out the Good Food Cooking School courses taught by cookbook author Heather Crosby from YumUniversity. I took the Bread Baking and the Classic Cookies 101 course a while back, and it’s what got me hooked on my baking journey. Take a tour to see if her baking courses are right for you! |
Did You Make This Recipe?
Once you try this recipe, remember to take a picture and share it with us on Instagram Tag it @Freshisreal_ #freshisreal
ALLERGEN NOTICE: Make sure the ingredients you purchase are prepared in a facility free from the top allergens you avoid. Gluten-free products should be certified GF and clearly labelled. Consult your medical professional with your dietary questions. Even certified gluten-free ingredients such as GF oats, corn, seeds, etc., can create health problems for individuals following a GF diet. Always consult a medical professional if unsure about ingredients for your needs.
Print
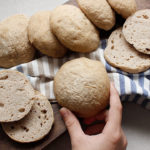
Soft Gluten-Free Dinner Rolls
- Prep Time: 15 minutes (+ 2 hours rising/hands off time)
- Cook Time: 25-30 minutes
- Total Time: 2:45 hours Makes 9 rolls
- Yield: 9 rolls 1x
- Category: Bread
- Method: Oven-Baked
- Cuisine: Gluten-Free, Plant-Based, Vegan, Nut-Free, Allergen-Friendly, Oil-Free
- Diet: Gluten Free
Description
These pull-apart or free-form dinner rolls are soft and squishy, and they’re also gluten-free, vegan, allergen-friendly, refined sugar-free and xanthan gum-free! This recipe includes a step-by-step video to help you make them!
Gluten-Free Sourdough Rolls recipe and how-to video.
Ingredients
- 1 cup light buckwheat flour (120g)
- 1/2 cup white rice flour (70g)
- 1/2 cup brown rice flour (65g)
- 1/2 cup tapioca flour/starch* (60g)
- 1/2 cup potato starch (70g)
- 1/2 cup seed or nut flour** (50-60g)
- 1/2 tablespoon fine grey sea salt (6g)
- 1 tablespoon coconut palm sugar (8g) (or maple syrup)
- 2 tablespoons psyllium husk (whole) (14g)
- 2 teaspoons active dry yeast (10g)
- 1 cup warm water (+ 2 tablespoons if necessary)***
- 1 cup homemade hemp milk****
- Olive oil or coconut oil (optional)
Baking Tools
- Small bowl(s)
- Measuring cups
- Measuring spoons
- Scale if you want to weigh your ingredients
- Large mixing bowl (clear is great)
- Sifter or sieve
- Spoon(s)
- Baking sheet or 8 x 8-inch baking dish
- Plastic wrap, silicon cover, or clean tea towel
- Unbleached Parchment paper
Instructions
Before you begin, please watch the recipe video to help you make these Soft Gluten-Free Dinner Rolls.
Step 1
To start, measure (or weigh) and sift all the dry ingredients. This step is essential to avoid little clumps of starch or flour in your rolls.
Step 2
Combine the warm water, yeast and psyllium husk in a small bowl and gently mix. Let the mixture sit for at least 5 minutes. To help you sift your dry ingredients, place a sieve over the top of your large mixing bowl and, one at a time, add the dry ingredients and push them through the sieve. Remove the sieve and gently mix the ingredients in the bowl. Add the gelled yeast/psyllium mixture and the hemp milk and mix in until all the dry and wet ingredients are well incorporated. It’s important not to leave any dry bits of flour at the bottom. If you have leftover dry ingredients at the bottom, this is when you can add 1-2 tablespoons (maybe more) of water or milk and finish mixing the dough.
Step 3
Cover the bowl and let it rise in a warm area for 2 hours or until the dough has grown a bit in size.
Step 4
Once ready to bake, preheat your oven to 400° F. Lightly grease your oven-safe dish (see Baking Dish Options below) with a little olive or coconut oil. If you don’t want to use oil, line your baking dish with a piece of unbleached parchment to prevent sticking.
Baking Dish Options:
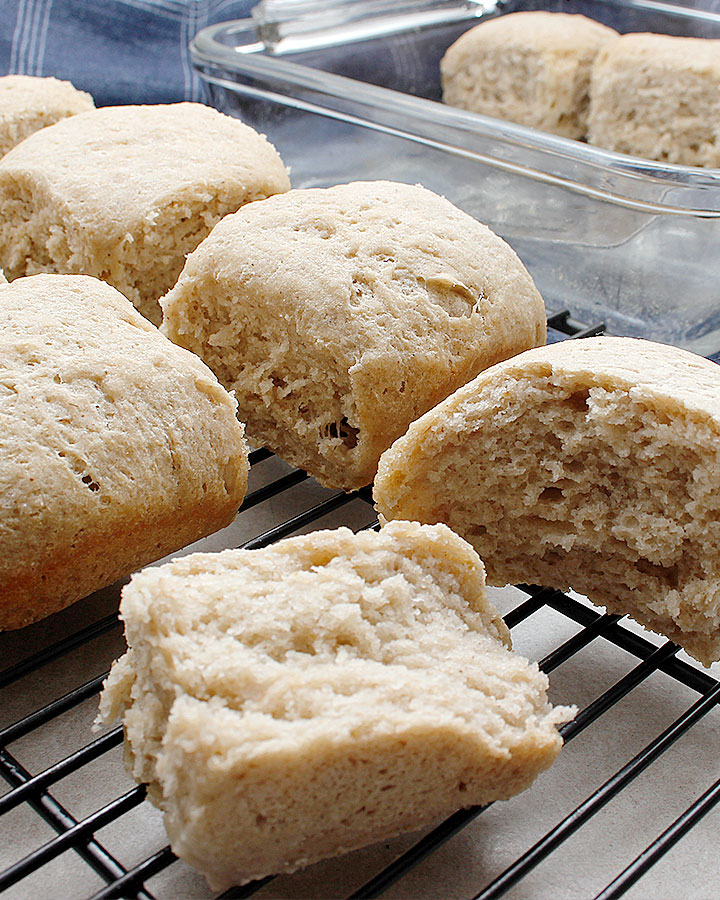
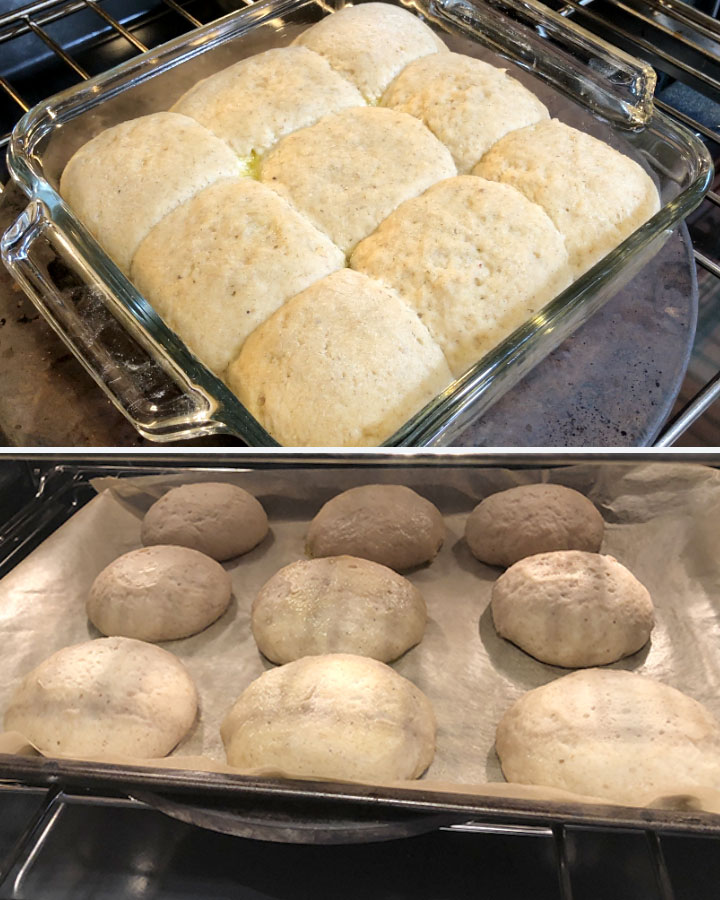
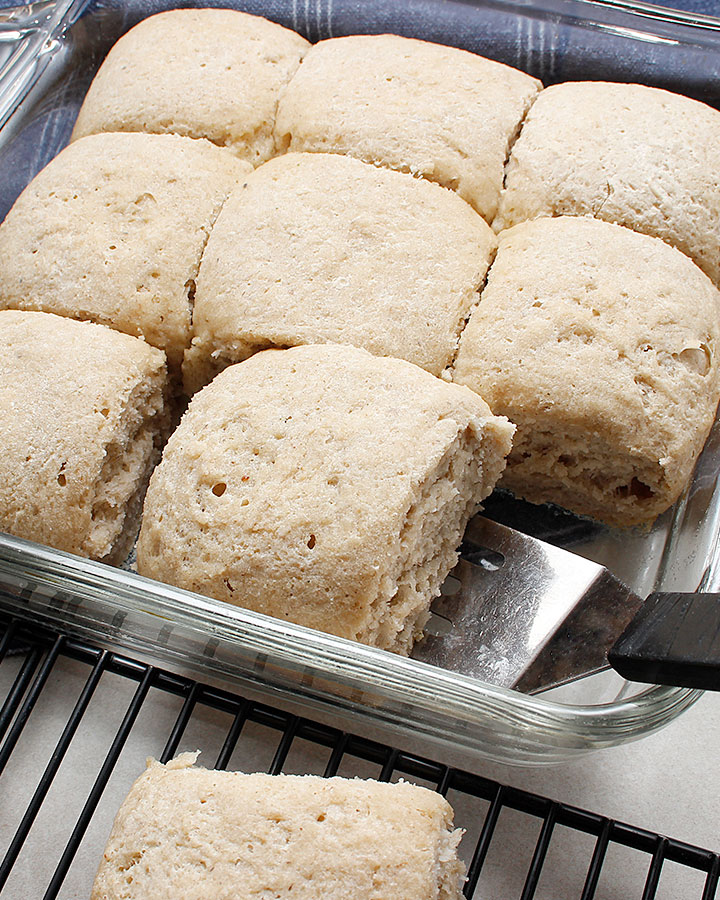
If you chose an 8 x 8-in dish, your rolls will rise and bake closely together in a pull-apart style. Doing so creates very soft rolls that are delicious with a buttery spread or homemade jam.
You can also space out each dough ball onto a parchment-lined baking sheet. Baking the rolls in a free-form way will make them more golden in colour. The texture won’t be as soft this way, but this method is excellent to make tasty sandwich or burger buns.
Step 5
With a soft spatula or spoon, gently transfer the dough to a flour-dusted board or clean kitchen counter. Brown rice or buckwheat flour is great for this. Pick up the dough and let it stretch a bit then fold it a few times to create a large roll, about 12 inches wide. You will then use a large knife or dough scraper to divide the roll into 9 equal pieces. You can dust your hands and the divided dough with a little extra flour to prevent sticking. Proceed to roll each piece, in your hands or on the counter, into a ball. Place each one in your baking dish or sheet. Try not to overhandle the dough. Watch the How-To Video to help you.
Step 6
Transfer the baking dish or sheet to the oven and bake the rolls for about 25-30 minutes. If making the free-form version, you could consider creating a tent with a piece of aluminum foil for the first half of the baking time, but it’s not completely necessary. NOTE: The pull-apart version baked for 30 minutes and the free-form rolls baked for 28 minutes.
Step 7
Once baked, if you make the pull-apart version, let them cool in the dish for about 5 minutes. Then proceed to remove the rolls from the dish and place them on a cooling rack to prevent them from getting soggy. If you try the free-form rolls, you can place them on a cooling rack as soon as you remove them from the oven. Let them cool a little. Best enjoyed fresh!
Storage Tips
Once cooled, wrap these rolls in a clean tea towel for one day. Placing them in a glass container or plastic bag will keep them fresh for a couple of days. You can store them in the fridge for longer or freeze them. If freezing the rolls, you can slice them in half before transferring them to the freezer. Warming up or toasting the leftovers is highly recommended.
Notes
*Arrowroot starch flour is an excellent substitute for tapioca flour.
**I’ve tested organic raw sunflower, pumpkin and also tried almond meal flour. Only use almond flour if you are not allergic.
***For the best bread, please use non-chlorinated water. Filtered and spring water works best.
****You can try other kinds of plant-based milk. I often use hemp milk as it’s allergen-friendly and a wonderful 2-ingredient homemade milk. To make your own hemp milk, combine 1/3 cup of organic hemp seeds with 1-1/4 cups of water and blend in a high-speed blender until white and frothy. Pour the hemp milk through a mesh bag or fine mesh sieve to remove larger unwanted bits.