


An active, lively Gluten-Free Sourdough Starter is key if you want to bake gluten-free sourdough bread. A good starter can be ready in 7 days.
A bubbly sourdough starter is not only great to bake loaves of bread, but it can be excellent to add to pancakes, muffins, cookies, pizza crusts, crackers, quick breads and so much more.
This 7-day step-by-step recipe guide and quick video will list what to expect with some tips and tricks. Or keep reading to watch these new videos (also below) created to help you even more along the way.

7-Day Summary
- Day 1 – Start by mixing flour and water
- Day 2 – Feed your starter with more flour and water
- Day 3 – Discard some starter and feed (this process creates a pleasant-smelling starter)
- Day 4 to 6 – Your starter is transforming into yeast. Keep discarding and feeding
- Day 6 to 7 – The starter comes to life, has a pleasant aroma, and is ready to use
Below is the original video (1:46).

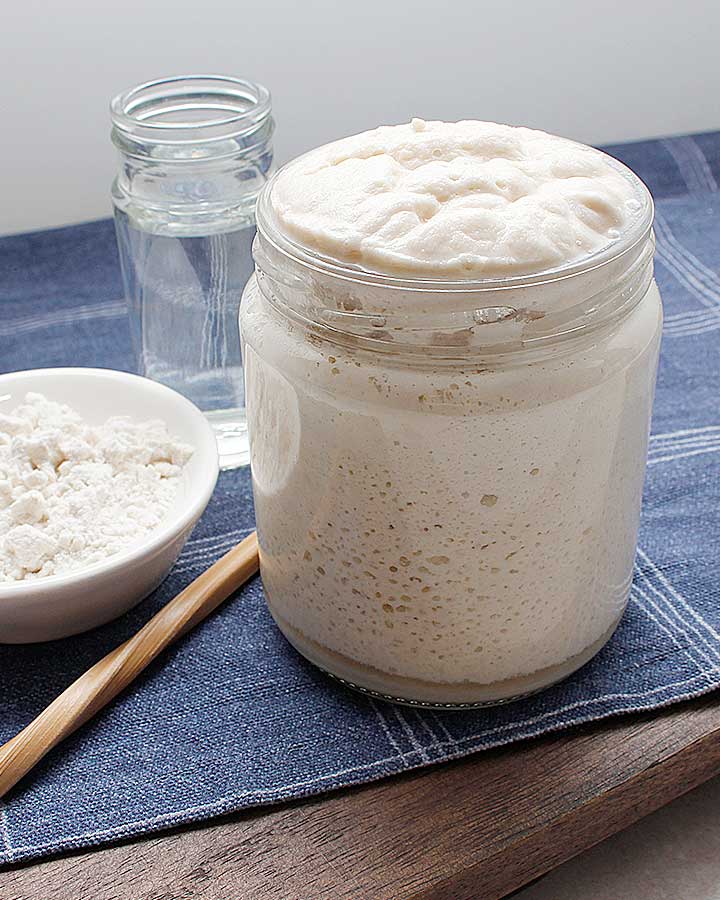
Gluten-Free Sourdough Starter
The texture of a light gluten-free sourdough starter is like thick creamy buttermilk but with lots of bubbling action.
I don’t include dairy or eggs in baked goods anymore. For that reason, I often use GF sourdough starter and add other nutritious plant-based ingredients to create original-tasting recipes.
Baking without eggs, dairy or other common allergens can be very different at first. I enjoy the challenge of transforming everyday meals and snacks into more nutritious alternatives.
Easier-to-Digest Bread
Sourdough is known as the easier-to-digest bread, but please note that the sourdough loaves at your grocery store are most likely made with wheat. Just ask if you’re not sure. If you can’t eat gluten for whatever health reason, even the wheat version should be avoided.
On a positive note, so many bakers are now experimenting with fermenting a variety of gluten-free grains like brown rice, buckwheat, millet, and sorghum, to name a few. So don’t be surprised to find more gluten-free and vegan (egg and dairy-free) options in the future.
Wild Yeast
Sourdough starter (wild yeast) is the leavening agent prepared with gluten-free flour, water and the bacteria that float around in the air, in your kitchen, and even on your skin. That cultured yeast is what will help your baked goods rise.
Easy to Make
Making your first gluten-free starter is a lot of fun! So much so that my fridge is full of different-smelling starters. But in all honesty, it’s very easy to make, but it will require your attention for a few minutes per day to get it going.
A naturally fermented starter can create unique-tasting loaves. Where you live in the world, the season, the activity in your kitchen (fruits on the counter, etc.), and even the gender of the person that makes it can affect how a starter will smell and taste in your baked goods.
Different People, Different Methods
Understand that most people will probably use different methods to make a starter. Just like no two people will ever make pizza the same way. Below are my tips on how to prepare a simple active, gluten-free sourdough starter.
I’ve tested everything from adding kombucha, grapes, water kefir and apples to create pleasant-smelling starters. Each method has different outcomes. I’ve even placed fruit beside my starter to see if the bacteria from the fruit would magically fly into my starter to make it sweeter.
My friend Melissa Torio makes her starter with kombucha yeast.
Start with a simple method. As you get better at experimenting, you can test different ingredients to achieve a lively, bubbly starter you will love to bake with.
Discard
If you search sourdough starter recipes and methods, you will sometimes run into the term discard. When making a starter, some yeast will need to be discarded to create a strong, active pleasant-smelling starter.
Some people toss out a lot of starter during the initial process—and this part breaks my heart! I developed my method to discard as little as possible at the beginning and never again afterwards—unless your jar exceeds its capacity.
The Easiest GF Sourdough Starter creates a smaller portion with little or no discard.
Hooch
Once in a while, your starter will have a clear liquid on the surface; it’s called hooch. Some stir the hooch back into the starter, but I usually pour it out, feed my starter with fresh flour and water, stir, and wait for the yeast to do its thing.
Keeping the hooch is ok if it’s clear, but could result in a more sour-tasting and smelling starter and loaf of bread.
Ready to Start?
You’re here now, so let’s try this together! You can ask me questions in the comments below or join my free GFV Baking Facebook group.

Gluten-Free Baking Academy
If you’re interested in learning more about gluten-free and vegan bread baking, consider learning from the GFBA! Check out Heather Crosby’s famous baking course. Learn how to make flatbreads, quick breads, and even yeasted loaves with even more plant-powered ingredients. Enrolment is usually twice per year.
Baking with new ingredients, especially gluten-free ones, is very different. Heather walks you through each step with videos and printable documents. Included are shopping lists and troubleshooting tips for all her methods and recipes. Take a peek
Previous Recipe
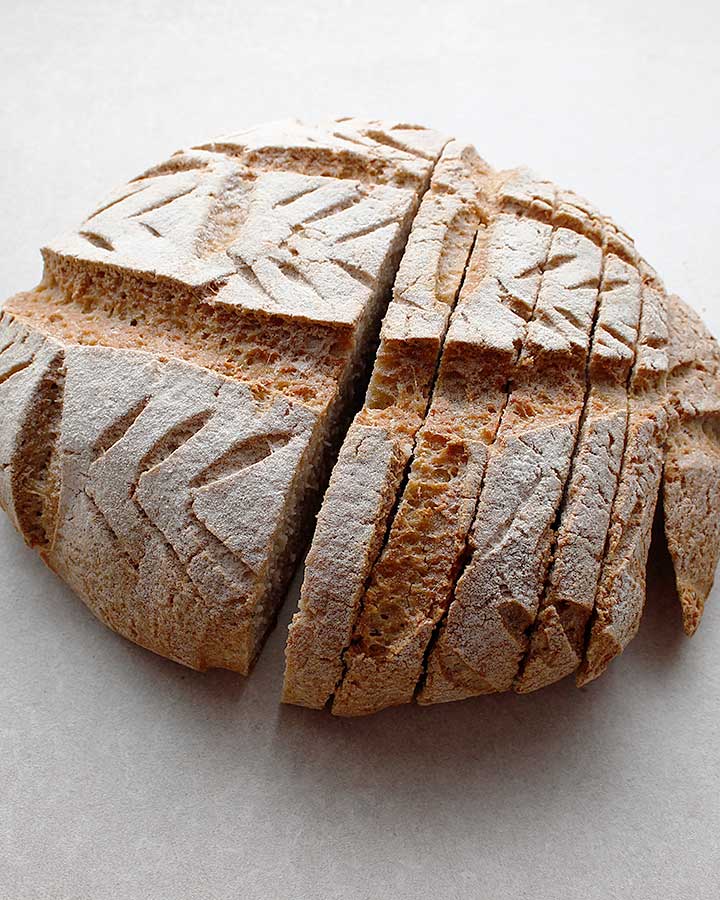
My last recipe was my favourite Buckwheat Sourdough Loaf (GF Vegan). To make the artisan-style boule, you will need a gluten-free starter, so you’re in the right place to learn.
More GF Sourdough Bread Recipes
Visit the GF Sourdough Bread category for the complete list of recipes.
More GF & Grain-Free Sourdough Starter Recipes
Visit the GF Sourdough Starter page to view one of the four recipes. If you can’t consume organic brown rice, try the sorghum flour starter.
Are you living a grain-free lifestyle? You can create a grain-free starter with cassava flour.
Share Your Creations
If you created your first gluten-free sourdough starter recipe, congratulations! You did it! Share your success by taking a picture! Post it on Instagram and tag it @freshisreal_
And don’t forget to rate your experience below in the comments.
BONUS
Download the 3-page easier-to-read printable to help you prepare natural wild cultured yeast! No sign-up is required. Click the graphic below!


Gluten-Free Sourdough Starter
- Prep Time: 5 minutes per day
- Total Time: up to 7 days
- Yield: 3+ cups 1x
- Category: Bread, Sourdough
- Method: Fermentation
- Cuisine: Allergen-Friendly, Plant-Based, Gluten-Free, Vegan
- Diet: Gluten Free
Description
This sourdough starter recipe is prepared with gluten-free brown rice flour and is simple to make. Plan up to seven days to develop natural wild cultured yeast with a pleasant aroma and lots of active bubbles to use in a sourdough bread recipe.
BONUS! Printable Gluten-Free Sourdough Starter Recipe Guide (3-page pdf).
Ingredients
8 cups gluten-free brown rice flour*
Filtered or spring water**
1 tablespoon maple syrup (optional)
1 tablespoon grape juice, freshly squeezed from organic grapes (optional)
Tools
1 large glass jar (at least 950 ml)
1 large elastic band
1 coffee filter***
* Organic brown rice flour might work best. Freshly milled grains work equally well.
** Chlorinated tap water will not work.
*** You can also use a doubled-lined cheesecloth or breathable clean cotton fabric.
Instructions
The ingredients are simple, but the process requires daily feedings and options to customize along the way. Included will be some general tips and tricks to help you create your first starter.
Start by printing this out: FREE gluten-free sourdough starter 7-day guide (pdf)
It’s the same great information as below but easier to reference. Keep it with you in the kitchen and check off your progress as you go.
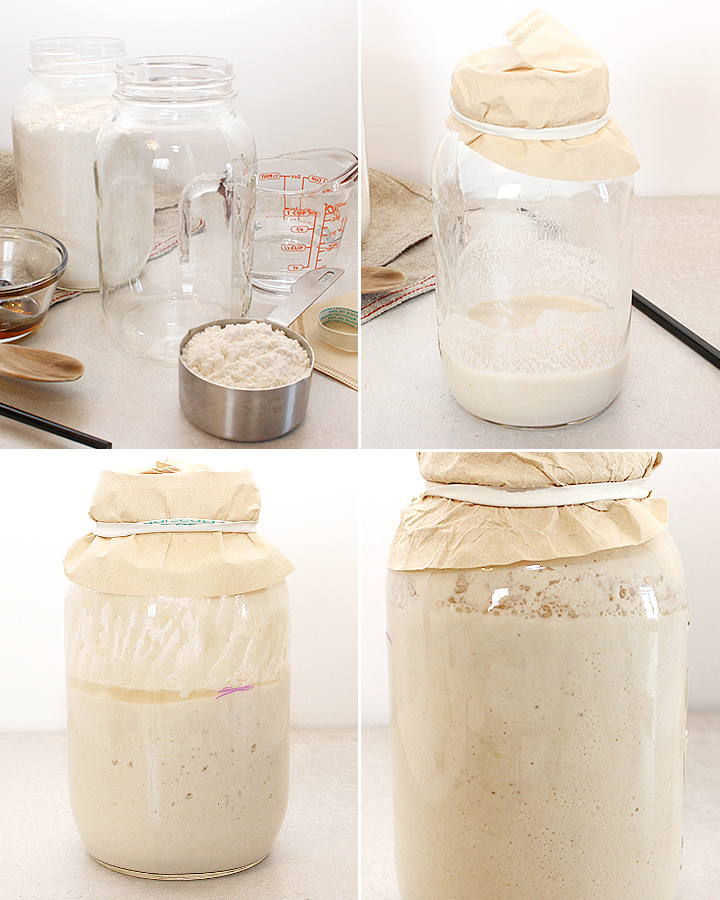
What to expect from Day 1 to 7
Day 1 – Morning —————
Instructions: To a large glass jar, add 1/2 cup of brown rice flour and 1/2 cup of water. To help speed things up (optional): add 1 tablespoon of maple syrup. Stir well with a long wooden spoon or chopstick. Cover with a coffee filter and secure with an elastic band and place in a warm area. You can also cover the jar with a tea towel.
Day 1 – Afternoon/Evening —————
Instructions: Add 1/2 cup of brown rice flour and 1/2 cup of water to the same jar. Stir well. Cover with a coffee filter and secure with an elastic and return to a warm area in your kitchen or other.
Day 2 – Morning —————
Instructions: Add 1/2 cup of brown rice flour and 1/2 cup of water to the same jar. Stir well. Cover with a coffee filter and secure with an elastic and return to a warm area.
Day 2 – Afternoon/Evening —————
Instructions: Add 1/2 cup of brown rice flour and 1/2 cup of water to the same jar. Stir well. Cover with a coffee filter and secure with an elastic and return to a warm area in your kitchen or other.
Day 3 – Morning —————
What to expect:
- At this point, you might start seeing some little bubbles.
- The starter might still smell like wet flour or dough.
- Some clear liquid might form at the top.
Instructions: Pour out any clear liquid. Scoop out 1 or 2 spoonfuls of starter and discard. Add 1/2 cup of brown rice flour and 1/2 cup of water to the same jar. Stir well. Cover with a coffee filter and secure with an elastic and return to a warm area.
Note: if the clear liquid at the top is gel like it’s possibly because you added maple syrup. Don’t worry just remove it and continue with feeding your starter with flour and water.
Day 3 – Afternoon/Evening —————
What to expect:
- At this point, even more, bubbles are forming, that’s a great sign.
- The starter might start smelling sour, and that’s ok.
- Some clear surface liquid might collect at the top.
Instructions: Pour out any clear liquid. Scoop out 1 or 2 spoonfuls of starter and discard. Add 1/2 cup of brown rice flour and 1/2 cup of water to the same jar. Stir well. Cover with a coffee filter and secure with an elastic. With a piece of tape or chalkboard marker, indicate the level of starter in your jar with a line. By now, it should be at the halfway mark if you used a large 950 ml jar. Return to a warm area.
Day 4 – Morning —————
What to expect:
- More bubbles are forming.
- Some clear liquid might form at the top.
- Starting to smell yeasty and sour.
- If you did not use maple syrup on Day 1, your starter most likely smells sourer.
- See option to add organic grape juice, in notes below.
Instructions: Pour out any clear liquid. Scoop out 1 or 2 spoonfuls of starter and discard. Add 1/2 cup of brown rice flour and 1/2 cup of water to the same jar. Stir well. Cover with a coffee filter and secure with an elastic and return to a warm area.
Note: If you did not use maple syrup on Day 1, you could follow this optional step below to help sweeten the sour smelling starter. By the way, the sour smell is normal. It’s part of the fermentation process, but it is different if you are new to sourdough.
To help sweeten the sour smell (optional), add the juice of a few organic grapes (wipe grapes with a clean towel, do not use chlorinated water to wash). You can add about 1 tablespoon of freshly squeezed grape juice to your starter and mix. Green or red grapes will work fine.
Day 4 – Afternoon/Evening —————
What to expect:
- More bubbles are forming.
- Some clear liquid might form at the top.
- If you added grape juice in the morning, your starter might smell less sour.
- The level of your starter should be at about half the jar.
Instructions: Scoop out 1 or 2 spoonfuls of starter and discard. Add 1/2 cup of brown rice flour and 1/2 cup of water to the same jar. Stir well. Cover with a coffee filter and secure with an elastic and return to a warm area.
Day 5 – Morning —————
What to expect:
- More bubbles are forming, or your starter might have fallen flat overnight.
- Some clear liquid (less than before) might form at the top.
- Smell a little yeasty but not too sour (adding grape juice can help to sweeten the starter and reduce sourness).
Instructions: Pour out any clear surface liquid. Scoop out 1 or 2 spoonfuls of starter and discard. Add 1/2 cup of brown rice flour and 1/2 cup of water to the same jar. Stir well. Cover with a coffee filter and secure with an elastic and return to a warm area.
Day 5 – Mid Afternoon (optional) —————
What to expect:
Consider adding a third feeding today, if you find that your starter is not where it should be. If you fed it in the morning and a few hours later (like 5-6 hours) there was a tiny bit of surface liquid but not many bubbles, giving your starter more food might be beneficial. Feeding your starter extra flour and water could get things moving faster.
Instructions: Pour out any clear surface liquid. Scoop out 1 or 2 spoonfuls of starter (or reduce contents to half the jar) and discard. Add 1/2 cup of brown rice flour and 1/2 cup of water to the jar. Stir well. Cover with a coffee filter and secure with an elastic and return to a warm area.
Day 5 – Evening —————
What to expect:
- You’re noticing larger bubbles multiplying throughout—a great sign!
- Only a little clear liquid formed at the top (for some none).
- The starter smells better and better each day. Excellent job, you’re getting there!
Instructions: Pour out any clear liquid. Scoop out 1 or 2 spoonfuls of starter (or reduce contents to half the jar) and discard. Add 1/2 cup of brown rice flour and 1/2 cup of water to the same jar. Stir well. Cover with a coffee filter and secure with an elastic and return to a warm area.
Day 6 – Morning —————
What to expect:
- Lots of bubbles throughout the starter looks fluffy and light.
- No surface liquid.
- The aroma is mild and pleasant.
- Almost ready to use.
Instructions: Pour out any clear surface liquid. If your starter did not have any, you don’t have to discard at this point. You can scoop out 1 or 2 spoonfuls of starter and discard if your jar is getting too full. Add 1/2 cup of brown rice flour and 1/2 cup of water to the same jar. Stir well. Cover with a coffee filter and secure with an elastic and return to a warm area.
Day 6 – Afternoon/Evening —————
What to expect:
- Bubbles are distributed throughout and looking good.
- Once uncovered, you can hear the lively bubble activity.
- The aroma is mild and pleasant.
- Almost ready to use or ready to use.
Instructions: At this point, you will need to decide if you’re going to bake with the starter or keep feeding it until you are ready to use it. If you’re not ready yet, continue with discarding a little starter (to make room in your jar) and feeding it once or twice per day until you are.
If your starter is not ready and bubbly yet, this could be because of the temperature in your home or other variables. Continue to feed it once in the morning and once in the afternoon (or evening) until you are happy with the texture, smell and bubble activity.
Tips:
If your starter is ready, but you can’t find time to bake with it for a while, transfer to the refrigerator until you’re ready. Once ready to bake with it, you will need to feed it and bring it back to room temperature in a warm place. This step will bring the yeast back to life.
Once your starter is ready, active and happy, the amount of flour and water you feed it is flexible. You won’t always have to be so precise. One day the starter might require more food, and on another day it might be thriving with much less.
This variable will also depend on the amount of starter in your jar when transferred to the refrigerator. If you store it half full, you will only need to give it a little food to create enough starter to use in a recipe. Gluten-free sourdough recipes will require on average half a cup to a full cup of lively starter. This detail is excellent to keep in mind when preparing to bake.
Day 7 – Morning —————
What to expect:
- Bubbles are looking good and appearing throughout your starter.
- Once uncovered, you can hear the lively bubble activity.
- The aroma is mild and pleasant.
- Should be ready to use.
Instructions: If your starter wasn’t ready on day 6, by now it should be. If yours hasn’t reached an aroma and bubbly activity you are happy with, continue to discard a little starter and feed it some flour and water until it’s right for you.
Day 7 – Afternoon/Evening —————
What to expect:
- Bubbles are popping throughout and looking great!
- Once uncovered, you can hear the lively bubble activity.
- The aroma is mild and will keep getting better and better each time you feed your starter.
- The starter is light in texture, lively and should be ready to use.
Instructions: By now your starter should be ready to use. Go ahead and start preparing your first sourdough loaf recipe. If you’re not ready to bake yet, you can continue to discard a little and feed your starter on a daily basis or transfer your starter to the fridge until later.
Tips:
Once your starter is ready, and you’ve used it in a bread recipe. Don’t forget to replenish your starter with more flour and water before you store it in the fridge for future recipes. Having an established and healthy starter means that you shouldn’t have to discard any more starter unless your jar gets too full. I don’t like wasting any starter so once I have a good starter I prefer keeping it at a level that requires zero waste (so no discard).
Notes
How to store If you don’t bake regularly I suggest storing your starter in the refrigerator. Once you’ve used some starter, I recommend feeding it 1/2 cup of flour with 1/2 cup of water, stir it and place it in the fridge covered with a coffee filter and secured with an elastic band.
Is it ready?
- Your starter is ready to use once it grows a little (sometimes a lot) in size a few hours after a feeding.
- The sourdough wild yeast has a lot of bubbles throughout.
- When it smells pleasant, mildly sour, sweet, and not too yeasty. Note: If it smells too sour, and you don’t enjoy the odour, you’re not going to like using it in a loaf. Be patient, keep feeding it and discarding some starter until you reach a consistency and smell you do like.
- When the texture is bubbly and light.
Ready to use On the day you want to bake a loaf (usually in the morning), remove the starter from the fridge. Pour out any surface liquid, feed your starter, mix, cover and let it sit in a warm area until it becomes alive, light, bubbly, and ready to use. This can take a few hours depending on the temperature of your house.
How to use Once the starter is bubbly and light, try not to stir or mix, it will go flat. Instead, gently pour out the portion you need into a liquid measuring cup until you’re ready to add it to a recipe.
How to maintain Storing your starter in the refrigerator is most likely your best bet if you don’t plan to bake a lot. Every once in a while you will need to feed the starter to keep it alive. For myself, once every week (or two) seems to work well for my starters. Some have probably gone longer without dying. To maintain a lively starter, remove it from the fridge, pour out any surface liquid, feed with fresh flour and water, cover it and return it to the fridge.
Troubleshooting FAQs
What to do if your starter dries out on the counter or fridge? You may or may not be able to salvage it. It’s hard to say unless you try. You could try scooping out a little bit of the dried starter, transferring it to a new clean jar, and try reviving it with more fresh flour and water. Don’t forget to cover it and then see what happens.
If mould appears, please throw it out and start over.
Your starter should also be completely discarded if undesirable aromas occur. You will know if it’s gone bad, the smell will be awful.
If you need a larger quantity of bubbly starter to bake more loaves or you want to bake twice in a day simply increase your feedings. You could also divide your starter into two jars to augment the total level of starter. This way your jars won’t overflow.
If you have more questions while making your first starter, please ask in the comments below the post or join the GFV Baking Facebook Group.
Lastly, if you haven’t done so yet, don’t forget to print out the printable guide!
FREE 7-day gluten-free sourdough starter step-by-step guide (pdf)
Find it online: https://www.freshisreal.com/gluten-free-sourdough-starter/