


When I share recipes like this Wild Yeast Bread, I’m excited and even a little nervous! The interest in gluten-free and vegan bread baking is growing—rapidly, and I’m thrilled to help!
Just knowing that so many look up to Fresh is Real for plant-based and allergen-friendly recipes make all the hard work of recipe creation and food blogging worth it!
This sourdough bread recipe, with wild yeast (GF sourdough starter), is similar to other fermented bread recipes on the blog, but the method is different. By making a few tweaks, I’m hoping that we can all improve our gluten-free sourdough baking skills!
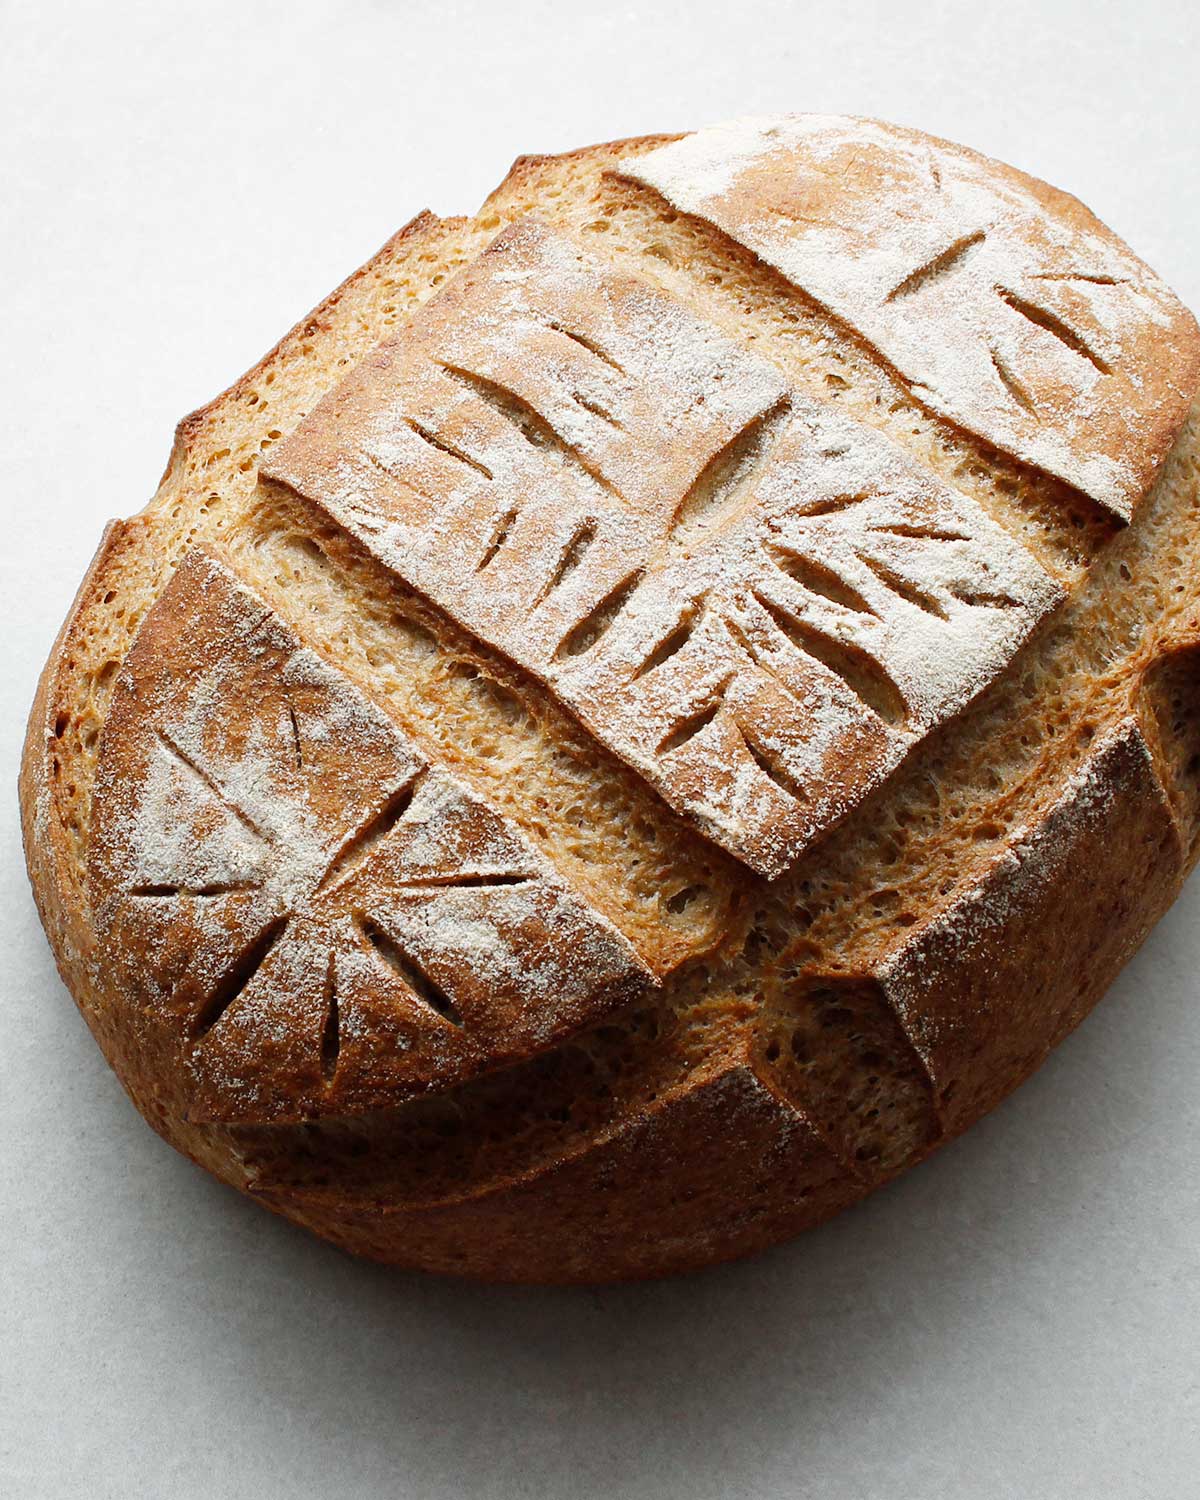
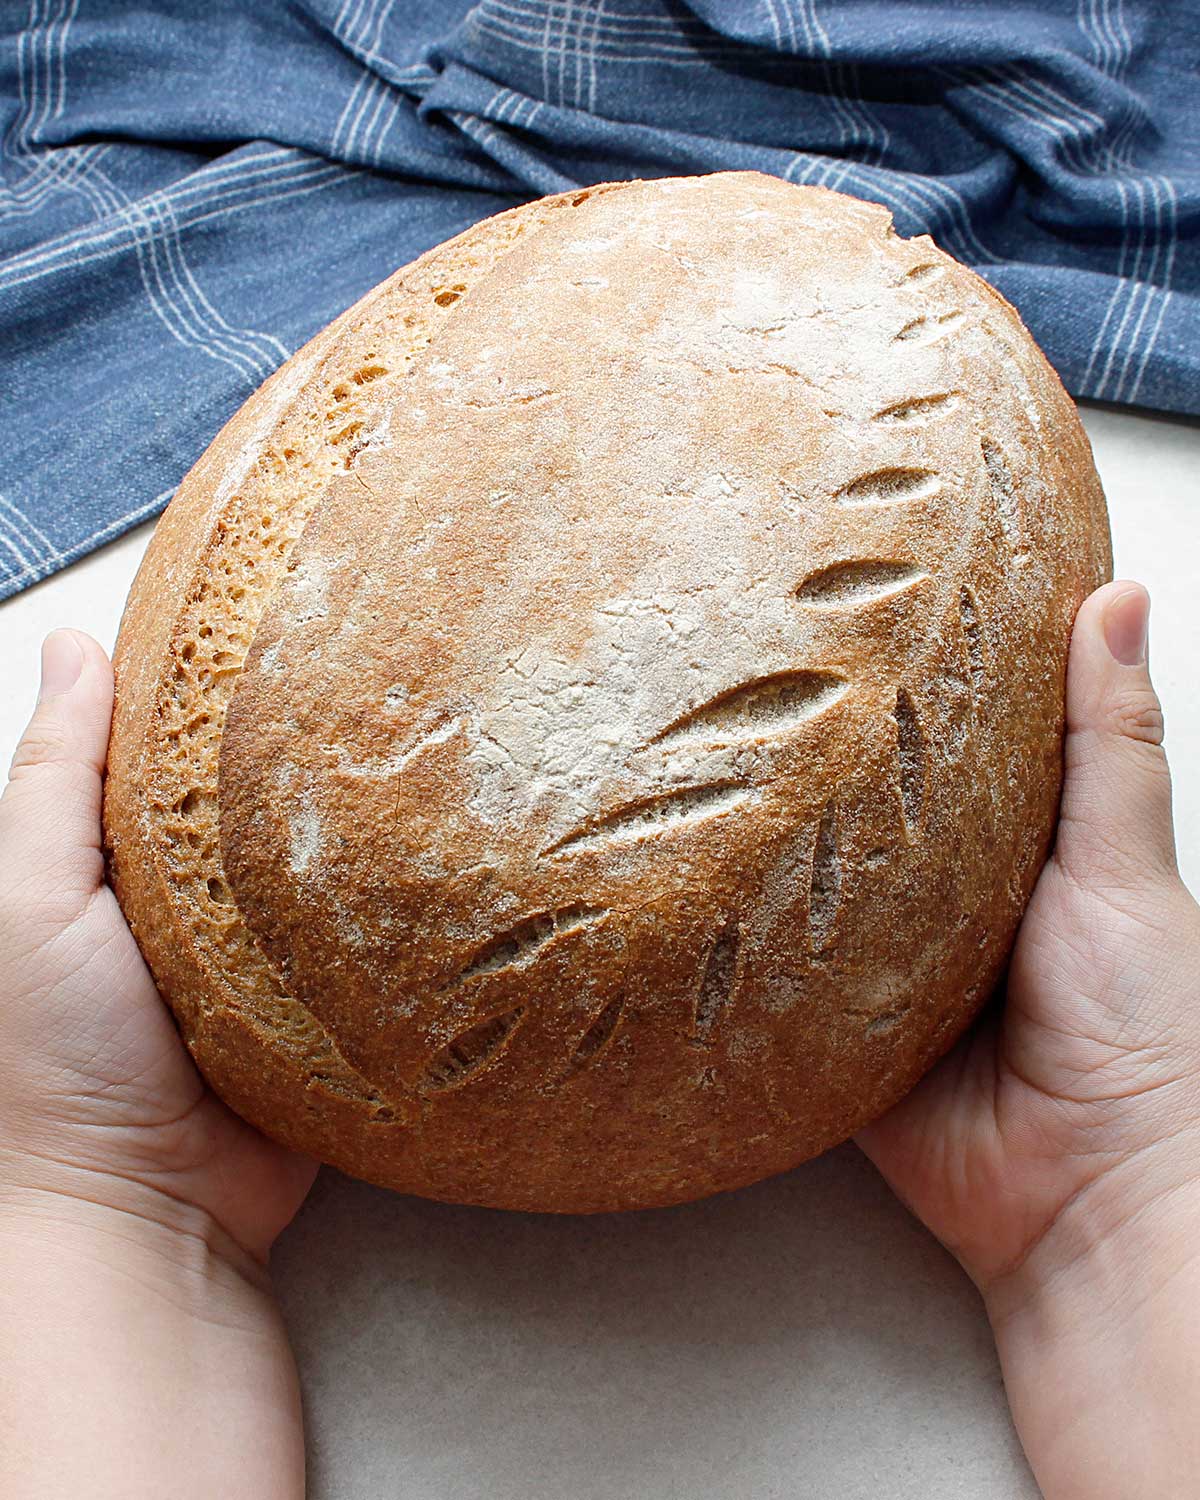
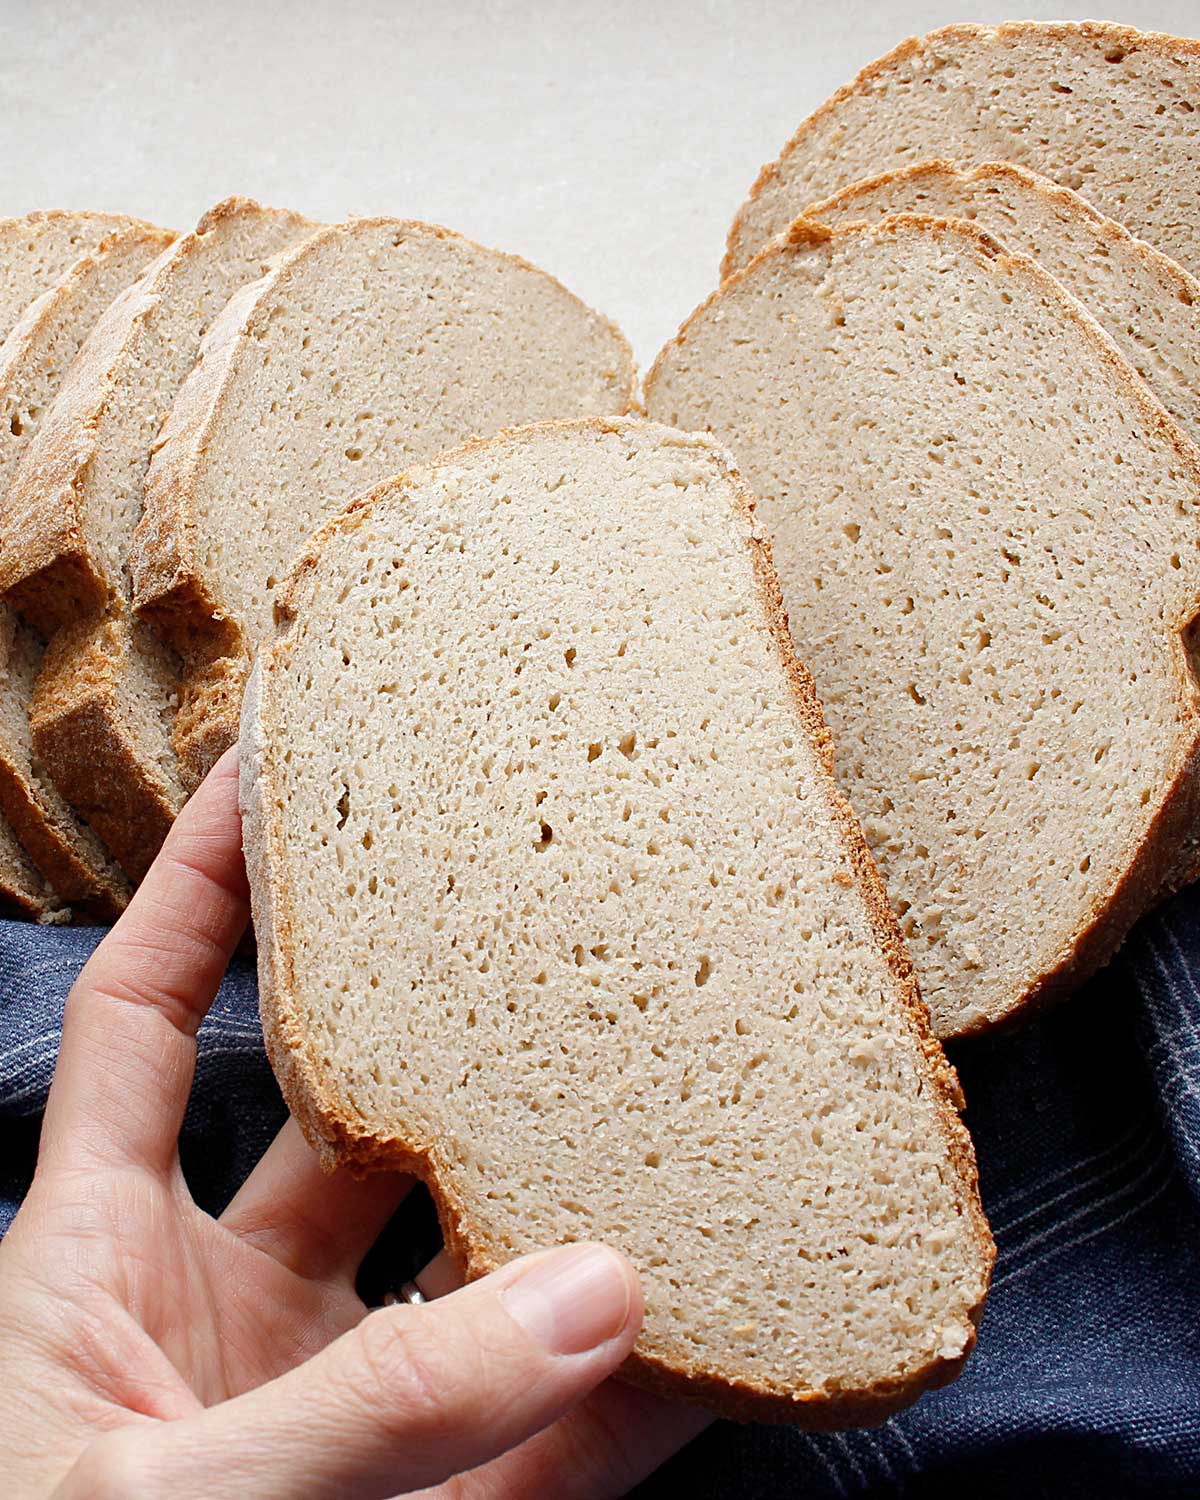
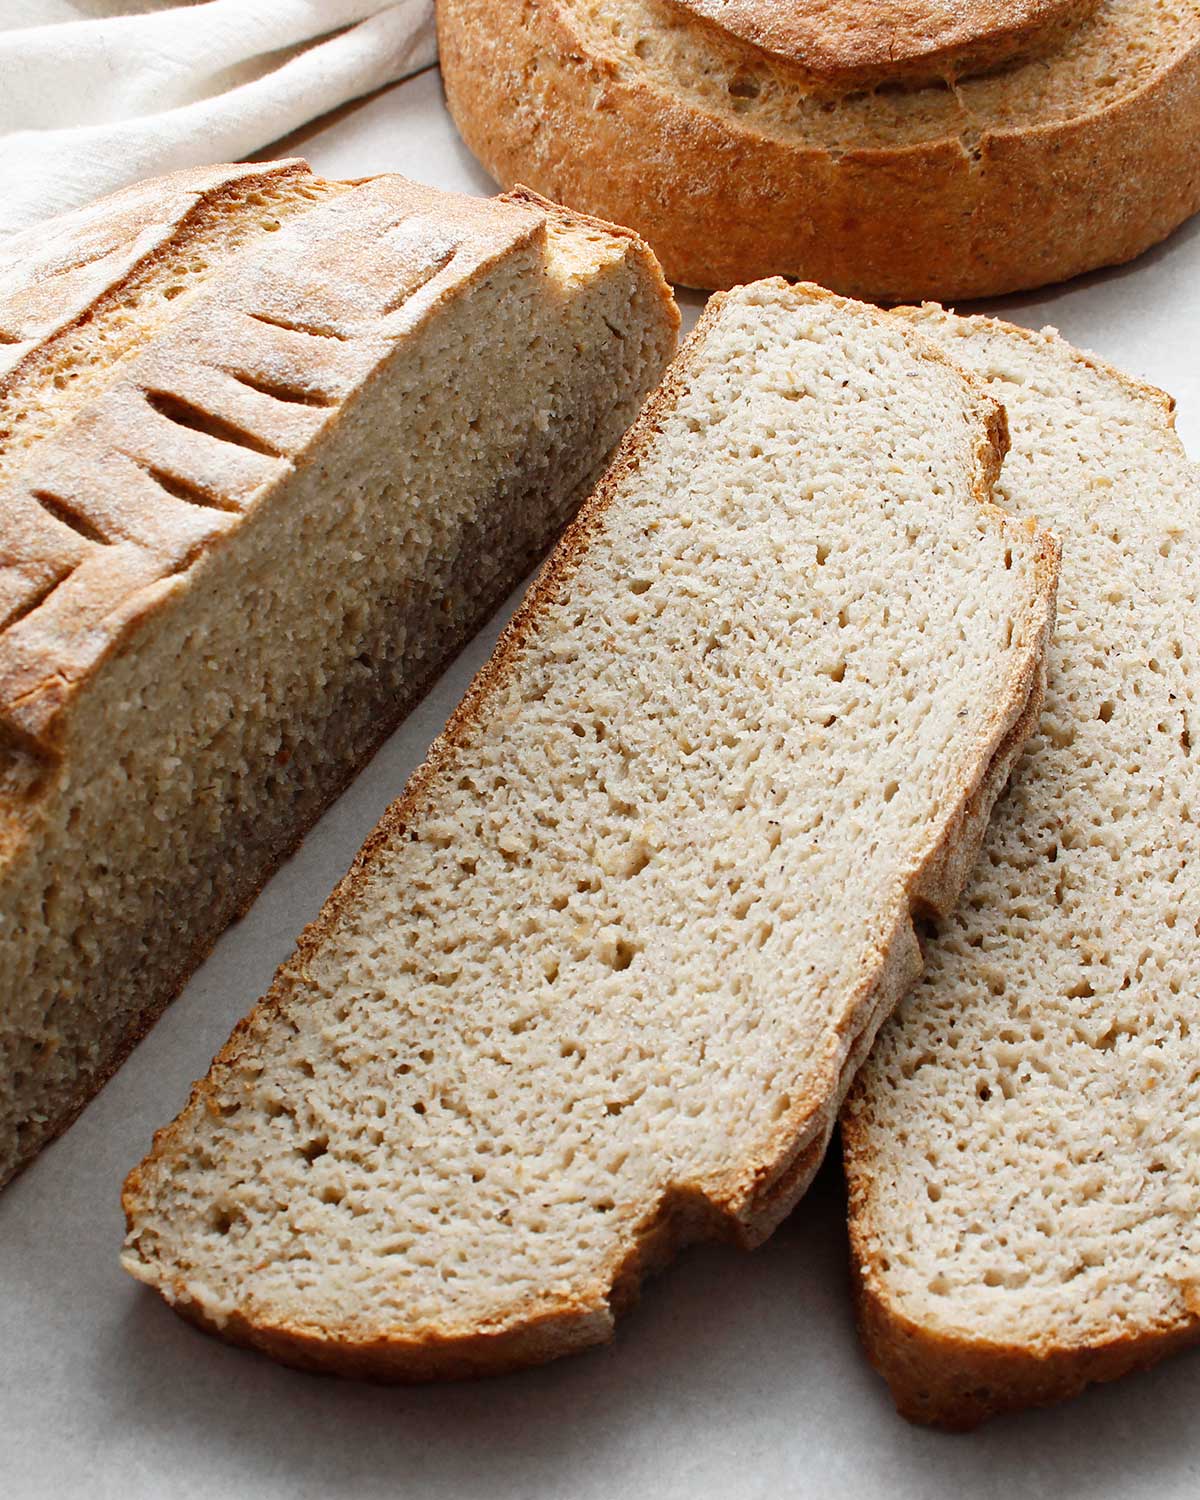
I baked a few loaves to test this recipe and photographed four while highlighting them in the How-To Video. In case you’re wondering, all loaves are the same recipe. The only difference was the amount of water I added.
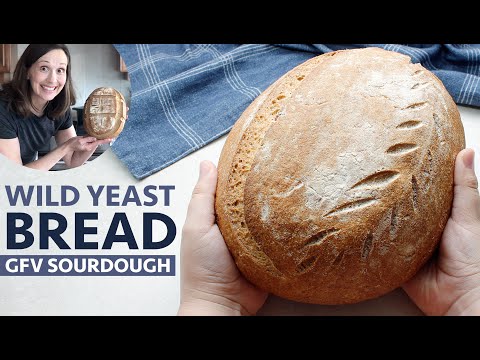
NEW – Wild Yeast Bread Recipe!
You might wonder why I created yet another gluten-free sourdough recipe. Or why wild yeast bread recipes are so popular right now. Well, there are a few reasons.
Even before the pandemic started, there was already an increase of interest in gut-friendly bread recipes. And using natural homemade wild yeast, also known as sourdough starter, is perfect for people that can’t seem to find any commercial active dry yeast due to shortages.
The process of fermenting bread helps to break down the ingredients making it much easier to consume for people with digestive issues. And even though regular wheat-based sourdough bread can be easier on some of our tummies, this gluten-free version of sourdough is not the same.
A growing population of bread lovers can get very sick if they consume gluten or wheat. If you use allergen-friendly ingredients, it can be so much safer for people with allergies. Just make sure to purchase baking ingredients that are free of the allergens you avoid.

Unless you have food sensitivities, allergies or autoimmune conditions, I’m pretty sure you’re not going to stumble across this post. You could be here to learn for a loved one, if that is the case, I applaud you for your curiosity and willingness to try!
I’m pretty sure many of us experience the same struggles when it comes to finding healthier alternatives to recipes we miss. I hope this post or the How-To Video for this recipe will help answer some of your bread baking questions and teach you how to make Wild Yeast Bread!


Wild Yeast Bread Process
The steps for this recipe are actually easy once you have all your ingredients and your gluten-free sourdough starter is ready! Here are a few photos of the process.
Refreshing and feeding a gluten-free wild yeast sourdough starter.

Only 10 simple ingredients in this Wild Yeast Bread recipe! The addition of extra psyllium husk and flaxseed meal really helps the structure of the bread.

Gluten-free sourdough wild yeast bread dough before and after rise.


Tools
To make this recipe, you will need a few key tools! If you have a stand mixer, use it for this recipe—it’s much faster!
- Stand mixer
- Medium bowls or measuring glass cups
- Dry ingredients measuring cups and spoons
- Kitchen scale
- Dutch oven or bread pan
- Unbleached parchment paper
- Banneton basket or soup bowl(s)
- Spatula and spoons
- Bench/dough scraper
Helpful How-To YouTube Video
If you’ve never made a gluten-free sourdough wild yeast bread before, make sure to watch the helpful How-To Video.
I created it to help reduce any fears you might have before starting your sourdough baking journey!

Top 8 Free!
If you avoid most or all top allergens, this sourdough wild yeast bread recipe will be excellent for you to try! Plus, it’s also free of corn, oil, legumes and can be oat free!
When buying new baking ingredients, make sure to read the labels. This step is crucial to ensure they are free of the allergens you must avoid.
If you would like to learn more about gluten-free, vegan and allergen-friendly ingredients, visit the FLOUR GUIDE post! It’s packed with tips that will help you with baking substitutions!


Previously on FiR
Once you have a gluten-free sourdough starter, make sure to try the yummy Gluten-Free Sourdough Brownies recipe!
There’s also a brownie version without starter if that’s easier for you! I hope you try making this treat!

More Learning Options
Whether you are new to gluten-free baking or you’ve been doing it for a while, I’m happy that you’re here to learn!
Here’s another beautiful gluten-free sourdough recipe by Meghan Telpner! She was my culinary nutrition teacher back in 2016!
I started my gluten-free baking journey about four years ago. At first, I knew nothing, and even though I tried, I did have many flops. That’s when I decided to learn from the best and take the learn-at-your own-pace GFBA online bread baking course! I eventually also took the Classic Cookies 101! The teacher for both is the amazing Heather Crosby! If you’re looking for a class-type learning experience with videos and printables, baking this way was great fun and might be right for you!


Fresh is Real’s Amazon Storefront
Visit my Amazon Storefront to search for and buy baking and kitchen staples! Take Me Shopping!
Questions Before You Start?
The best way to ask your recipe questions is in the comments of this post (scroll to the bottom) or the Facebook group.
The group is a great place to ask allergen-friendly baking questions, get tips, inspiration and share recipes! Join our amazing and friendly Gluten-Free Vegan Baking by Fresh is Real Facebook Group!
Did You Make This Recipe?
Once you try this recipe, remember to take a picture and share it with us on Instagram Tag it @Freshisreal_ #freshisreal
Print
Wild Yeast Bread (GF/V)
- Prep Time: 30 minutes
- Cook Time: 60 minutes
- Total Time: 8-24 hrs (hands-off time)
- Yield: 1 loaf 1x
- Category: Bread
- Method: Oven-Baked
- Cuisine: Gluten-Free, Vegan, Allergen-Friendly
- Diet: Gluten Free
Description
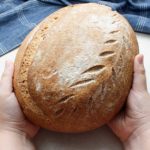
Get your stand mixer ready for this gorgeous Wild Yeast Bread! You could probably do it by hand, but now is a great time to improve your skills. This recipe is impressive and only includes ten ingredients! You’ll fall in love with the fantastic structure of this gluten-free, vegan and allergen-friendly loaf!
TOOLS:
- Stand mixer
- Medium bowls or measuring glass cups
- Dry ingredients measuring cups and spoons
- Kitchen scale
- Dutch oven or bread pan
- Unbleached parchment paper
- Banneton basket or soup bowl(s)
- Spatula and spoons
- Bench/dough scraper
Ingredients
Wild Yeast Refresh (GF Brown Rice Sourdough Starter)*:
- 1/4 cup (30g) brown rice flour (with 30g water, just enough to stir)
Wild Yeast for Bread (GF Brown Rice Sourdough Starter):
- 1/2 cup refreshed GF brown rice sourdough starter (150g)
- 1 cup brown rice flour (125g)
- 3/4 to 1 cup water (177g to 240g)**
Psyllium Husk/Flax Gel:
- 1/3 cup whole psyllium husk (20g) (or 20g psyllium husk powder)
- 1/3 cup golden flaxseed meal (30g) (or 30g ground flax)
- 1–1/2 cups warm water (355g)
Bread:
- 1–1/4 cup sorghum flour (138g)
- 1/2 cup light buckwheat flour (70g) (or 70g GF oat flour)
- 1/2 cup white rice flour (70g)** (or 70g GF oat flour)
- 1/2 cup arrowroot starch (60g) (or 60g tapioca flour/starch)
- 1/2 cup potato starch (70g)
- 1 tablespoon coconut palm sugar (12g), optional
- 1 tablespoon fine grey sea salt (10g)
- 1/4 to 1/2 cup water (60 to 118g)**
Instructions
Before you begin, watch the Wild Yeast Bread How-To Video!
Step 1 – STARTER REFRESH
The night before you plan to bake, refresh your refrigerated starter with 1/4 cup (25g) of brown rice flour with just enough water to stir. Cover your jar and let it sit at room temperature until the morning.
Step 2 – PREPARING THE STARTER
The morning you want to bake, feed your starter by choosing one of the methods below.
Method 1: Feed your starter directly into your jar (approx. 950ml). Your jar should already contain a minimum of 150g of starter. Give it 1 cup brown rice flour (125g) and 3/4 cup (177g) up to 1 cup (240g) of water, mix it well and let it get active and bubbly (approx. 2-4 hours). Add 2 cups of lively starter (approx. 515g) to the bread ingredients once it reaches its peak of activity.
Method 2: If your jar is already half full or more, your other option is to remove 1/2 cup of starter (150g) and place into a medium-sized bowl. Feed that portion 1 cup of brown rice flour (125g) and 3/4 cup (177g) up to 1 cup (240g) of water, mix it well, cover the bowl and give it a few hours to get active. This method can take longer, sometimes up to 10 hours. TIP: If you want to save time, you could consider doing this step the night before you plan to bake. Doing so would require you to refresh your starter beforehand in the afternoon. This method will create about 2 cups of thin bubbly starter. Add it to the bread ingredients once it reaches its peak of activity.
Proceed with Step 3 once your starter is ready.
Step 3 – PREPARING THE GEL
Combine the psyllium husk (whole or powder) and flax (flaxseed meal or ground flax), add the warm water, mix well. It will start to get thicker and gel, set aside while you prepare the bread ingredients.
Step 4 – COMBINING THE INGREDIENTS
To a stand mixer bowl, sift and combine the bread ingredients. With a spoon, you can give the dry ingredients a quick mix by hand. Attach the mixer bowl and the attachment to your stand mixer. If using a KitchenAid Stand Mixer, I find that the flat beater attachment works well. Pour in the wild yeast starter, the gel mixture and mix on a low setting for about 1 minute. The dough should come together nicely, and you might notice some dry ingredients leftover at the bottom. At this point, add the 1/4 cup of water and keep mixing. If the dough ball seems too stiff, consider adding a bit more water in increments (up to 1/2 cup). Add carefully, because adding too much will result in a dough that you can’t handle with your hands. Depending on the ingredients you use, some brands of gluten-free flours are more absorbent. The dough mixture should be well combined after a few minutes of mixing.
Step 5 – SHAPING THE DOUGH
Transfer dough to a well-floured flat surface—brown rice flour is perfect. Gently stretch and fold the dough a few times while keeping it loose. Don’t overwork the dough. Watch HOW-TO VIDEO for guidance. Tuck in the dough while turning it to create a round shape. Transfer dough ball to a flour-dusted banneton basket or a soup bowl lined with a clean tea towel and dusted with some brown rice flour. Cover your dough and insert it in a plastic bag to help it rise. Place it somewhere warm in your kitchen and let it rise for 4-6 hours. It will take less time in the warmer months. Check on the rise at the 3-hour mark. If the dough shows some growth (up to 1 inch), proceed to turn on your oven to 450° F. It’s ready to bake when it bounces back when gently pressed down. Preheat your oven, along with a 5- 7QT Dutch oven, so they both get hot (preheat for at least 30 minutes). If your dough is not quite ready, preheat your oven when you’re happy with the rise of your dough—ideally, thirty minutes to one hour before you want to bake.
Step 6 – BAKING
Ready to bake? Make sure your oven is hot. Have a 10×13-in sheet of parchment paper and a bread scoring lame or sharp knife ready. Remove the preheated Dutch oven from the oven and be careful it will be hot. Transfer your dough onto the parchment paper, dust it with more brown rice flour if you wish and score it with a simple design. TIP: The main scoreline should be about 1/4-in deep to help the loaf expand in the right way. The additional decorative lines can be less deep (1/8-in). With the help of the parchment paper, transfer the dough to the preheated Dutch oven and place a few ice cubes (if you wish) under the parchment paper. You can also spray a mist of water. Doing so will create steam once you cover your pot. Place the cover and bake in your preheated oven for 25 minutes covered, 25 minutes uncovered and 10 minutes directly on the middle rack. Tap the top, sides and bottom of your loaf! If it sounds hard and hollow—it’s ready!
Step 7 – COOLING
Let your loaf cool on a wire rack for a good 6 hours or overnight. Doing so will help set the crumb and make it less sticky. Slice your bread and enjoy it fresh or toasted! You can store your loaf wrapped in a clean towel for a day or so, then slice the leftovers and refrigerate for a few more days or freeze for a few months.
Notes
*Make sure you have at least 1 cup of starter in your 950ml jar before refreshing it.
** Depending on if you added 3/4 or 1 cup of water when preparing your starter, you might not need more than 1/4 cup of water when mixing the dough ingredients. It’s always best to add less water to start and increase the amount if necessary.
Find it online: https://www.freshisreal.com/wild-yeast-bread-gf-v/