


Here’s a Yeast-Free Gluten-Free Vegan Bread recipe with new pictures and a few updates! If you got here by mistake and need a similar recipe with active dry yeast, you can check out this basic dough recipe.
This a great allergen-friendly recipe to bake if you can’t consume yeast. It’s easy-to-make and a wonderful gluten-free, vegan bread for beginners to try.
No mixers are required, and it’s a knead free dough! It’s simple; combine the ingredients in a large glass bowl, mix, transfer to a baking pan, bake, and that’s it! The bonus part is that it can be ready in less than 1 hour from start to finish. The texture might remind you of biscuit bread. So good with your favourite buttery spread!
If you love to learn by watching videos, keep reading to find a few helpful videos for this recipe!
(Originally published February 2018, updated December 2020)
Yeast-Free Gluten-Free Vegan Bread
If you found this post, it’s most likely because you have food sensitivities, allergies or maybe you or your family follow a primarily plant-based lifestyle.
Like me, you might not be able to eat bread from the grocery store. Many are somewhat nutritious, but there’s always at least one ingredient on the label that you can’t tolerate. Sound familiar?
Well, I hope that this recipe might just be the right combination of ingredients for you to try!
This bread will hopefully satisfy your sandwich, toast, burger, pizza crust, and snacking needs while providing you with the right kind of nutritious ingredients.
Avoiding Top Allergens
When you, or a loved one, first gets diagnosed with either food allergies, sensitivities, or even celiac disease, life does take a turn. A HUGE one, in fact! Not just for the one diagnosed, but it affects the whole family.
Figuring out the ingredients you should avoid—even some healthy ones—can be so confusing. If you’re new to such a lifestyle, it can be very overwhelming. Don’t worry, though; after some time, you will get to know what works and what doesn’t.
If unsure, always consult a medical professional to help you determine which top allergens you should avoid.
You can reference this Flour Guide to help you bake without top allergens.
YouTube Video Tutorials
Yeast-Free Gluten-Free Vegan Bread Video From 2018:

If you happen to watch my first ever YouTube recipe video, it was for this yeast-free bread recipe. Watching it now makes me realize just how much my video skills have improved.
Yeast-Free GF Vegan Bread – GF Flour Mix Comparison Video:
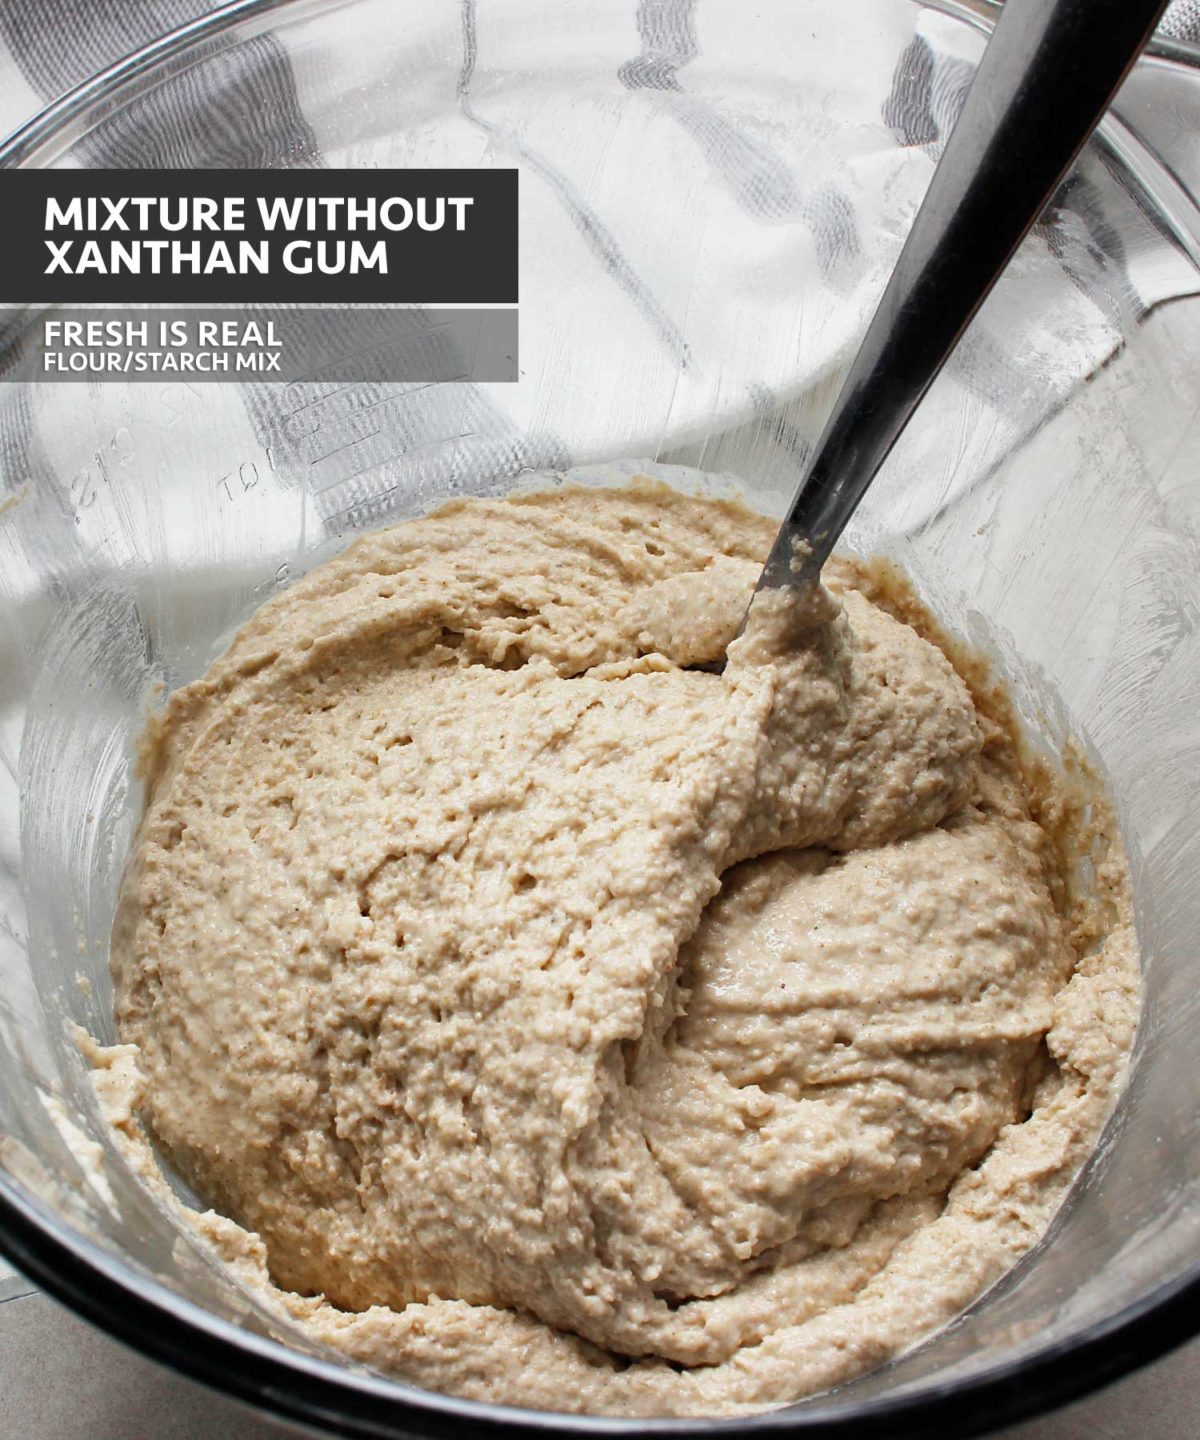
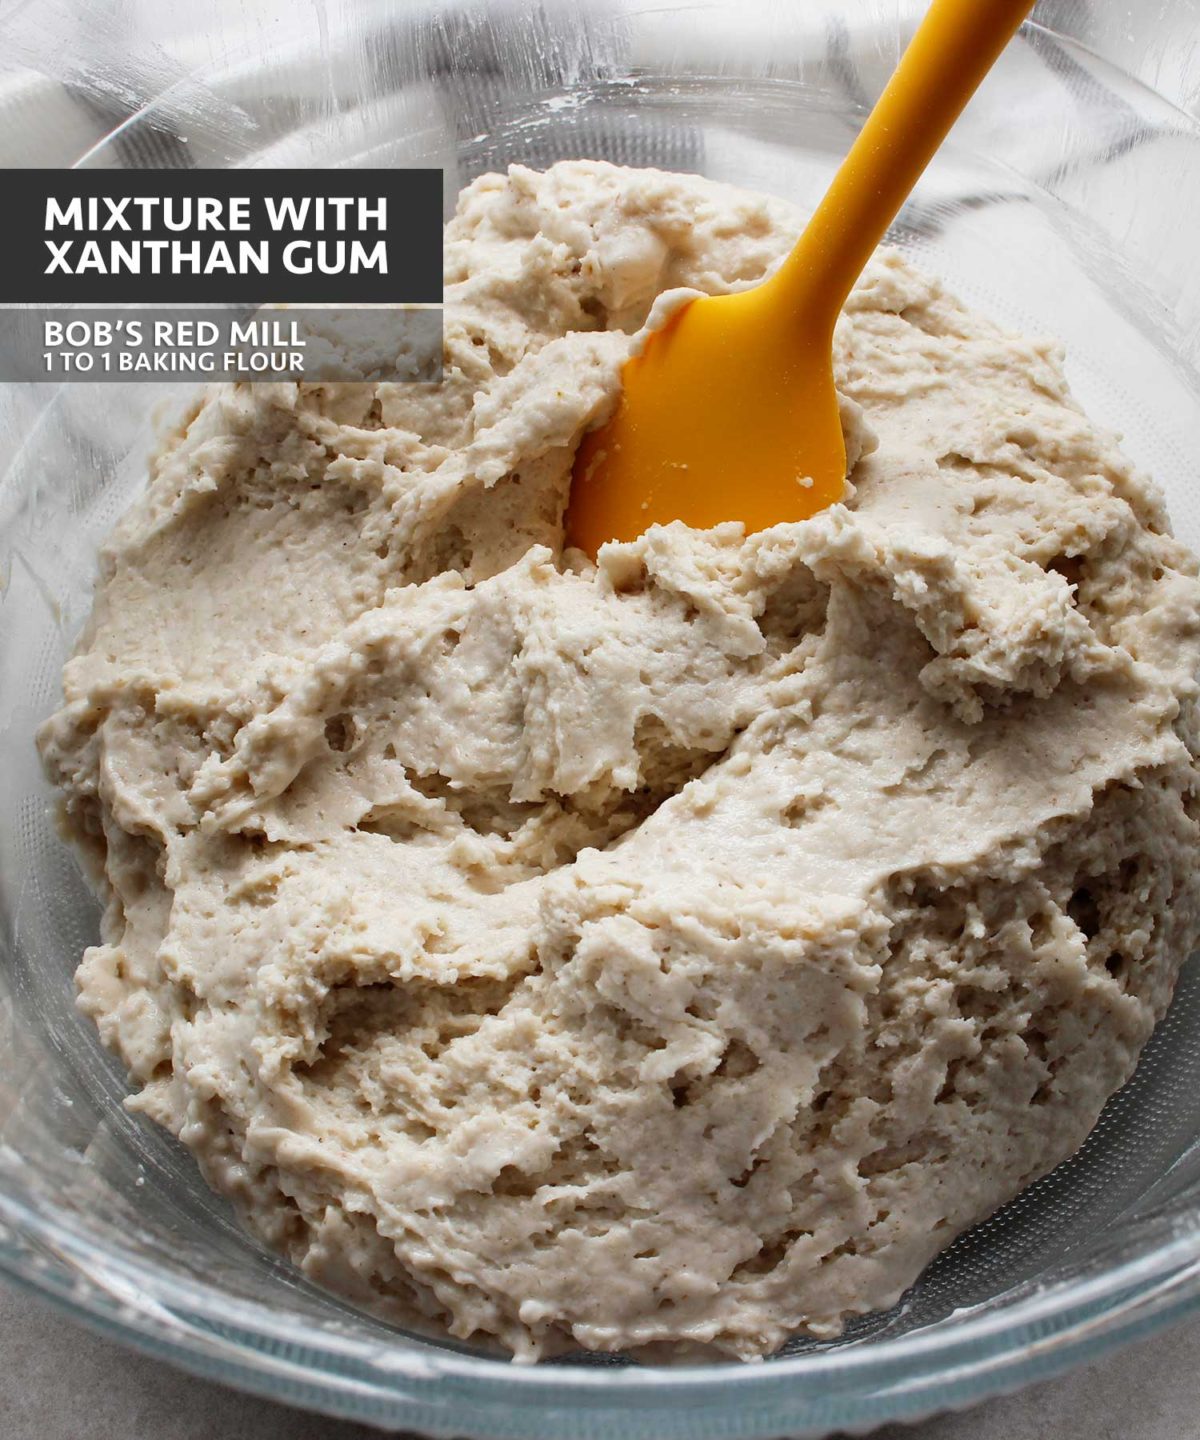
NOTE: In the video below one batch is made with Bob’s Red Mill GF 1 to 1 Baking Flour (contains xanthan gum) and the other is my recipe as listed below (no xanthan gum).
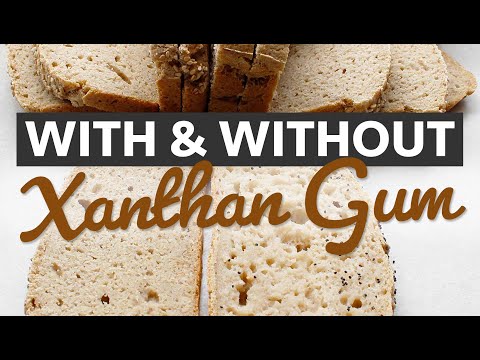
Store-Bought Versus Custom GF Flour Mix
This post will show you the difference in using Bob’s Red Mill GF 1 to 1 Baking Flour in place of the flours and starches I suggest in my yeast-free bread recipe.
If you decide to try a store-bought flour mix that contains xanthan gum, please consider omitting the psyllium husk in the recipe. Keep reading for details.
The Ingredients & Process
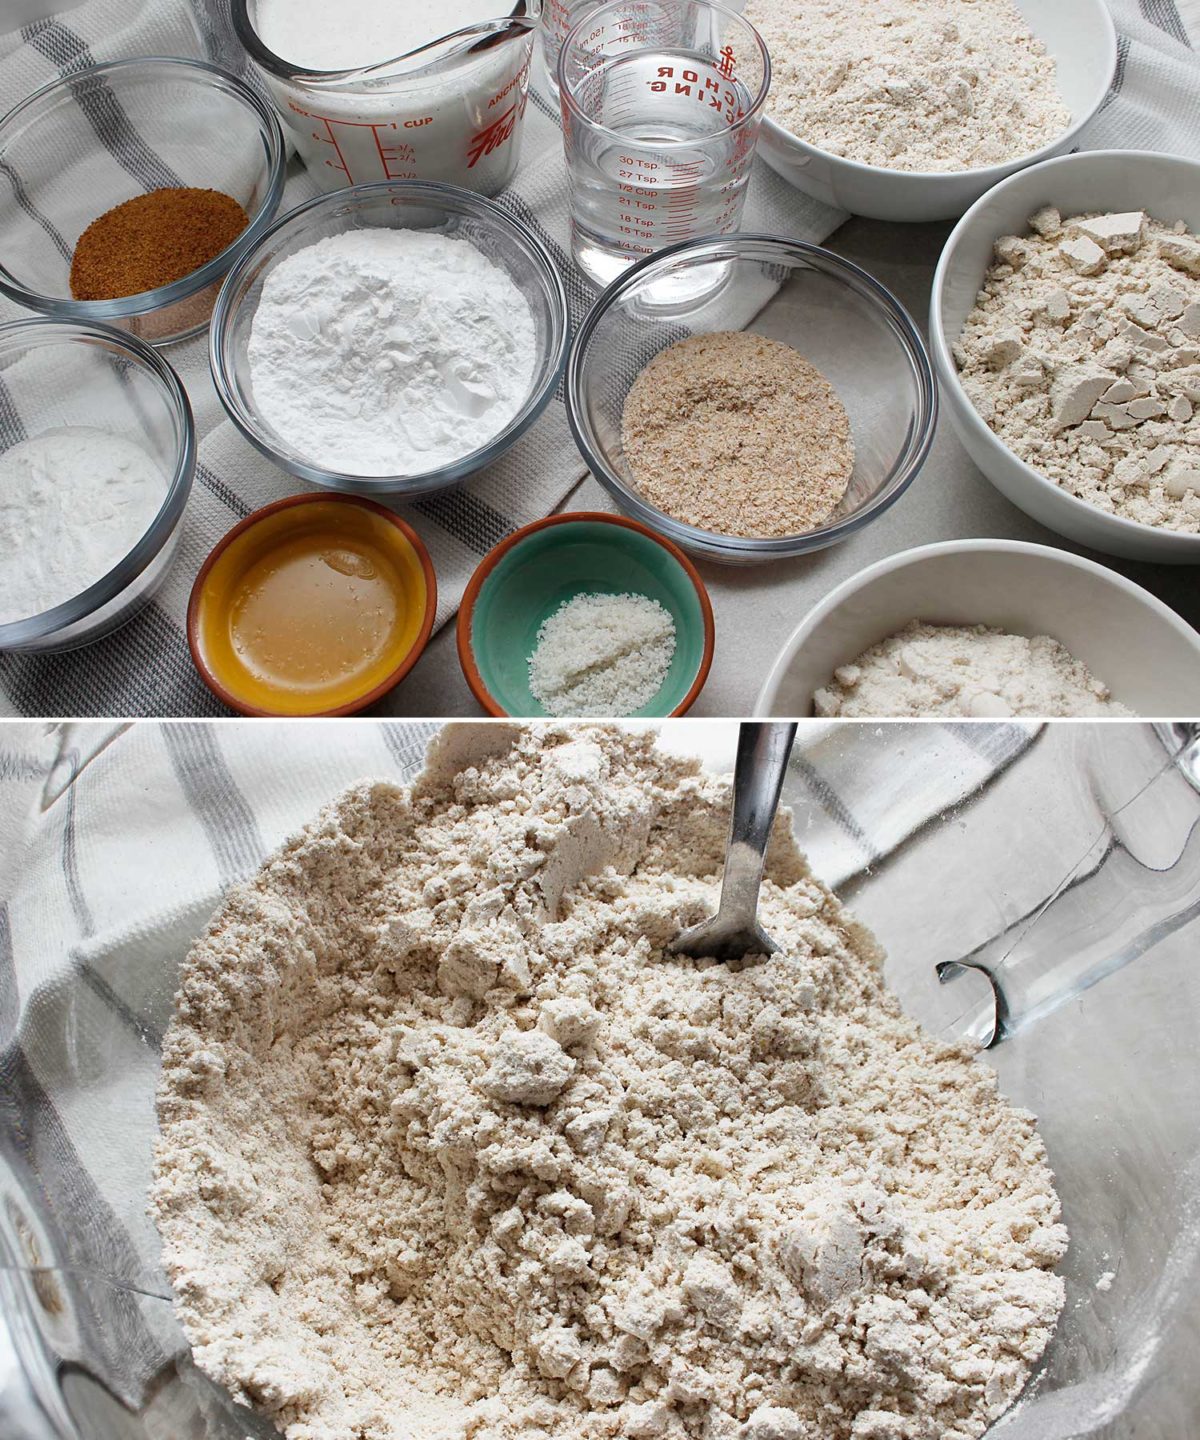
For this experiment, I decided to bake a couple of mini loaves (one batch of dough) by simply replacing the starches and flours in my recipe with a store-bought GF flour mix (Bob’s Red Mill GF 1 to 1 Baking Flour).
I did it to show you the outcome because it’s a question that I get asked often. So, let me show you the results of swapping the flours/starches and keeping everything else in the recipe.
Baking Options
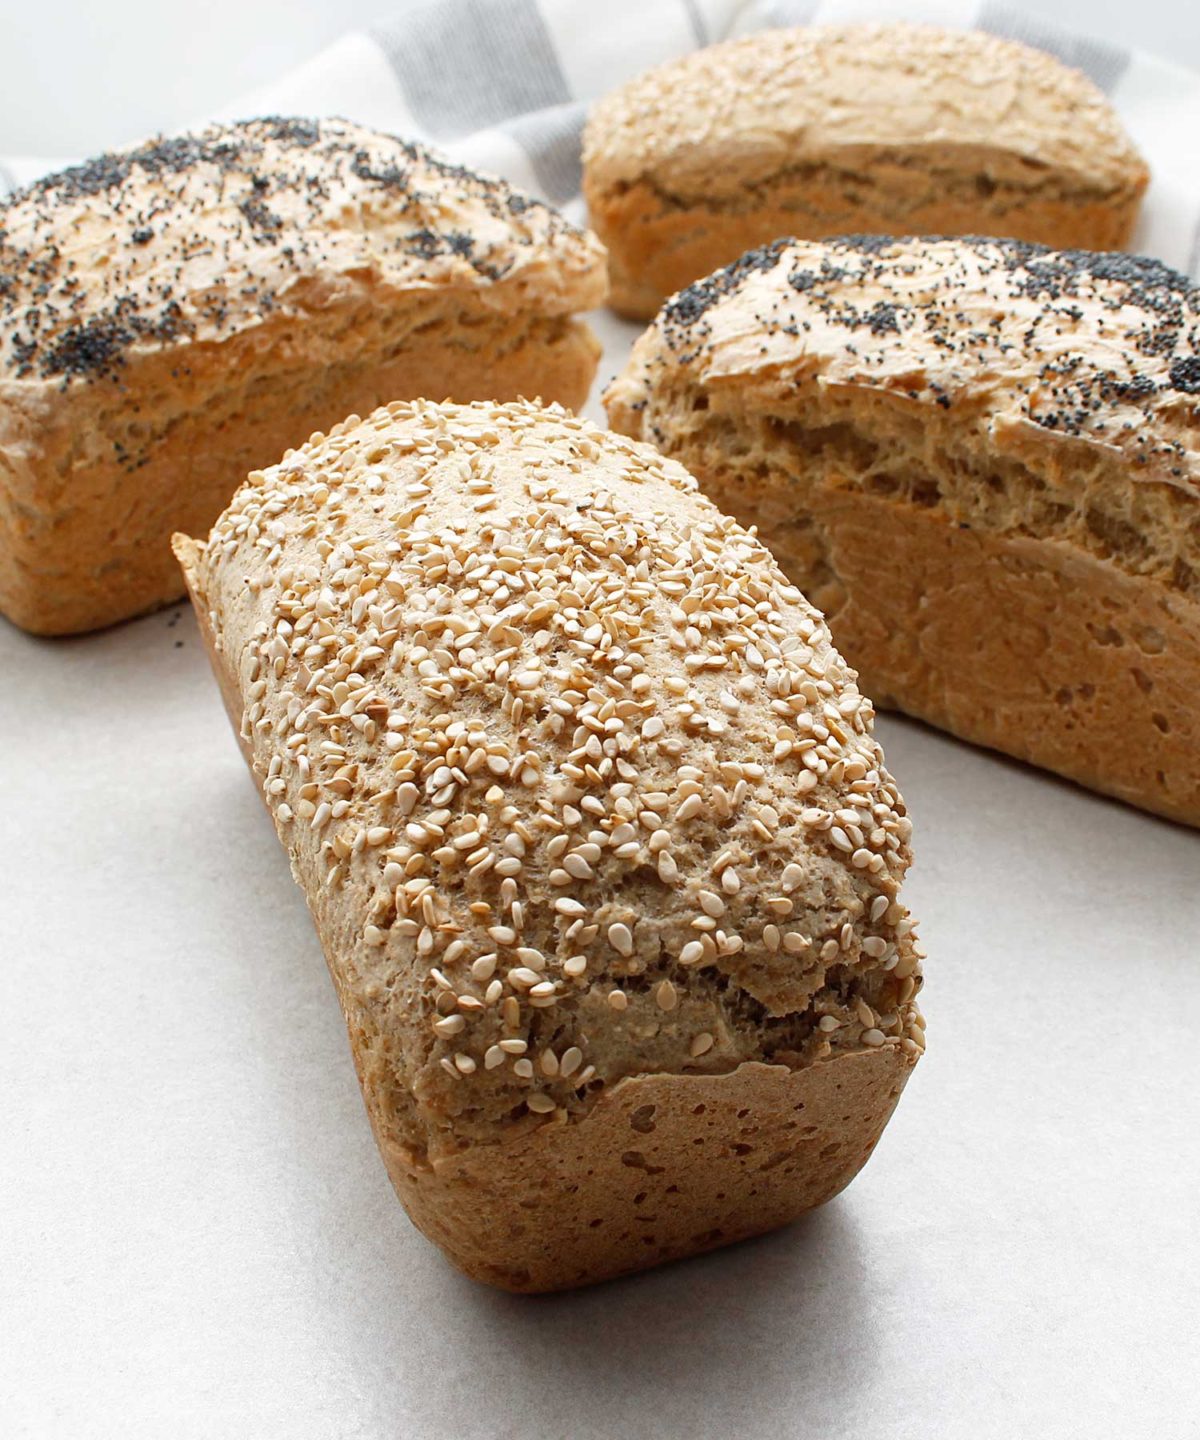
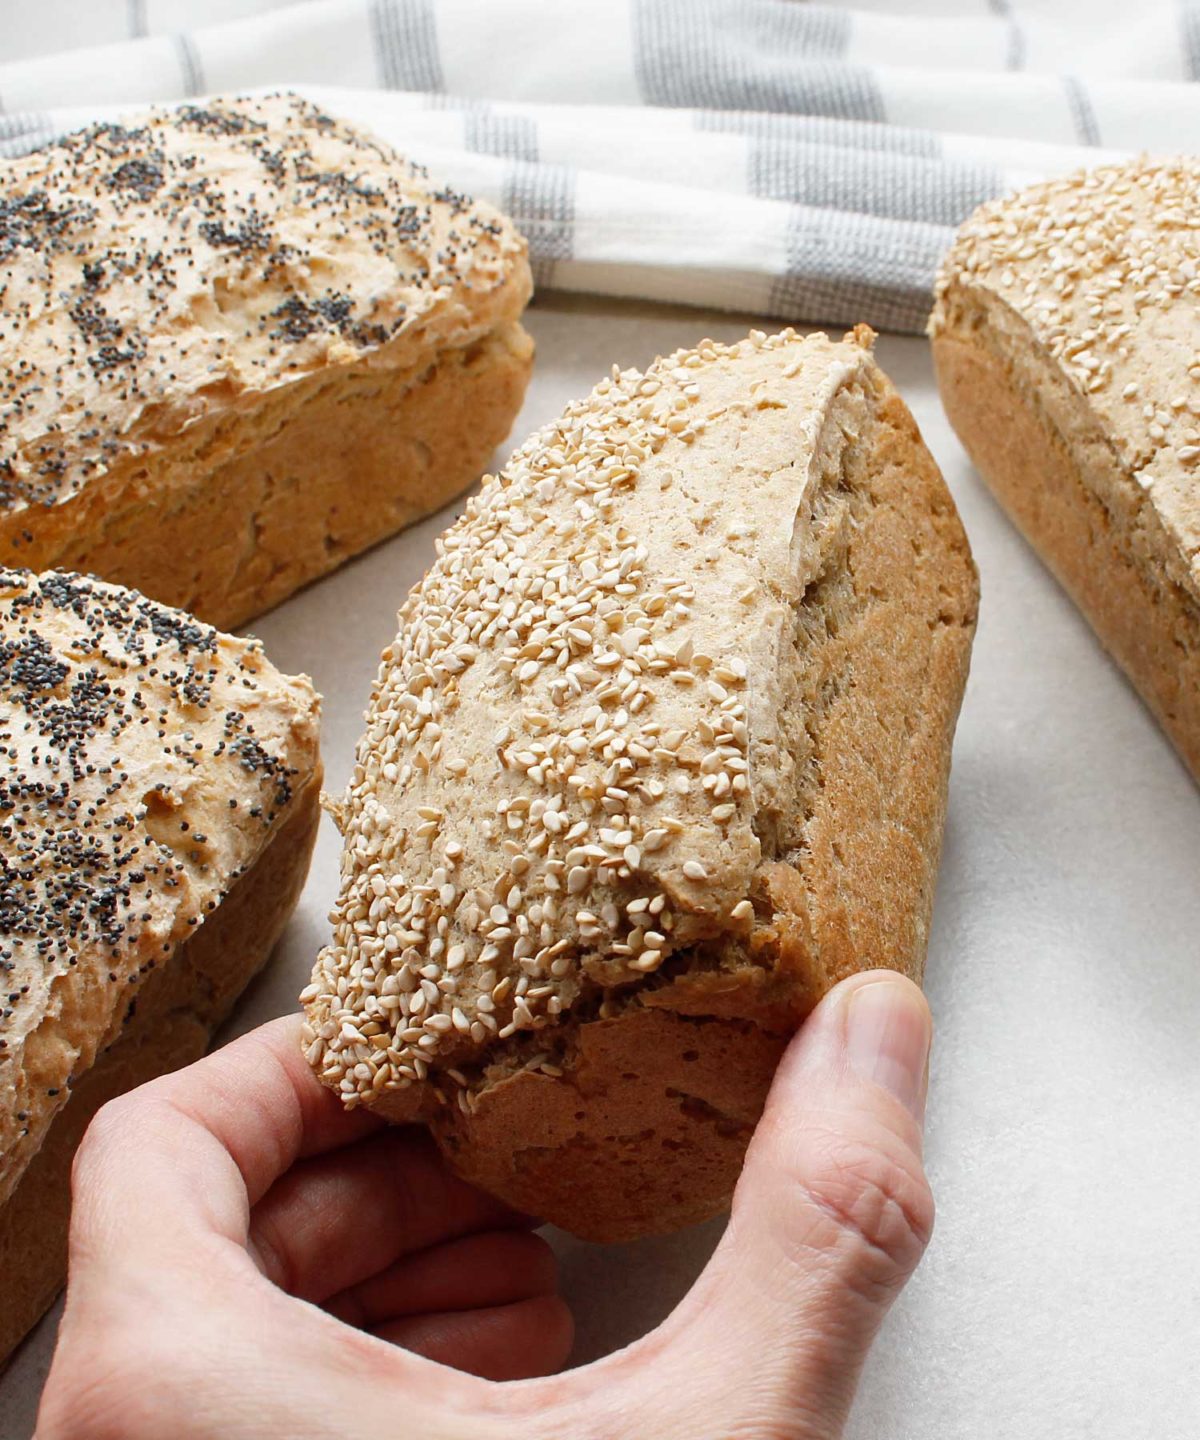
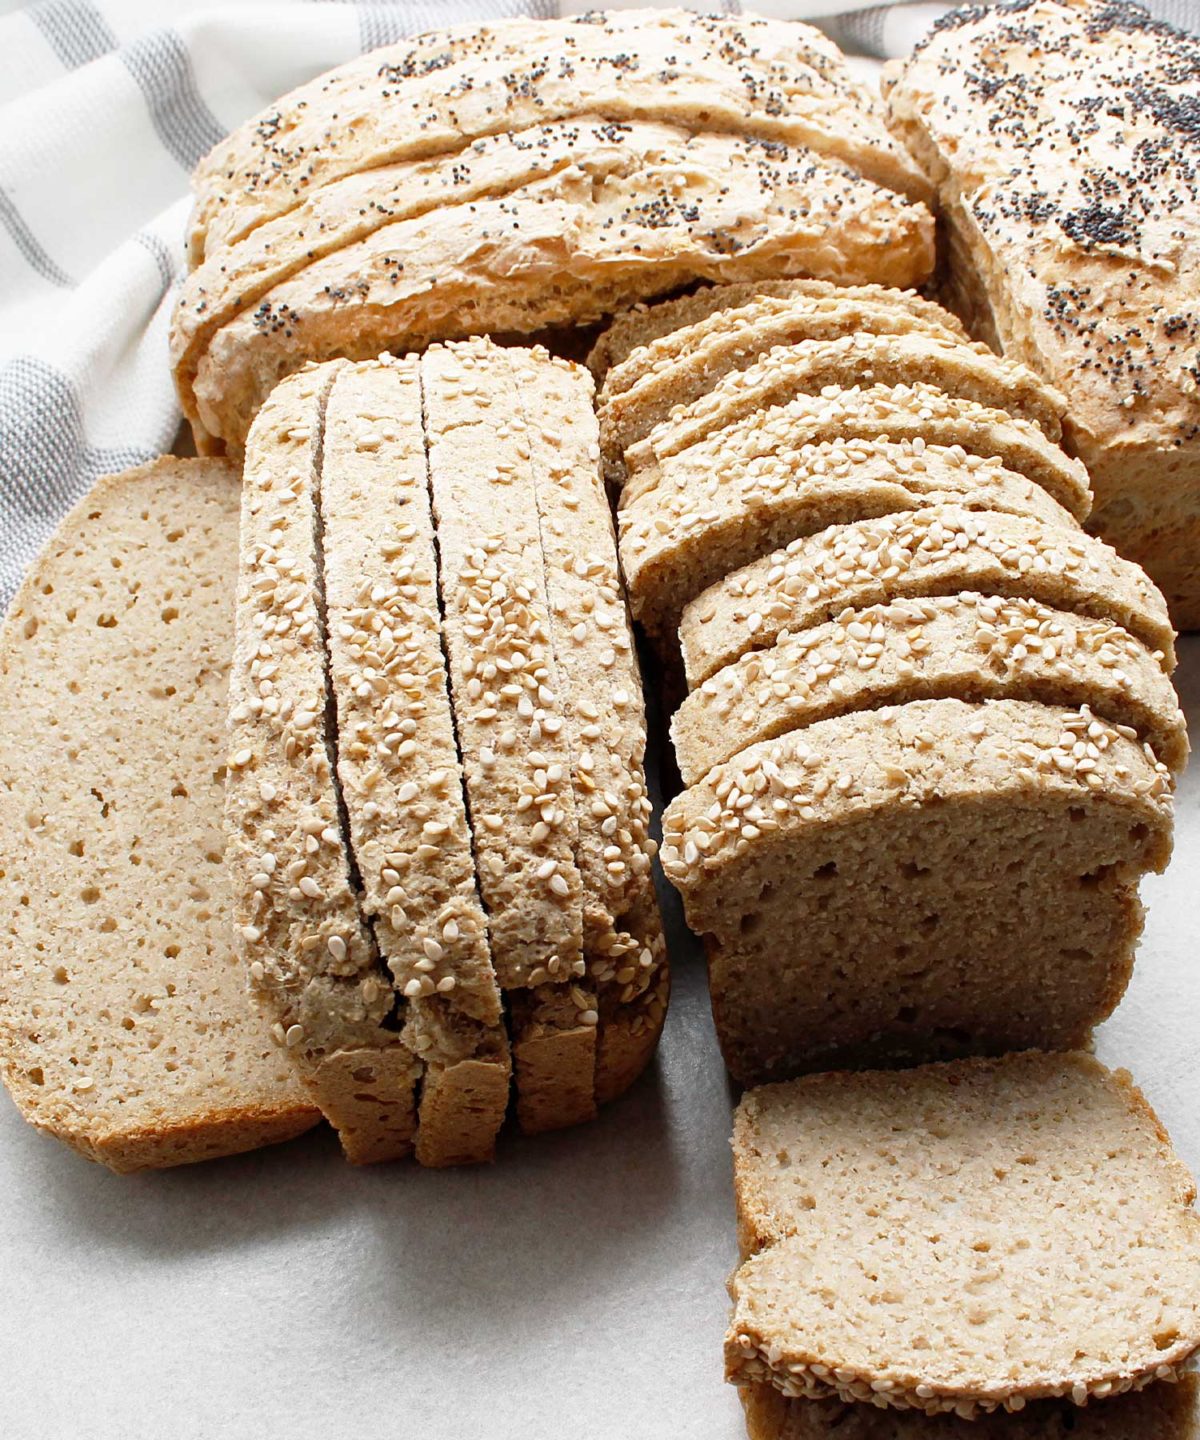
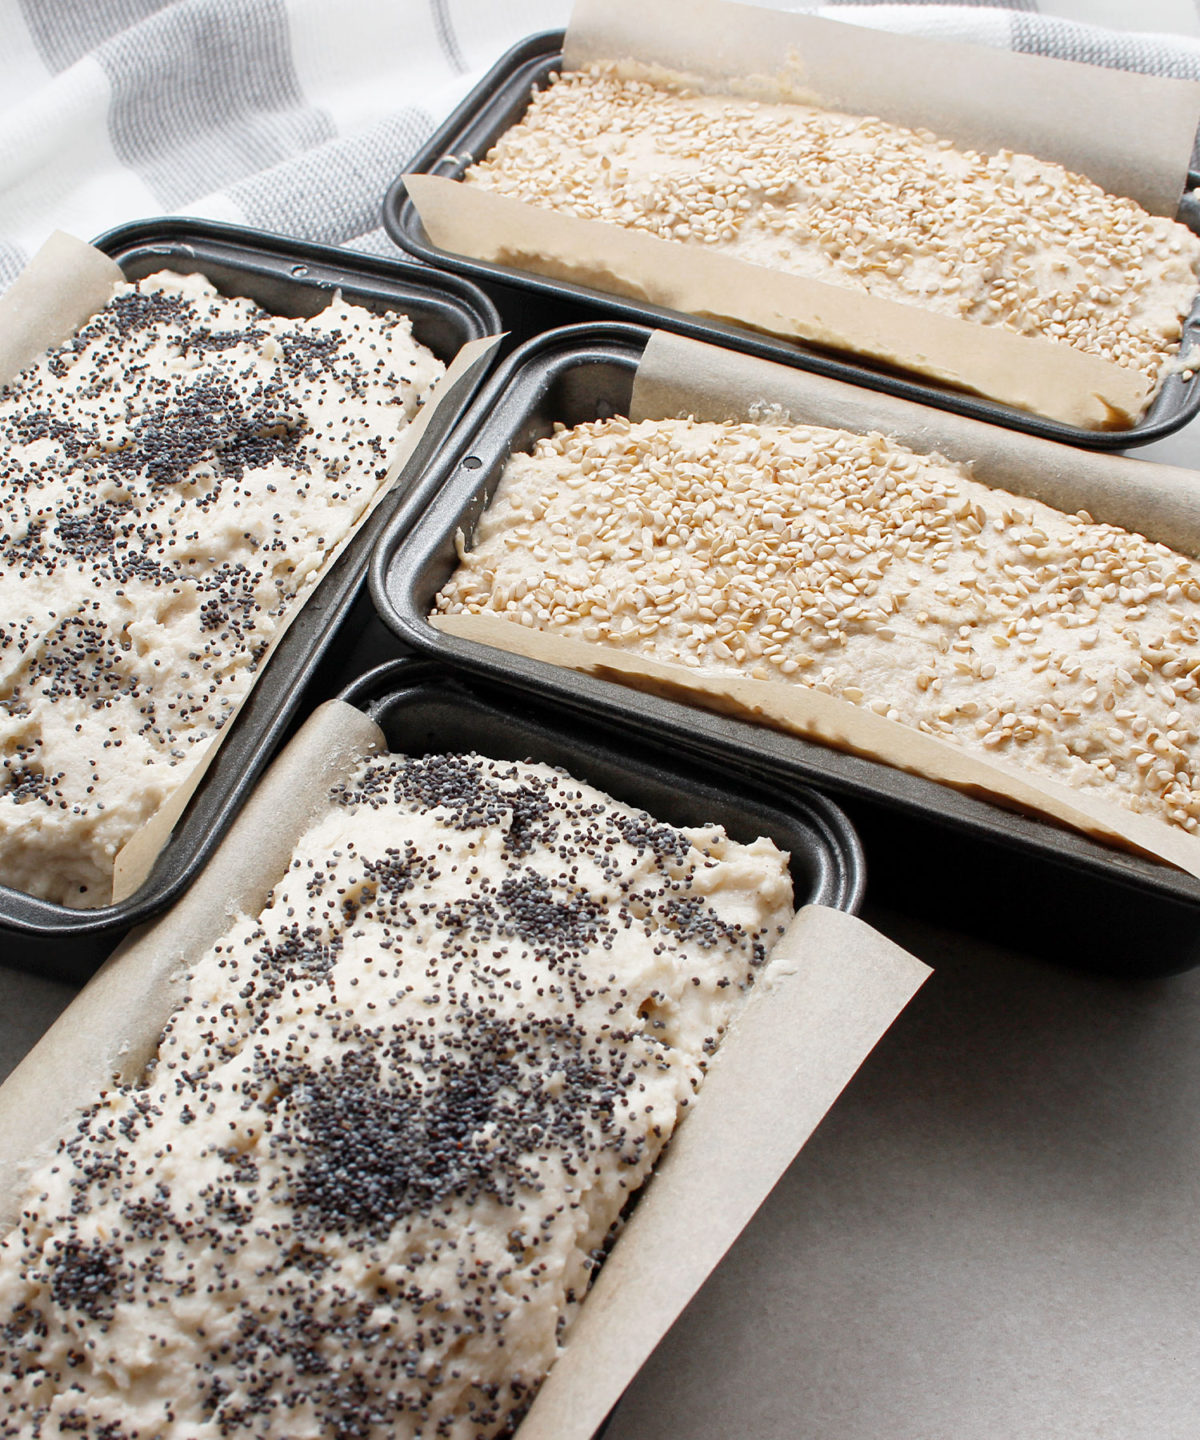
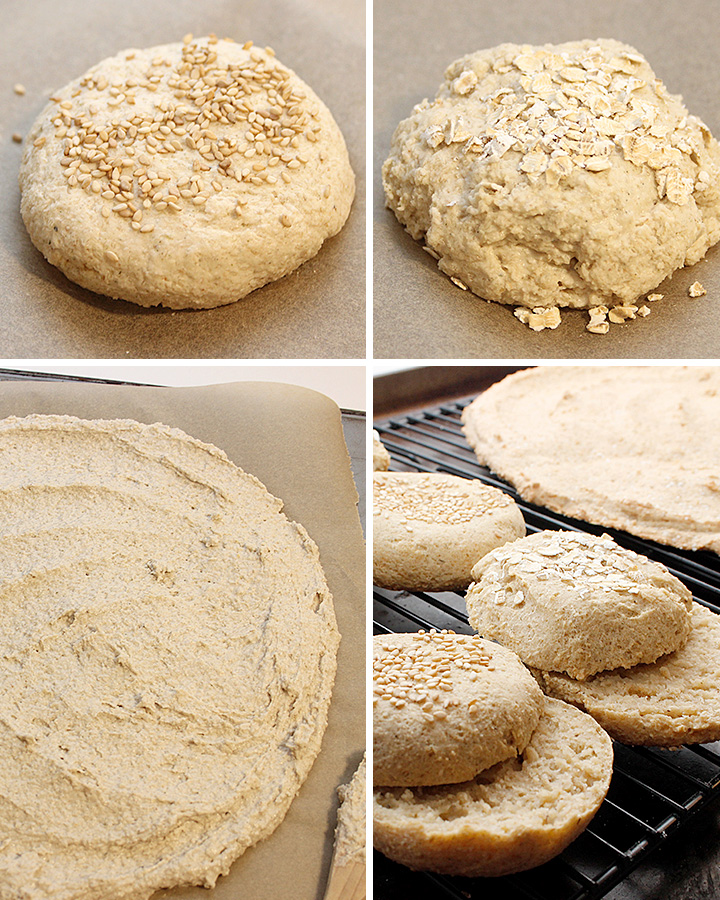
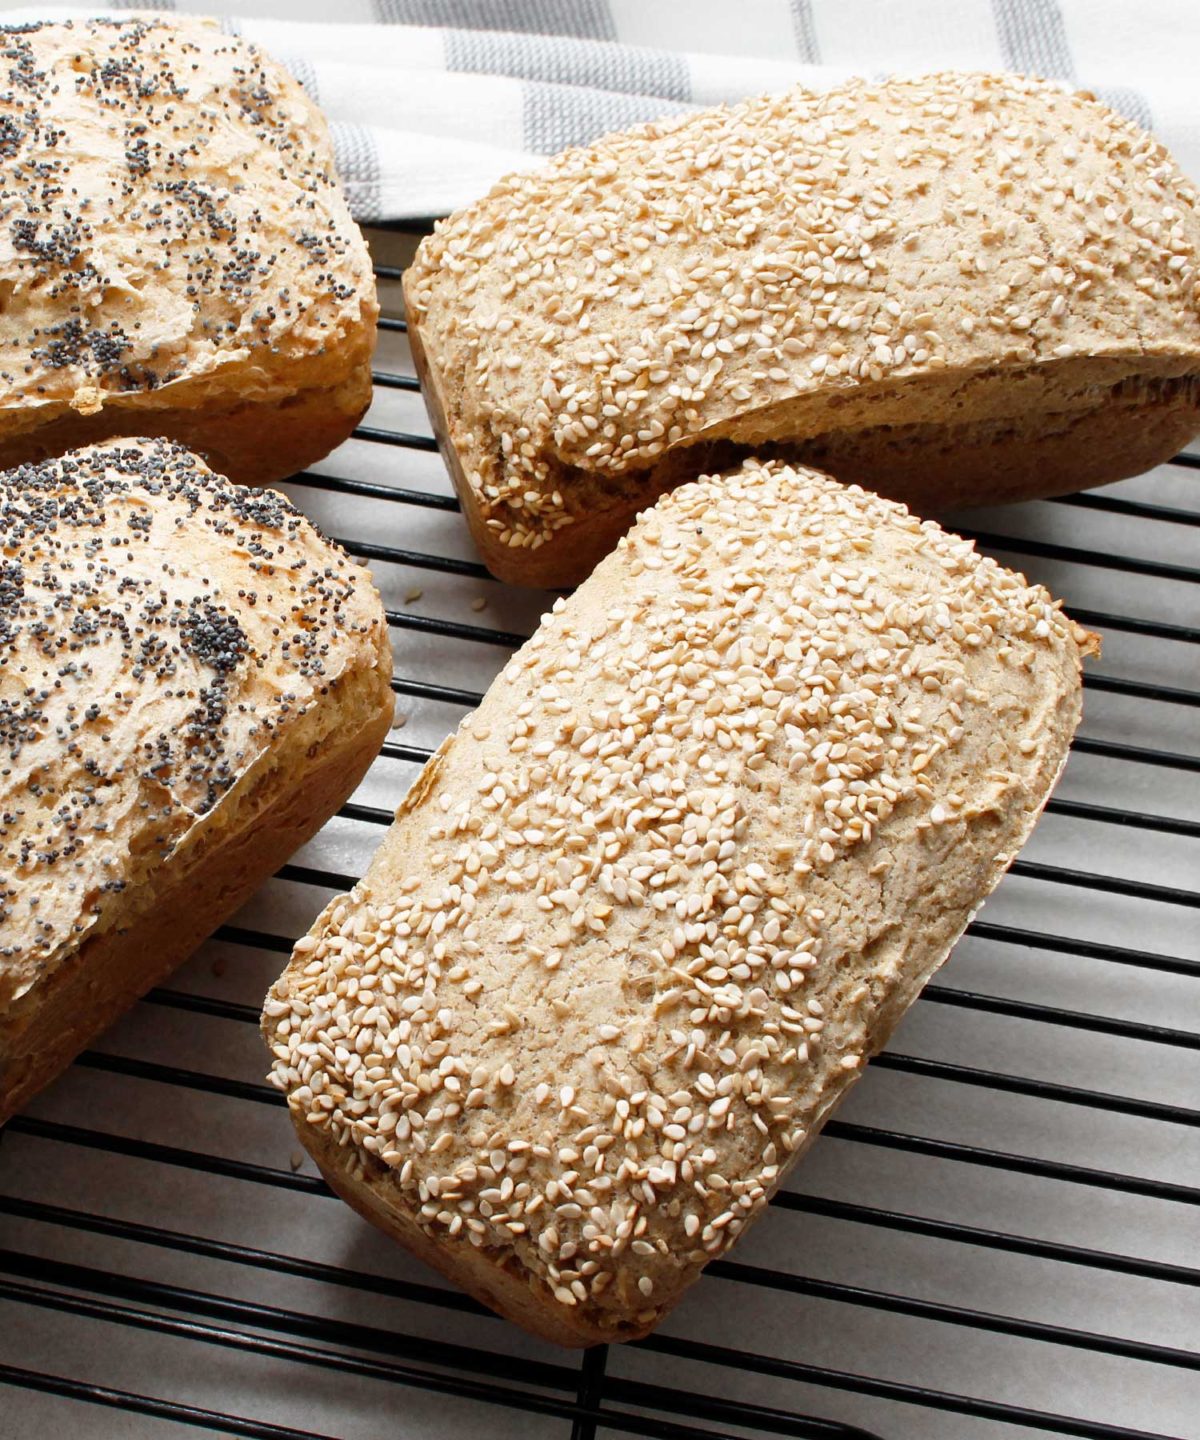
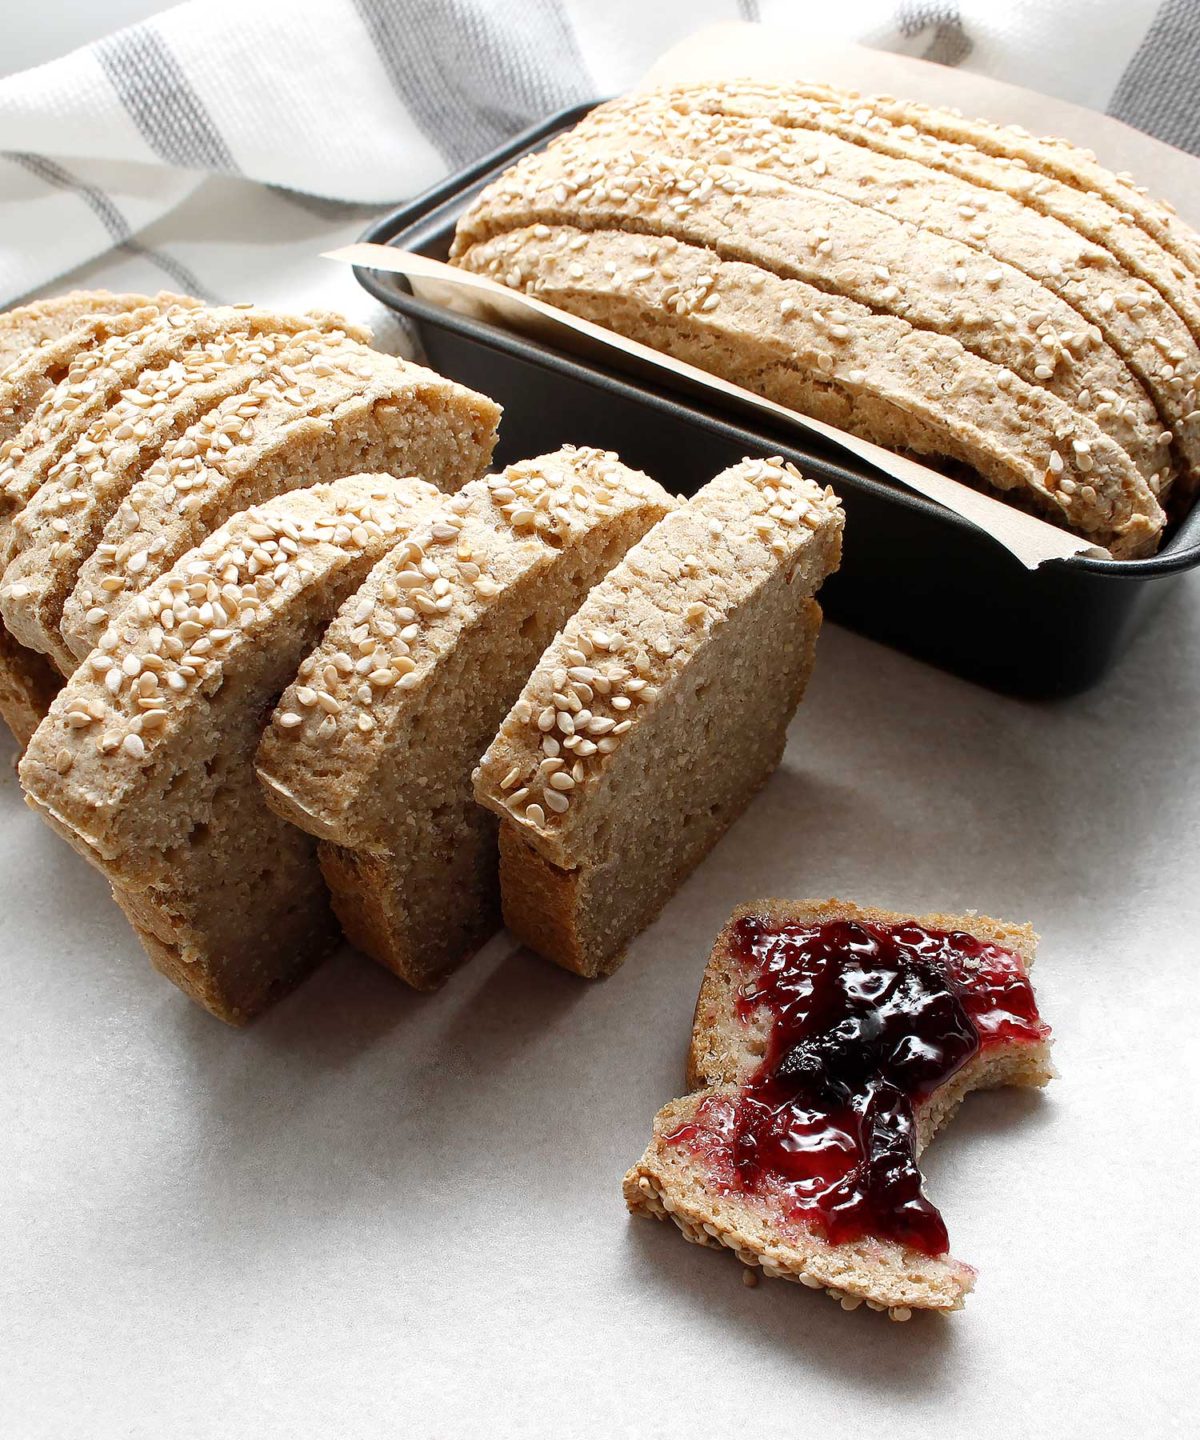
This yeast-free dough is amazing baked as mini loaves (5×2 inches), a smaller loaf (7.5×3.5 inches) rolls, or yummy pizza crust(s)!
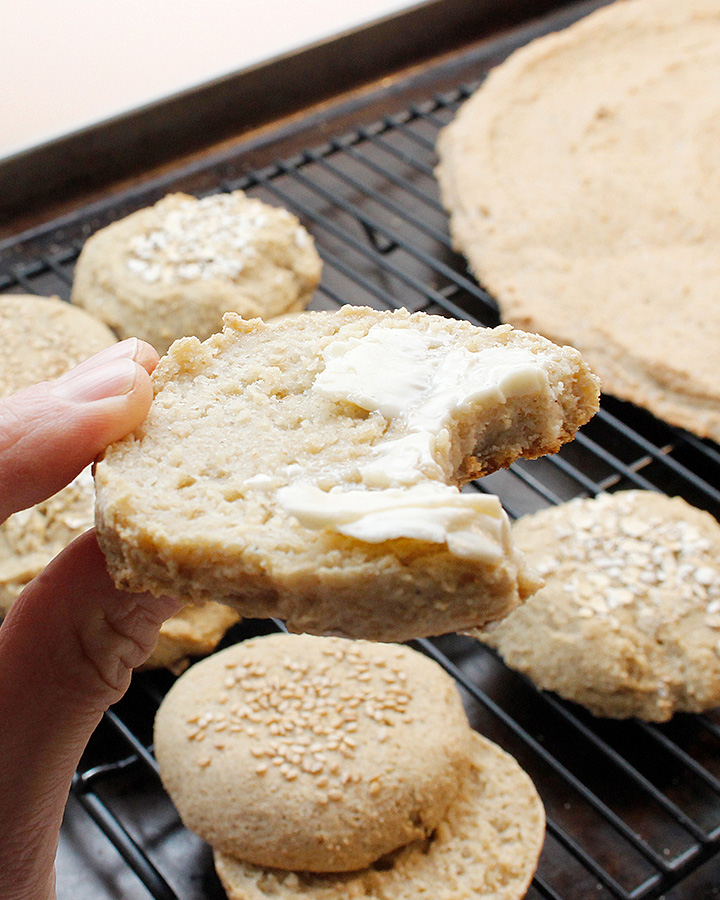
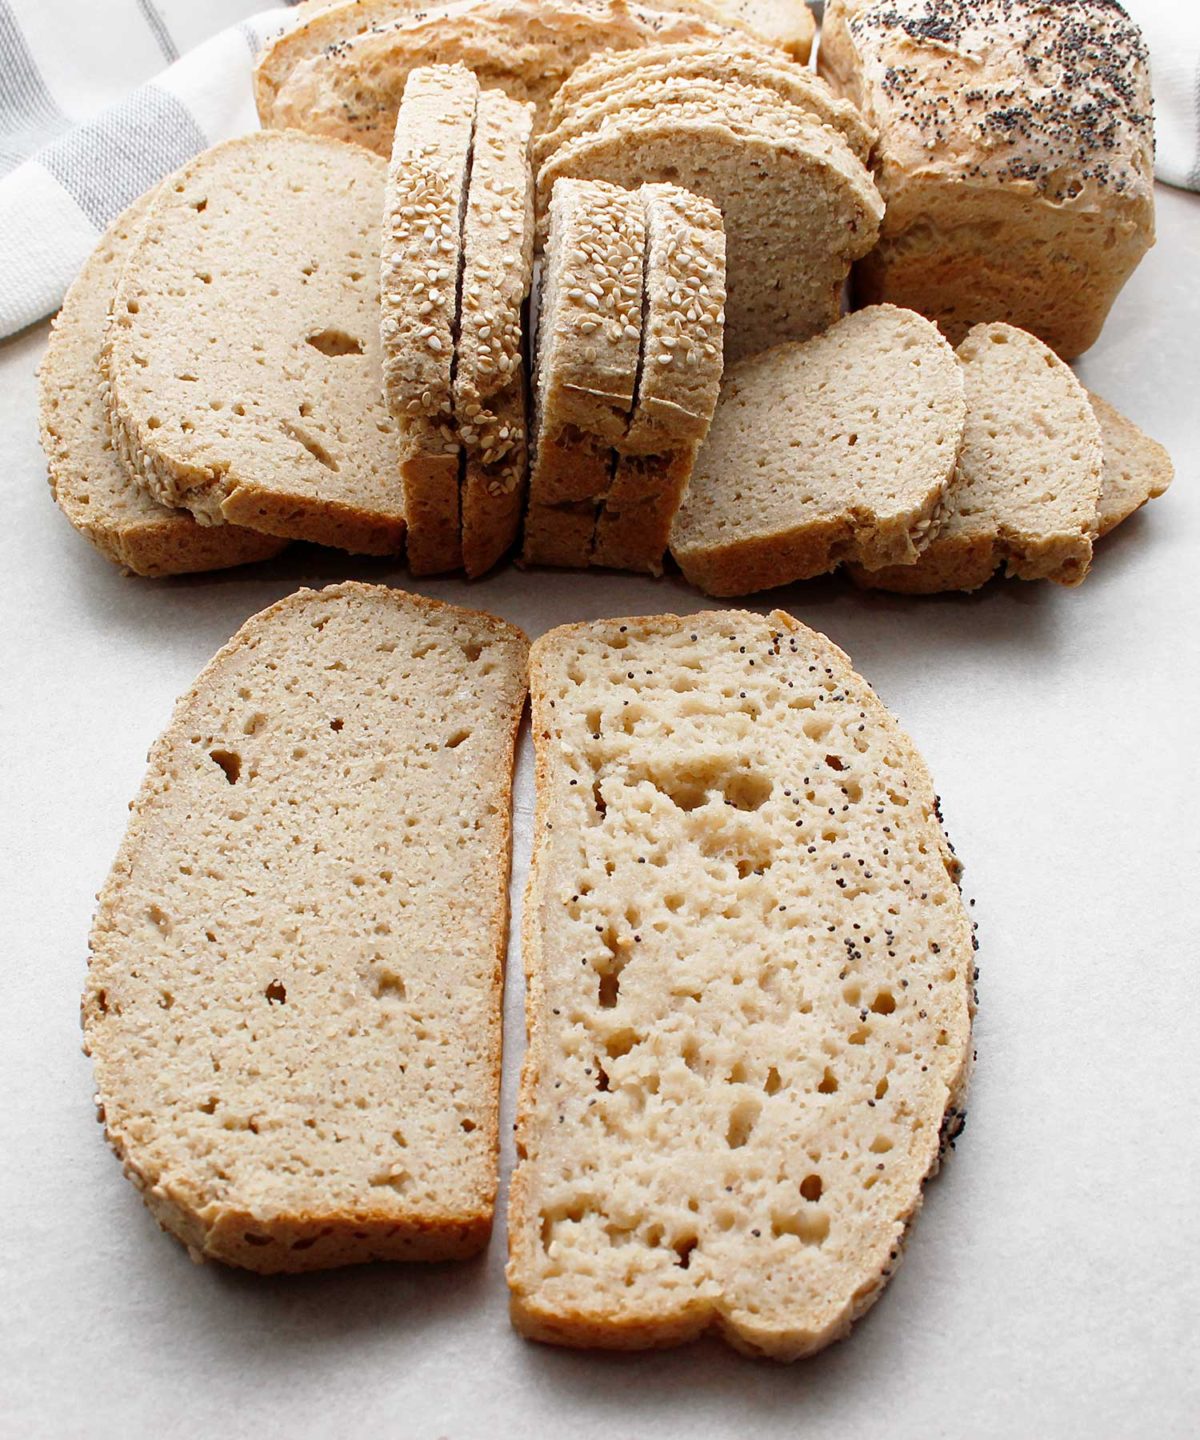
The texture of a yeast-free, gluten-free and vegan loaf is different than squishy white wheat-based bread. If you haven’t been able to consume any bread in a while, this might be the perfect alternative.
The taste of this bread reminds me of biscuits. And that first bite you take—after spreading a nice amount of your favourite spread—will be a memorable one!

Baking Tools
You don’t need too much to make this recipe, but you will need the following, and of course an oven!
You’ll need a large bowl (I love using a glass bowl), measuring cups for dry goods and liquids, a kitchen scale if you want to weigh your ingredients, measuring spoons, a mixing spoon, a spatula, a flour sifter, unbleached parchment paper, and baking pans (cookie sheet, loaf pan(s), or other). If you have a baking stone, use it for the pizza or rolls.
The mini bread pans I use are 5 x 2 inches. The smaller loaf pans I have are 7.5 x 3.5 inches.
Plant-Based & Nutritious
I tested many gluten-free and vegan bread recipes in the past few years. The ones I’m sharing with you are safe for my family, and hopefully yours as well.
Developing bread recipes that are nutrient-dense, gum-free, corn-free, legume-free, and free of all top allergens (egg, soy, dairy, nuts, etc.) is important to me.
Questions Before You Start?
The best way to ask your recipe questions is in the comments of this post (scroll to the bottom) or the Facebook group.
The group is a great place to ask allergen-friendly baking questions, get tips, inspiration and share recipes! Join our amazing and friendly Gluten-Free Vegan Baking by Fresh is Real Facebook Group!
The Comparison
For this test, I basically swapped the flours and starches from my recipe with a store-bought flour mix from Bob’s Red Mill called GF 1 to 1 Baking Flour. My recipe doesn’t have xanthan gum but I do add psyllium husk.
The slice on the right is from the loaf with xanthan gum. For this test, I kept all the other ingredients as is so it also included psyllium husk. As you can see in the above picture, it was way too sticky.
Overall, I much preferred my version because of the texture and flavour, even if it was a little denser. Keep in mind, this is a yeast-free recipe.
If you were to try using a store-bought flour mix just know that depending on the brand the ingredients could vary. It may or may not include xanthan gum. If it does, consider omitting the psyllium husk as you probably won’t enjoy the texture as much.
| 👩🍳 🍞 Good Food Cooking School 🥖🍪 | |
| If you’re interested in learning more about gluten-free baking, check out the Good Food Cooking School courses taught by cookbook author Heather Crosby from YumUniversity. I took the Bread Baking and the Classic Cookies 101 course a while back, and it’s what got me hooked on my baking journey. Take a tour to see if her baking courses are right for you! |
More Yeast-Free Bread Recipes


If you want bread in less than one hour, try the newest soda bread recipe! The plain vegan yogurt creates such an amazingly soft texture. Enjoy this bread while still warm, it’s incredible!
ALLERGEN NOTICE: Make sure the ingredients you purchase are prepared in a facility free from the top allergens you avoid. Gluten-free products should be certified GF and clearly labelled. Consult your medical professional with your dietary questions. Even certified gluten-free ingredients such as GF oats, corn, seeds, etc., can create health problems for individuals following a GF diet. Always consult a medical professional if unsure about ingredients for your needs.


Fresh is Real’s Amazon Storefront
Visit my Amazon Storefront to search for and buy baking and kitchen staples! Take Me Shopping!
Print

Yeast-Free Gluten-Free Vegan Bread
- Prep Time: 20 minutes
- Cook Time: 35-40 minutes
- Total Time: 55 minutes
- Yield: 2 mini loaves, or 1 smaller loaf, or a few rolls, or 1 large pizza crust or a few smaller ones 1x
- Category: Bread, Yeast-Free
- Method: Oven-Baked
- Cuisine: Gluten-Free, Vegan, Plant-Based
- Diet: Gluten Free
Description
Be prepared for the most incredible aroma while baking this yeast-free gluten-free, and vegan bread recipe! You don’t need a mixer or kneading skills for this beginner bread recipe. You can even make rolls and a pizza crust(s) with the same dough.
The recipe is free of gluten/wheat, eggs, dairy, nuts, corn, gums, soy, peanuts, oil, legumes, and yeast.
Ingredients inspired by Heather Crosby Gluten-Free Baking Academy.
Ingredients
1 cup hemp milk, homemade (244g)*
1 tablespoon fresh lemon juice or apple cider vinegar
1 cup oat flour (90g)
3/4 cup brown rice flour (90g)
3/4 cup sorghum flour (90g)
1/2 cup arrowroot starch (65g)
2 tablespoons GF baking powder (8g)**
2 tablespoons psyllium husk, whole (14g)
1 tablespoon organic coconut palm sugar (12g)
1 teaspoon sea salt (6g)
1/2 cup (120g) (up to 3/4 cup) (180g) lukewarm water (filtered or spring)***
Toppings (optional):
Seeds (flax, hemp, sunflower, pumpkin, sesame, poppy), oats, dried herbs
Instructions
Before you start, you can watch the how-to recipe video from a few years ago. This is the link to the GF flour comparison video.
- Preheat oven to 450 degrees F.
- Line 2 mini loaf pans (5 x 2 inches) with unbleached parchment paper. You can grease the corners and uncovered parts of your pan before placing the parchment if you want.
- In a small bowl, combine 1 tablespoon of fresh lemon juice with 1 cup of hemp milk, set aside.
- Place sifter over a large glass bowl. Sift and combine all dry ingredients: flours, baking powder, psyllium husk, coconut palm sugar, sea salt.
- Remove the sifter and mix the dry ingredients well.
- Add soured milk to the dry ingredient bowl and mix in a little.
- Add water, start with 1/2 cup (up to 3/4 cup***), and mix well until all the liquid is absorbed.
- Let the dough rest for 5 minutes.
- Divide dough between 2 parchment-lined mini loaf pans (5 x 2 inches) and gently spread evenly. Top with seeds of choice (optional).
- Bake mini loaves in preheated oven for 35 minutes until golden and crusty on the edges.
- Let mini loaves cool for 5 to 10 minutes before removing them from pans.
- Then cool on a wire rack. Slice and enjoy with your favourite spreads!
Notes
Store any leftovers wrapped in a tea towel or in a glass container on the counter for one day and then refrigerate for up to five days. You can also slice the leftover bread and freeze it for later.
* To make homemade hemp milk: Blend 1/3 cup organic GF hemp hearts with 1-1/4 cup of water (filtered or spring) in a high-speed blender. Pour the milk through a mesh bag into a bowl and squeeze all the beautiful milk out. This step is to remove unwanted bits or grittiness. ** Make sure to use gluten-free, corn-free and aluminum-free baking powder. The ingredients in mine are cream of tartar, baking soda and tapioca starch. IMPORTANT TIP: If your baking powder is not gluten-free, corn-free and aluminum-free, 1 tablespoon may be enough. If unsure, start with less. Adding too much of a different brand of baking powder that’s not GF could alter the bread recipe’s taste. *** Not sure if 1/2 cup of water is enough? It might be best to test with 1/2 cup + 2 tablespoons of water. That way, your dough won’t be too wet for your first try. If you make the recipe often, you will get better at judging the amount of water required. If your dough mixture looks too dry, then, by all means, add the extra 1/4 cup of water for a total of 3/4 cup water. Your dough should be thick and smooth but not runny.
Instructions for bread rolls: Once the dough is ready, scoop out a palm-sized amount and place it on an unbleached parchment-lined baking sheet. Gently shape with hands if necessary. Flatten a little to achieve thinner rolls. Sprinkle with your favourite toppings and bake on the middle rack in a preheated 450 degrees F oven for about 25 minutes. Note: if bottoms are getting dark around the 18-minute mark, you can always flip the rolls over for the rest of the baking time. Remove from oven, let cool on a cooling rack, enjoy!
Instructions for one smaller loaf: For a smaller 7.5 x 3.5-inch loaf, once the dough is ready, scoop out the dough and place it into a parchment-lined (and greased, if you want) bread pan. Gently shape with hands or spatula if necessary. Sprinkle with your favourite toppings and bake on the middle rack in a preheated 450 degrees F oven for about 40 minutes. Remove from oven, let cool in the pan for 5-10 minutes. Then remove from the pan, peel off the parchment paper and cool a bit longer on a wire rack, enjoy!
Instructions for 10-in pizza crust: Once your dough is ready, spread the mix with a plastic spatula in a circular shape until you reach about 10 inches in diameter. You will be doing this directly on an unbleached parchment-lined baking sheet or baking pizza stone. I like to sprinkle a little grey sea salt for extra flavour before baking the crust.
Pizza crust for later: Bake on middle rack in preheated 450 degrees F oven for about 20 minutes. Remove from oven and let cool on a wire rack. Once cooled, wrap up and refrigerate until ready to use. Will keep in the refrigerator for five days. Once ready to eat, top your pizza with your favourite toppings and bake in a preheated 425-degree oven for 12-15 minutes.
Pizza crust for now: Bake on middle rack in preheated 450 degrees F oven for about 20 minutes. Remove from the oven (with baking sheet), add your toppings, return the pizza to the oven and continue baking for another 7-15 minutes. Your pizza is ready once the sauce is bubbly, your toppings are well baked, and the crust is golden on the edges.
TOOLS: You will need a large glass bowl, measuring cups for dry goods and liquids, a scale if you like to weigh your ingredients, measuring spoons, a large spoon, a spatula, a flour sifter, unbleached parchment paper, and baking pans (cookie sheet, loaf pan, or other). Nice to have tools: a spice/coffee grinder, baking stone. To keep things simple, use what you have on hand. If you don’t have bread pans, be creative and shape foil to desired shapes and line with parchment paper. I’ve successfully tried this method for baguettes. If you have a baking stone, use it for the pizza or rolls.
Additional Tips: 1. To measure your flours and starches, scoop out with a spoon from the jar or flour bag into the measuring cup. Never pack them in. 2. If using a baking stone, I recommend to preheat it in the oven as the oven is warming up. 3. For a large pizza crust, you can use a flat plate, cutting board, or the backside of another baking sheet to help you transfer the parchment paper with the unbaked pizza crust. Just slide the paper and dough right onto the hot preheated stone in the oven and follow suggested baking times. 4. Remember that if you’re avoiding gluten, make sure that all your ingredients are certified gluten-free. 5. For best results, or just for fun, try milling whole grains using a clean spice or coffee grinder. It creates the best textures and enhances all the beautiful flavours of homemade bread.
SUBSTITUTIONS – Plant-based milk: You can try other types of plant-based milk. I did not test any other milk substitutions. I highly recommend using a 2-ingredient plant-based kind of milk (water + seed/nut). You can try with store-bought brands, but they often include thickening agents and other less desirable ingredients. Flour: In place of sorghum flour, you can use millet or buckwheat flour. Or consider using more oat flour. Psyllium husk: If you can’t eat or don’t like using psyllium husk, you could try just leaving it out or adding 1 extra tablespoon of arrowroot starch/flour with 1 tablespoon of ground chia seeds or flaxseed meal. Follow the rest of the recipe as listed. Sugar: Try using maple syrup or organic cane sugar if you don’t have coconut palm sugar. Or leave it out.
Allergen Notice: Ensure that all your ingredients are labelled gluten-free, egg-free, dairy-free, and free of any other top allergens you or your family avoids.
Find it online: https://www.freshisreal.com/yeast-free-gluten-free-vegan-bread/