


This Buckwheat Sourdough Loaf was originally posted in February 2018 as the third recipe in a 3-part bread series.
It’s one of the top recipes on Fresh is Real and I’m so proud of everyone that’s tried it! This bread is a lot of fun to make if, like me, you love baking and experimenting in the kitchen.
Keep reading for the recipe, tips and new step-by-step video and bonus Q&A video!
This sourdough loaf will be easy for you to make if you have an active bubbly gluten-free starter. A starter is the wild cultured yeast used to leavened this loaf. Don’t worry, I will explain everything you need to know to give this free-form loaf a try.
If you haven’t seen them yet, Part 1 is a Yeast-Free Bread recipe and Part 2 is a Basic Yeasted Dough.


Fresh is Real’s Amazon Storefront
Visit my Amazon Storefront to search for and buy baking and kitchen staples! Take Me Shopping!

YouTube How-To + Q&A Videos
Even though this is a great beginner sourdough recipe, it could feel a little intimidating to some, especially if you’ve never baked bread before—let alone a sourdough loaf.
Please watch the two YouTube videos below to guide you along the way.
The first video, Part 1, should clarify the process and Part 2 will answer a few common questions and include additional troubleshooting tips!

A Loaf With Benefits
Do you love squishy white bread (like my dad)? I’m sorry, but this bread recipe probably won’t be for you. Instead, please share this recipe with someone you know that enjoys heartier loaves. If you do share it, thank you!
If you’ve recently had to give up gluten, or other top allergens to improve your health, then this recipe might be just right for you! Wheat, eggs, and dairy are not in this recipe. And, this loaf is also free of corn, legumes, gums and oil.
It’s a simple and nutritious loaf prepared with ingredients that you can find at your grocery store or purchase online. Sourdough is often known as the easier-to-digest bread for people with various digestive issues.
Tools Needed
For this sourdough recipe, you won’t need a mixer! Just a little arm strength and a good spoon.
You will need these tools:
- large glass bowl
- measuring cups for dry goods and liquids
- measuring spoons
- kitchen scale (if you want to weigh your ingredients)
- large spoon for mixing
- soft spatula
- flour sifter
- unbleached parchment paper
- large soup bowl
- clean tea towel (or lined banneton basket)
- lame or sharp kitchen knife
- Dutch oven (5 to 7-QT)
- baking stone (optional) or baking/cookie sheet
A spice/coffee grinder, small blender or a grain mill to transform your whole grains and seeds into a fine flour will be helpful.
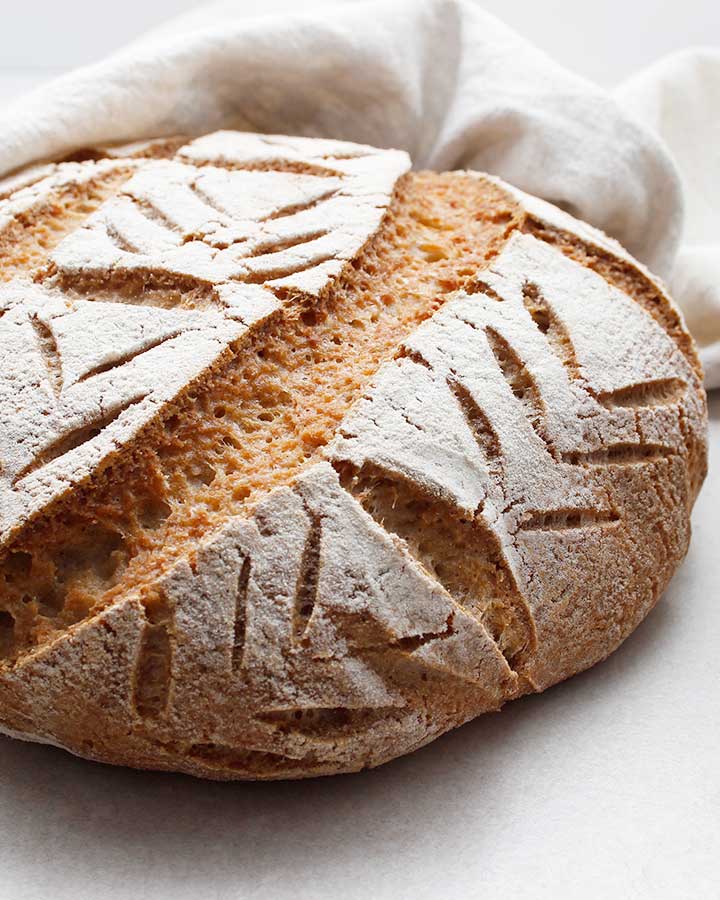
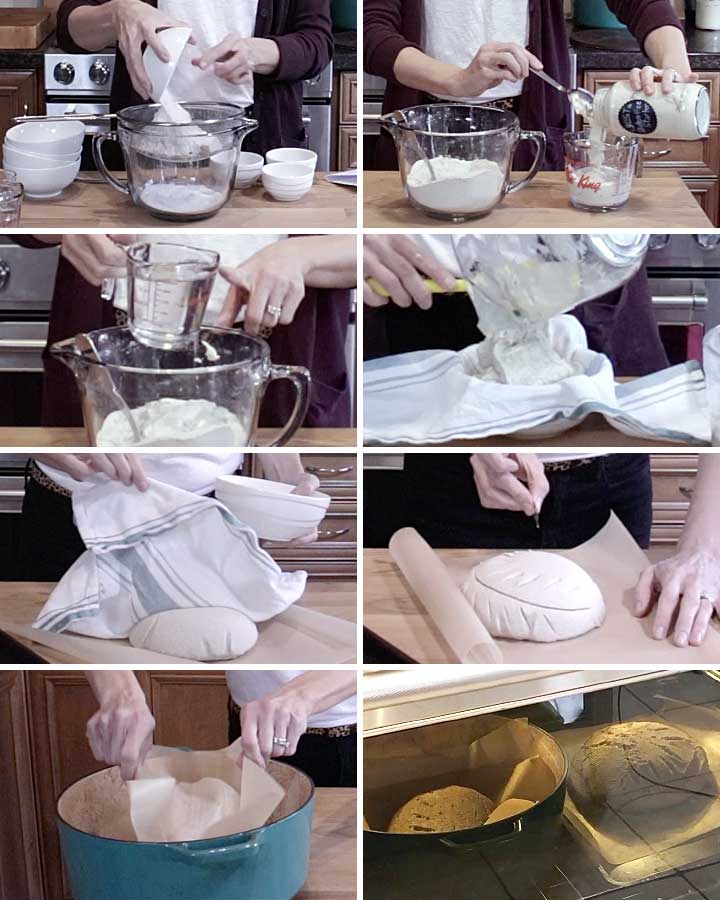
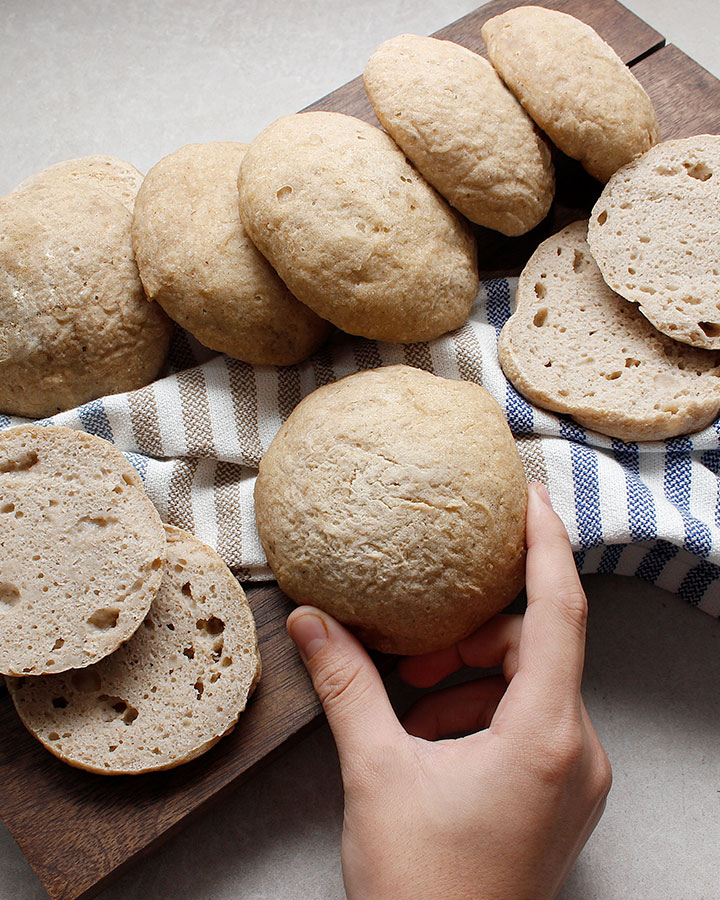
Process Photos
Here are a few process photos to show you that this gluten-free vegan buckwheat sourdough is as easy as mixing the ingredients, letting your dough rise, baking the bread and letting it cool before slicing!
Fresh is Real’s Amazon Storefront
Visit my Amazon Storefront to search for and buy baking and kitchen staples! Take Me Shopping!
Gluten-Free Grains and Seeds
All the grains and seeds listed in the recipe are gluten-free. Always make sure that pre-milled grains (flours) or seeds are certified gluten-free if you are avoiding gluten or other top allergens.
If you prefer buying buckwheat groats and large oats, you can transform them into a fine flour using a spice/coffee grinder.
I use this method for my sunflower and pumpkin seeds as well because, as of now, I still haven’t been able to find a supplier for seed flour.
In my opinion, milling your own at home is better because it makes your loaves taste so much better and fresher.
To store gluten-free flour, grains, or seeds, keep them in your pantry until ready to open. If you use them regularly, transferring them into a glass jar is excellent. If you don’t bake often, keep your flours in the fridge. Or you can freeze leftovers in their packaging.

Why This Loaf
When I test bread recipes in my kitchen, I always try to include various ingredients that will enhance the flavour, the nutrition value, and the texture of the loaves.
Baking with gluten-free flour and seeds is different. There is a learning curve to master the right texture, and hopefully, I’ve simplified the process enough to make it less intimidating for you to try.
As you get more confident with gluten-free and vegan baking, you too will want to tweak the ingredients to customize the recipe to make it your own. I’ve used this recipe not only as a free-form loaf but also for rolls, mini loaves, and even pizza crusts.
Troubleshooting
It’s important to note that this Buckwheat Sourdough Loaf, once sliced, might feel slightly sticky to touch. In all the sourdough loaves I’ve baked reducing the amount of water added helps.
Then again you don’t want to reduce it by too much and have the bread be too dry or even denser.
Adding more water helps to increase the rise, but it can also make your free-form loaves go flat. I’ve tested many scenarios, and this recipe is what worked best for me.
You can also consider playing around with the rising times. I suggest a 2-hour rising time to start but gradually increase the total rising time to see what creates the best bakes for you. On a cold winter day you can easily rise the dough for a good 6 hours before baking it.
You can also mix all your ingredients on day one then place the dough bowl (covered) in the fridge overnight. The next day transfer the dough to a tea towel lined soup bowl or banneton basket to rise.
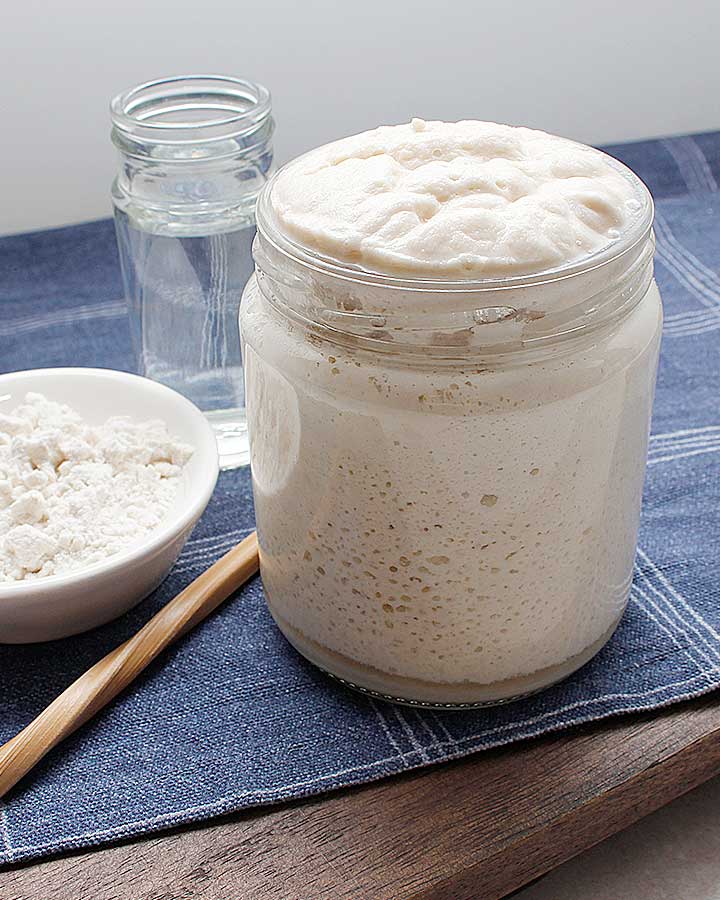
Gluten-Free Sourdough Starter
What is a gluten-free sourdough starter anyway? It’s the leavening agent for this bread recipe is wild culture yeast (gluten-free starter) that anyone can prepare in their kitchen.
Most sourdough loaves sold in stores are fermented but are often wheat based. If you’re not sure, always ask. Some bakeries are getting creative and trying new things, so it’s possible to start finding gluten-free sourdough nowadays.
My tested and true gluten-free starters are made with mostly organic, gluten-free brown rice flour and clean filtered or spring water. Do not use water directly from the tap to create a starter. Chlorinated water will not work with this process.
This gluten-free sourdough starter post includes tips and tricks to help you to create your first bubbly starter. Your kids might like this science experiment.
If you prefer using sorghum flour instead of brown rice flour in your starter recipe, check out the sorghum sourdough starter post.
Bread Obsessed
I’ve been fascinated with baking bread, ever since I was a young child. As a kid, I would attempt making these intricate recipes that would end up very dense and not the best to share with my family.
Who knew that one day I would bake again—but this time without gluten! Today, I’m utilizing other healthy grains that are better suited for me and my family’s dietary restrictions.
Previous Recipe
The last bread recipe on Fresh is Real was the oh so squishy yeasted Dinner Rolls! Yes, you read that right, these are actually soft gluten-free vegan (egg and dairy-free) bread rolls!
You can bake them as free-form rolls which are perfect for burger buns or toast and you can also bake them closely together in a dish to make the softest gluten-free vegan pull-apart rolls ever!
| 👩🍳 🍞 Good Food Cooking School 🥖🍪 | |
| If you’re interested in learning more about gluten-free baking, check out the Good Food Cooking School courses taught by cookbook author Heather Crosby from YumUniversity. I took the Bread Baking and the Classic Cookies 101 course a while back, and it’s what got me hooked on my baking journey. Take a tour to see if her baking courses are right for you! |
Questions Before You Start?
The best way to ask your recipe questions is in the comments of this post (scroll to the bottom) or the Facebook group.
The group is a great place to ask allergen-friendly baking questions, get tips, inspiration and share recipes! Join our amazing and friendly Gluten-Free Vegan Baking by Fresh is Real Facebook Group!
Did You Make This Recipe?
Once you try this recipe, remember to take a picture and share it with us on Instagram Tag it @Freshisreal_ #freshisreal
ALLERGEN NOTICE: Make sure the ingredients you purchase are prepared in a facility free from the top allergens you avoid. Gluten-free products should be certified GF and clearly labelled. Consult your medical professional with your dietary questions. Even certified gluten-free ingredients such as GF oats, corn, seeds, etc., can create health problems for individuals following a GF diet. Always consult a medical professional if unsure about ingredients for your needs.
Print
Buckwheat Sourdough Loaf Gluten-Free Vegan
- Prep Time: 20 minutes +2-hour rising (hands-off time)
- Cook Time: 55-60 minutes
- Total Time: 3.5+/- hours
- Yield: 1 loaf 1x
- Category: Bread
- Method: Oven-Baked
- Cuisine: Gluten-Free, Vegan, Plant-Based, Allergen-Friendly
- Diet: Gluten Free
Description
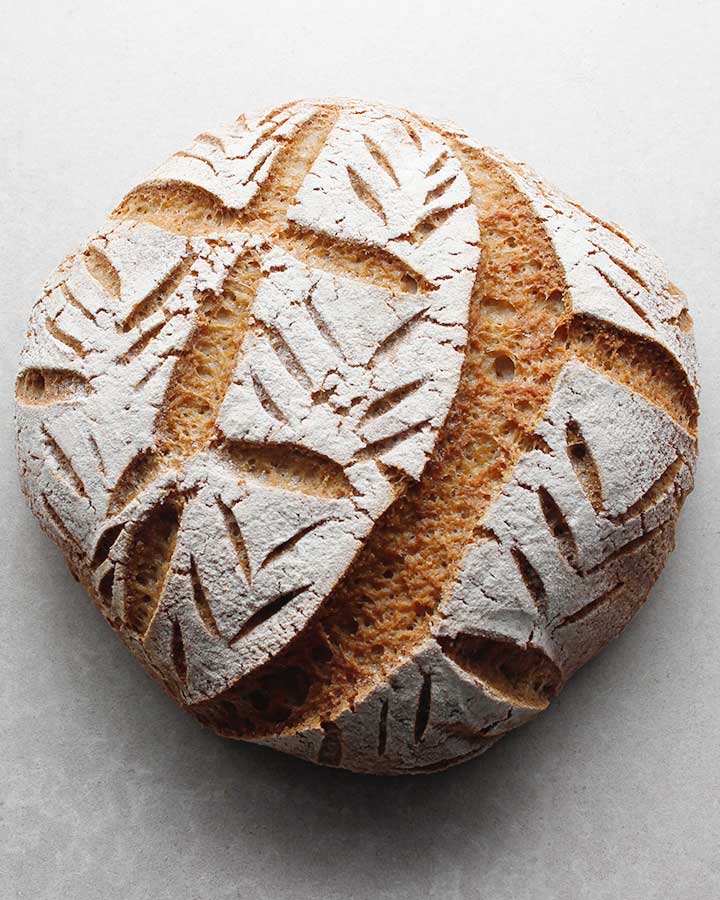
A less than 10-ingredient artisan-style naturally leavened sourdough recipe that transforms into a perfect little boule. This Buckwheat Sourdough recipe is gluten-free, vegan, allergen-friendly and requires some patience to prepare. No mixers or kneading required. Free of oil, corn, gums, and legumes.
You will need an active gluten-free sourdough starter (wild yeast) before starting.
Recipe and ingredients adapted and inspired by the lovely Heather Crosby. Taking her gluten-free bread baking course in 2017 was so much fun!
Useful Tools:
- large glass bowl
- measuring cups for dry goods and liquids
- measuring spoons
- kitchen scale (if you want to weigh your ingredients)
- large spoon for mixing
- soft spatula
- flour sifter
- unbleached parchment paper
- large soup bowl
- clean tea towel (or lined banneton basket)
- lame or sharp kitchen knife
- Dutch oven (5 to 7-QT)
- baking stone (optional) or baking/cookie sheet
Ingredients
Dry Ingredients:
- 3/4 cup buckwheat flour (90g)
- 3/4 cup sunflower seed flour (50g)*
- 1/2 cup arrowroot starch/flour (50g)
- 1/2 cup brown rice flour (50g)
- 1/2 cup oat flour (40g)
- 2 tablespoons psyllium husk, whole (14g)
- 1 tablespoon coconut palm sugar (8g)
- 1–1/2 teaspoon sea salt (6g)
Wet ingredients:
- 1 cup active GF brown rice starter (265g)
- 1–1/4 cups (up to 1–1/2 cups) warm water (295-354g)**
Instructions
Before you begin, please watch this step-by-step video to help you make this Buckwheat Sourdough.
Step 1
Cut a piece of unbleached parchment paper that will fit inside or on your baking vessel of choice, set aside.
Step 2
To a 2-cup measuring cup, add 1 cup of room temperature water with 1/4 cup of hot boiling water, let sit until ready to use. Prepare and measure or weigh all your dry ingredients. Place sifter inside (or on top) a large glass mixing bowl, sift and combine all dry ingredients; flours, psyllium husk, coconut palm sugar, salt. Remove the sifter and mix the dry ingredients well with a large spoon. Add 1 cup of starter and 1 cup of warm water (not hot) and mix well until the liquids are absorbed. Add the remaining 1/4 cup of water and mix it until all the water is incorporated. Make sure there are no dry bits at the bottom. The texture of the dough should be like a thick pancake mix. Let sit for 2-5 minutes. If, after a few minutes, your mixture looks too dry, add an extra 1/4 cup of water*** (for a total of 1-1/2 cups) and mix.
Step 3
Transfer the dough into a large soup bowl (lined with a clean tea towel) and dusted with a little flour. A cloth-lined banneton basket is ok too. Reference video for guidance. Loosely cover (plastic wrap, tea towel, plate), let rise in a warm place for a minimum of 2 hours. Read Step 4 (below) about preheating.
Step 4
Preheat your oven to 450 degrees F, at least 30 to 45 minutes before you are ready to bake your loaf. You will also need to preheat your Dutch oven (or baking stone) while the oven is warming up, everything needs to be hot!
Step 5
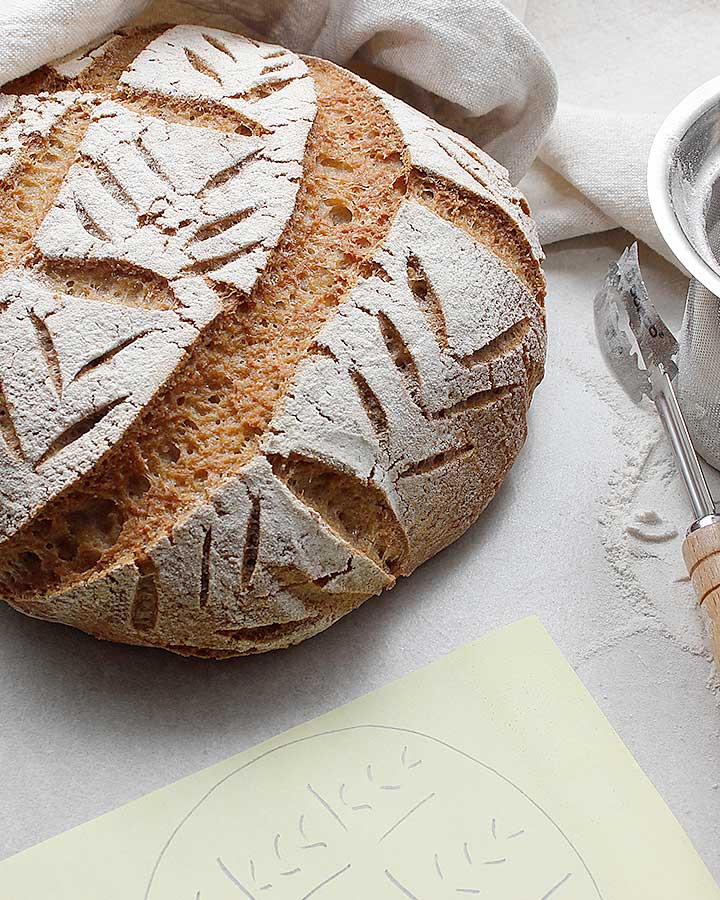
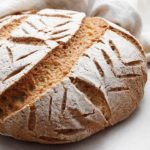
At the 2-hour mark (or longer if you decide to experiment), uncover the bowl or basket. Your dough should have increased a little in size and, it will rise more while baking. Grab your piece of parchment paper from Step 1 and carefully flip your dough bowl onto the paper. Remove the soup bowl and tea towel (or basket) slowly to help maintain the shape of the dough. You can dust the top with a little flour (buckwheat or brown rice). Scoring your dough boule is optional but, it can create a beautiful artisan-style looking loaf. With a bread lame or sharp knife, cut a 1/4 to 3/8-in deep curved line or pattern. TIP: For your first loaf, start with a simple score line and then try fancier artistic designs for future bakes.
Step 6
Remove Dutch oven (or baking vessel of choice) from the oven. Be careful; it will be hot! Transfer the dough with parchment paper into the Dutch oven, cover and return to oven. Bake for 25 minutes covered, then remove the lid and bake for another 25 minutes. At the 50-minute mark, you can finish baking the loaf placed directly onto the oven rack (without parchment paper) for another 5 to 10 minutes. The buckwheat sourdough should be ready when it sounds hollow and crusty when tapped with a finger.
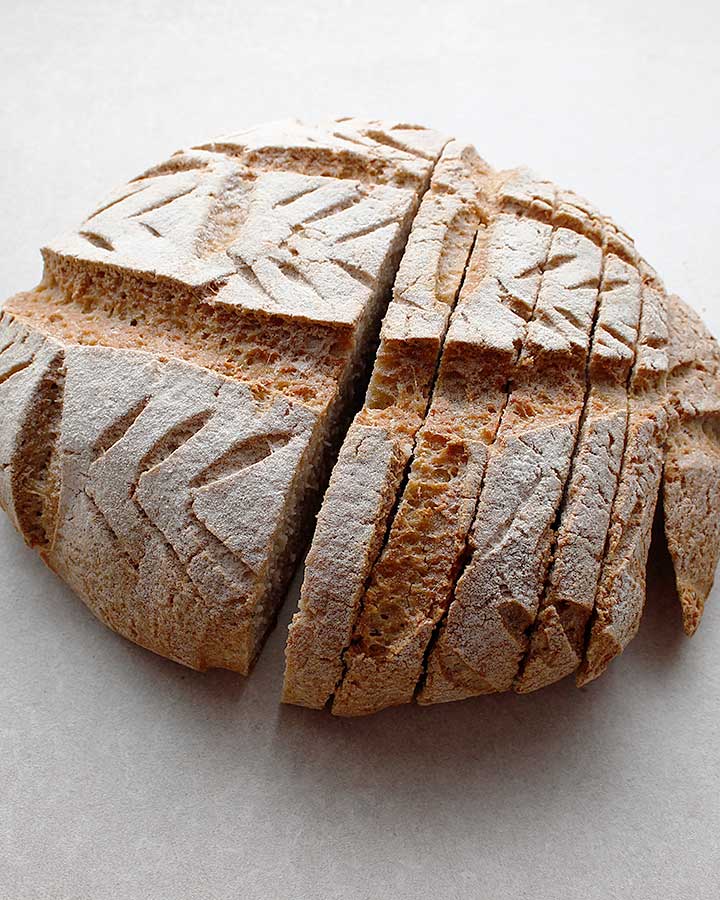
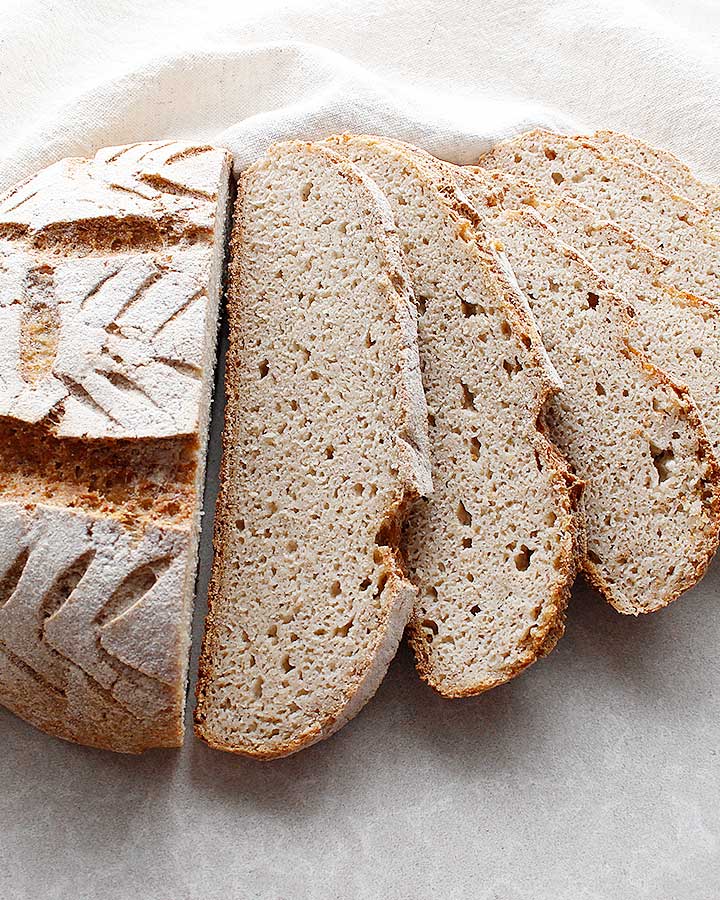
Step 7
Let your gorgeous loaf cool on a wire rack for a few hours or overnight. Please resist the urge to cut it right away; it needs time to finish setting. Once cooled, slice your loaf, enjoy it fresh, or toasted with your favourite spread or jam. If you have a cast-iron skillet, use it to make the most amazing toasted slices!
The bread will keep on your counter for one day wrapped in a clean tea towel. You can refrigerate the rest for up to 5 to 7 days. Freeze any leftovers, sliced, in a glass container or sealed plastic bag for 1 to 3 months.
Notes
*Always try to use organic raw seeds in bread recipes. Feel free to play around with the seeds you try. Using a combination of both sunflower and pumpkin seeds works very well in this recipe.
**Clean filtered or spring water. Do not use chlorinated tap water.
*** If unsure about adding the extra water, it will be best to try it with the smallest amount of water (1-1/4 cups) to start. A free-form loaf could fall flatter if the dough is too wet.
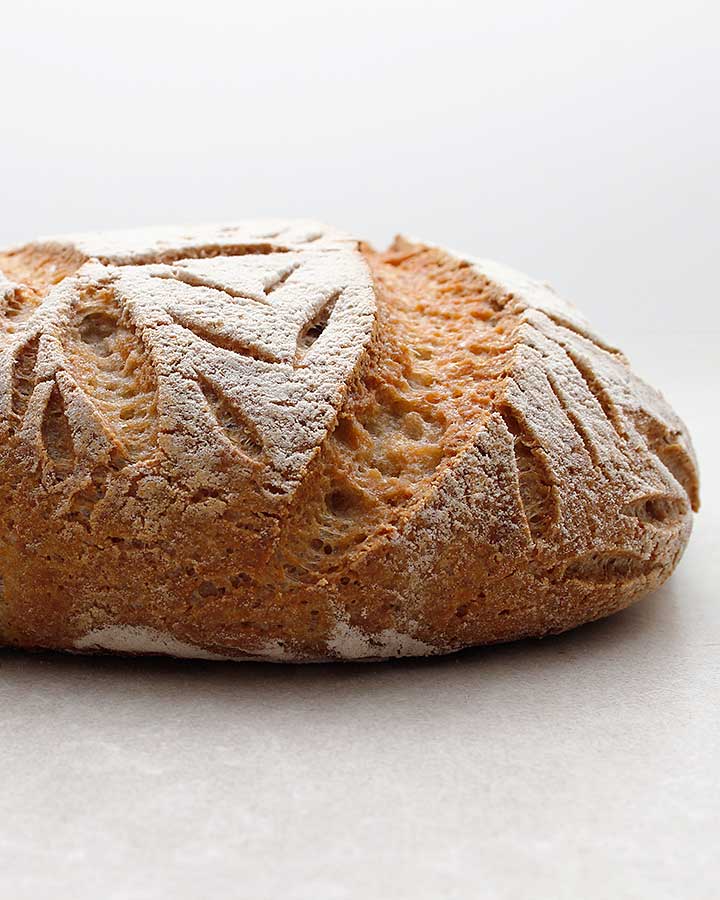
What To Expect: This loaf will not feel dry inside. It might even feel a bit sticky to touch. The crust will be crispy. After the bread has been refrigerated it will feel hard. Once toasted it will warm up beautifully and taste amazing! If you can, consume it fresh, have a slice (or two) before refrigerating it.
Tools: You will need a large glass bowl, measuring cups for dry goods and liquids, measuring spoons, a kitchen scale if you want to weigh your ingredients, a large spoon for mixing, a soft spatula, a flour sifter, unbleached parchment paper, a large soup bowl, clean tea towel (or lined banneton basket), lame or sharp kitchen knife, Dutch oven (5 to 7-QT), baking stone (optional) or baking/cookie sheet.
Tips: 1) Remember that if you’re avoiding gluten, make sure that all your ingredients are certified gluten-free. and allergen-friendly if necessary. 2) To measure each flour, I suggest scooping it with a spoon from the jar or flour bag into the measuring cup. Never pack it in. Or you can also weigh your dry ingredients for more precision. 3) When using a dutch oven or baking stone, preheating them in the oven at the same time as the oven is warming up is highly recommended. 4) For best results—or just for fun—try milling whole grains or seeds using a clean spice/coffee grinder, small blender or grain mill. Roasting the seeds prior to milling them is another way to enhance all the beautiful flavours of homemade bread.
Substitutions >> Flour: In place of buckwheat flour, you can use sorghum or millet flour (or half of each). Or you could consider using more oat flour to replace one of the flours. Gluten-free baking works best with a combination of grains and seeds. Psyllium husk: You can also use psyllium powder, just use a little less. If you can’t eat or don’t like using psyllium husk, you could try just leaving it out or adding 1 extra tablespoon of arrowroot starch with 1 tablespoon of ground chia seeds or flaxseed meal. Follow the rest of the recipe as listed. Note: I haven’t tested these exact substitutions with this specific loaf recipe. Sugar: Try using maple syrup or honey (not vegan) if you don’t have coconut palm sugar.
Allergen notice: Make sure that all your ingredients are labelled and certified gluten-free, and free of any other top allergens you avoid.